When installing a bench vise, consider the type that suits your work surface—wooden benches need bolts passing through the base, while concrete or masonry require anchors or specialized bolts for stability. Proper mounting guarantees safety and prevents wobbling or shifting during use. Always assess your workbench material and choose the correct hardware and technique. For detailed steps and tips on different types and their uses, keep exploring to guarantee a secure and effective setup.
Key Takeaways
- Choose the appropriate type of bench vise (e.g., woodworking, metalworking) based on your project needs.
- Ensure proper mounting hardware and technique suited to your workbench material for secure installation.
- Properly position the vise on your workbench for optimal accessibility and stability during use.
- Follow safety guidelines by securely anchoring the vise to prevent shifting or accidents.
- Regularly maintain the vise by checking hardware, cleaning, and lubricating parts for optimal performance and longevity.
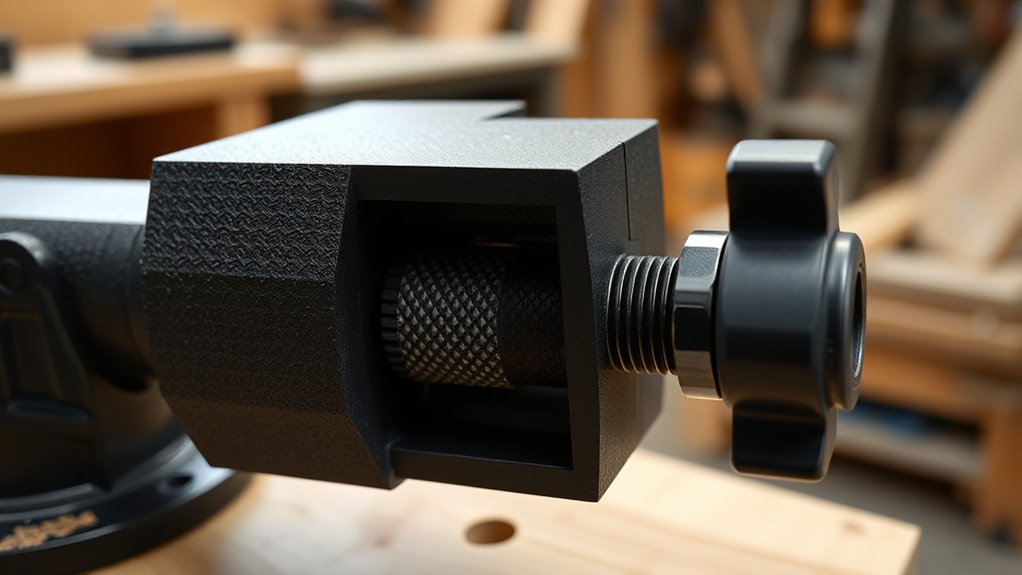
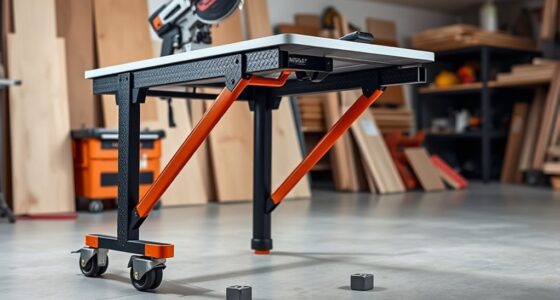
Installing a bench vise correctly is essential for guaranteeing stability and safety during your projects. When you set up your vise, choosing the right mounting technique is crucial. Proper mounting not only keeps the vise secure but also prevents accidents and damage to your workpiece. To start, consider the type of workbench you have. Wooden benches require different mounting methods than metal or concrete surfaces. For wooden benches, you’ll typically use bolts that pass through holes in the vise’s base and into the wood. Make sure to drill precise, evenly spaced holes to prevent wobbling. For concrete or masonry surfaces, you’ll need anchors or bolts designed specifically for those materials. Using appropriate mounting hardware guarantees the vise stays firmly in place during intense clamping, which is vital for safety and efficiency. Additionally, understanding the structural integrity of your work surface can influence the choice of mounting hardware and method.
Once you’ve mounted your vise, it’s important to think about vise maintenance. Regular upkeep keeps your tool functioning smoothly and extends its lifespan. After installation, check that the jaw screws turn freely and that the handle operates smoothly. Keep the sliding parts clean and free of debris, oiling the moving components periodically to prevent rust and corrosion. Tighten any loose bolts or nuts to maintain stability, since loose mounting can cause the vise to shift or wobble during use. Also, inspect the jaws for wear or damage—replacing worn or damaged parts promptly ensures your vise maintains a firm grip on your workpieces. Proper maintenance is a continuous process that involves cleaning, lubrication, and inspection to keep your vise in prime condition.
Frequently Asked Questions
How Do I Choose the Right Size Bench Vise?
To select the right size bench vise, consider the Vise jaw selection and your projects’ size. Pick a vise with jaws that comfortably hold your workpieces without excessive overhang. guarantee it’s compatible with your mounting surface, supporting the weight and size of the vise. For small tasks, a 4-6 inch vise suffices, but larger projects need 8 inches or more. Match the vise to your workspace and project needs for ideal performance.
What Safety Precautions Should I Follow When Installing?
When installing a bench vise, you should follow a safety installation checklist and wear proper safety gear, like gloves and eye protection. Make sure the workspace is clear and stable, and use the right tools to avoid slips or accidents. Secure the vise firmly to the workbench, double-check all bolts and screws, and work carefully to prevent injuries. Prioritizing safety guarantees a successful and safe installation process.
Can a Bench Vise Be Mounted on Any Workbench?
A bench vise can be mounted on most workbenches, but you should verify the materials. For example, wooden workbenches may need reinforcement to handle the vise’s strength, while steel or concrete benches are more suitable. Also, consider the vise jaw types—cast iron or steel—to guarantee compatibility. Properly securing the vise with strong bolts is essential for safety and stability, no matter your workbench material.
How Do I Maintain and Clean My Bench Vise?
While your bench vise might seem sturdy, regular maintenance keeps it reliable. You should lubricate the moving parts regularly with light oil, ensuring smooth operation. For cleaning, use a wire brush or rag to remove dirt and debris, then wipe it down with a damp cloth. Avoid harsh chemicals that can damage the metal. Proper lubrication tips and consistent cleaning methods prevent rust and extend your vise’s lifespan.
What Are Common Mistakes to Avoid During Installation?
When installing your bench vise, avoid common mistakes like improper mounting techniques and using the wrong installation tools. Make certain you drill holes accurately and securely tighten bolts to prevent wobbling or slipping. Don’t rush the process; double-check alignment and stability before fully tightening the vise. Using the right tools, like a wrench and level, guarantees a secure, durable installation, extending your vise’s lifespan and ensuring safe, efficient use.
Conclusion
Now that you’ve learned how to install your bench vise, you’re all set to enjoy its gentle guidance during your projects. With patience and care, this trusty tool will become a quiet partner in your craftsmanship, helping you achieve your best work with ease. Remember, a well-installed vise is like a good friend—steady and dependable—making your workshop experience smoother and more enjoyable. Happy building!