To install wall-mounted storage systems, start by selecting the right hardware for your wall type and weight needs. Use a stud finder to locate studs or strong anchors, then mark your placement accurately. Drill pilot holes, attach brackets securely, and verify everything is level. Double-check that your wall can support the weight, and distribute it evenly to prevent stress. For detailed steps and tips, keep going to ensure a safe, sturdy setup.
Key Takeaways
- Choose appropriate custom mounting hardware designed for your wall type and load weight.
- Locate studs or solid anchors with a stud finder and mark mounting points accurately.
- Use suitable anchors (toggle, molly, masonry) and drill pilot holes for secure attachment.
- Ensure shelves or storage units are level and evenly distribute weight across brackets.
- Regularly inspect mounted systems for stability and tighten hardware as needed.
Installing wall-mounted storage systems can instantly transform your space by maximizing vertical storage and reducing clutter. When you decide to mount shelves or cabinets, it’s vital to consider the importance of using the right hardware, especially custom mounting brackets. These brackets are designed to fit your specific wall type and the weight of the items you plan to store, guaranteeing a secure and durable setup. By selecting custom brackets, you prevent the risk of the system pulling away from the wall or collapsing under heavy loads. Always assess the weight capacity considerations for your storage system. Each bracket and mounting point has a maximum weight limit, and exceeding it can lead to failure or damage. Take into account not only the weight of the stored items but also any additional forces, like movement or vibrations, that could impact stability over time.
Before installing, it’s wise to measure your wall space carefully. Mark where you want your shelves or storage units to go, and double-check that the wall can support the weight. Walls made of drywall require different anchors compared to concrete or brick walls. Using appropriate anchors and screws tailored to your wall type is vital for safety and longevity. For drywall, toggle bolts or molly bolts can distribute weight more evenly, while masonry anchors are necessary for brick or concrete. These details help guarantee your storage system stays secure without causing damage to your wall.
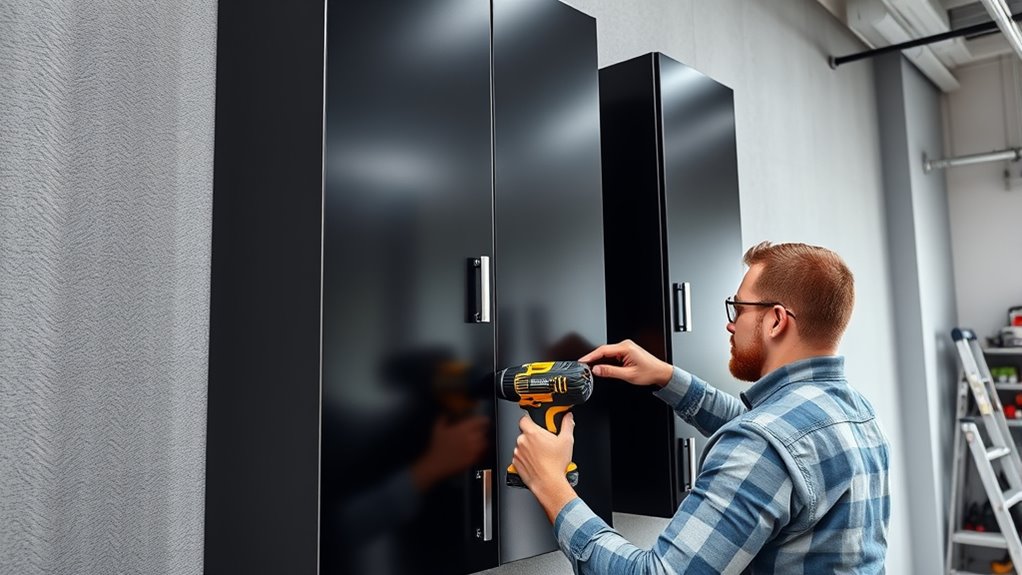
In addition, understanding the weight capacity of your mounting hardware is essential to prevent accidents and ensure longevity. When it’s time to install, start by locating studs or solid anchors to provide the best support. Using a stud finder can save you time and prevent misalignment. Once you’ve identified the ideal spots, drill pilot holes for your custom mounting brackets or anchors. Tighten everything securely, but avoid overtightening, as this can crack the wall or damage the brackets. Level your shelves or storage units as you go, ensuring everything is straight and balanced. Proper leveling not only looks better but also distributes weight more evenly, reducing stress on any one point.
Frequently Asked Questions
Can Wall-Mounted Storage Systems Be Installed Outdoors?
Yes, you can install wall-mounted storage systems outdoors if they have outdoor durability and weather resistance. Make sure to choose a unit made from materials like stainless steel or weatherproof plastic that can withstand rain, sun, and temperature changes. Proper installation is essential, so secure the system firmly and consider adding protective coatings or covers. This way, your storage remains functional and intact despite outdoor conditions.
What Is the Maximum Weight Capacity for Wall-Mounted Units?
The maximum weight capacity for wall-mounted units depends on their material strength and installation. Typically, you can expect weight limits from 50 to 500 pounds, but it varies by model. To guarantee safety, always check the manufacturer’s specifications and use appropriate wall anchors. Proper installation with sturdy materials like reinforced drywall or concrete will help support heavier loads, preventing accidents or damage.
Are There Specific Tools Required for Installation?
Ever wonder what tools you need to turn a bare wall into organized space? You’ll require a drill, screwdriver, level, and pencil for marking. Grab mounting brackets and wall anchors to guarantee stability and weight support. These tools help you secure your storage system properly, making installation smooth and safe. Don’t forget to double-check your measurements—precision is key to a sturdy, long-lasting setup!
How Do I Prevent Water Damage Behind Wall-Mounted Shelves?
To prevent water damage behind wall-mounted shelves, you should use waterproofing techniques like sealing edges with waterproof paint or sealant before installation. Reinforce the drywall with moisture-resistant materials, especially in humid areas. Make sure to install shelves away from potential water sources and check for leaks regularly. Proper waterproofing and drywall reinforcement create a barrier that shields your wall from water damage, keeping your shelves and wall safe over time.
Can I Install These Systems Without Professional Help?
Did you know nearly 70% of DIY projects result in some form of damage or injury? You can install wall-mounted storage systems yourself, but it’s vital to follow safety precautions. Make sure you have the right tools, locate studs accurately, and avoid electrical wires. While DIY is feasible, if you’re unsure or uncomfortable, hiring a professional guarantees safety and proper installation. Always prioritize safety and precision for the best results.
Conclusion
Now that you’ve installed your wall-mounted storage system, you’re not just organizing your space—you’re transforming it. Think of your wall as a canvas, and your storage as the brushstrokes that create a masterpiece of order and style. With a little effort, you’ve *opened* a world of neatness and efficiency. So go ahead, admire your handiwork, and remember: the true beauty of a well-organized space is that it makes your daily life a little brighter, every day.