TL;DR
Woodworking tool sets for DIY projects should match the work you plan to do, your available space, and whether you prefer hand tools, power tools, or a mix. Start with accurate measuring tools, clamps, a suitable saw, a drill/driver, sanding supplies, and safety gear; add specialized tools when a real project calls for them.
A shiny 100-piece tool kit can look like a shortcut to a workshop, but the square that slips and the clamps that cannot reach your project will stay in the box. A few dependable tools can get you building sooner.

Get business pricing on tools and workshop supplies
- Business-only prices and quantity discounts
- Tax-exempt purchasing
- Multiple users, one account, clear invoices
Woodworking tool sets for DIY projects work best when they match what you intend to make. You’ll see how to choose a starter collection, compare hand tools with power tools, spot what a boxed set leaves out, and build safety and storage into your plans.
Think of your first kit as a set of answers to practical questions: Can you measure accurately, hold the wood still, cut it safely, join the pieces, and smooth the edges? If you can make a simple shelf without fighting your tools, you have a useful start.
For shelves, boxes, and repairs, begin with measuring tools, clamps, a suitable saw, a drill/driver, sanding supplies, and safety gear.
Choose hand tools for quiet, portable work; use power tools when repeated cuts or fastening make speed useful.
Check a boxed set for batteries, charger, blades, bits, warranty, and tool comfort instead of relying on its advertised piece count.
A table saw is not a requirement for every DIY shop; a circular saw with a guide can handle many home projects.
Add specialized tools after a project reveals a real need, and treat eye, hearing, and dust protection as part of the kit.
Start with the tools your first projects actually need
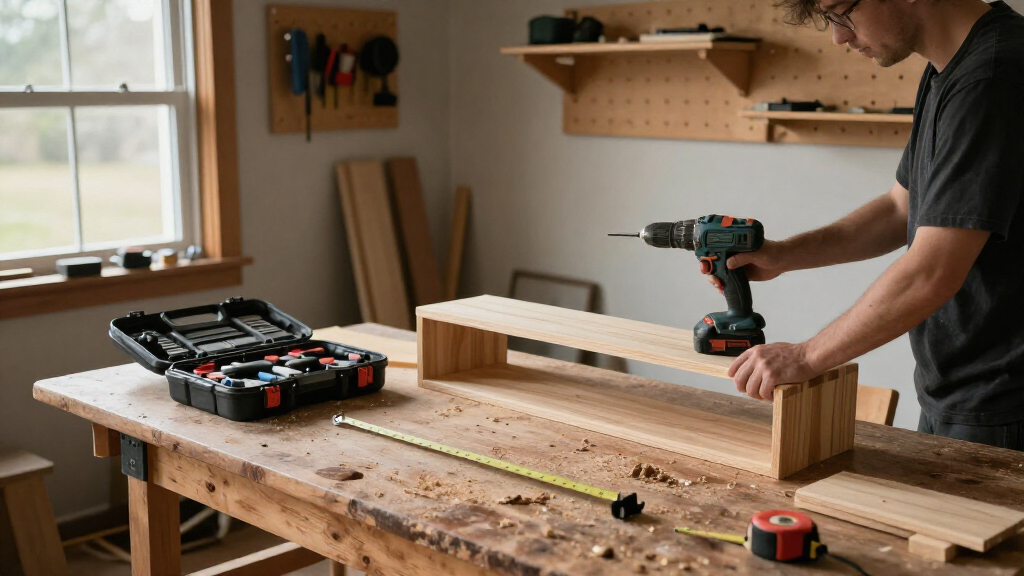
Woodworking tool sets for DIY projects should cover five jobs: measuring, holding, cutting, joining, and finishing. For a small shelf, storage box, or household repair, start with a tape measure, combination square, pencil, clamps, a suitable hand or circular saw, a drill/driver, and sanding supplies.
These jobs depend on one another. A small measuring error can leave a shelf out of square; a shifting board can turn an accurate mark into a poor cut; and rough edges can make a finished piece uncomfortable to handle. Imagine assembling a pine shoe shelf on a Saturday: reliable layout and secure workholding help every later step go more smoothly. They also make it easier to spot an error while it is still simple to correct.
Build the set around the actual cut list. A basic box might need a saw, drill bits, screws, glue, and two or four clamps, while a cabinet project could call for more precise layout tools and specialty clamps. The right collection of tools depends on the size and frequency of your work. A tool that saves time on one small project may not justify its cost or storage space; one you use repeatedly can make a dependable upgrade worthwhile.
Write down the steps in your first two projects, then circle every tool those steps require. That list exposes the genuine gaps. It can also save you from buying a large assortment of bits or blades before you know which materials you’ll cut. When a tool appears on both lists, it is more likely to earn its place in your kit.
Products Worth Considering

DREAME D30 Ultra CE Robot Vacuum and Mop, 25,000Pa Suction

Shark Rocket Pet Plus Corded Stick Vacuum, Bordeaux/Silver, HV322

Samsung 65-Inch 4K OLED Smart TV with Dolby Atmos, 120Hz Refresh Rate, and Amber Protection Bundle
As an affiliate, we earn on qualifying purchases.
Choose hand tools, power tools, or a mix that fits your shop
A balanced woodworking kit often combines hand tools for control with power tools for speed. Hand tools run quietly and fit in a closet or small apartment workspace; power tools can make repeated cuts and many screw-driving jobs faster. Your choice depends on your room, noise limits, budget, and the projects you plan to tackle. The tradeoff is not simply speed versus slowness: power tools need space, setup, maintenance, and safe handling, while hand tools ask for more time and technique.
Consider two neighbors making the same bookshelf. One works at a kitchen table and chooses a hand saw, a compact drill, and sanding blocks that pack away after dinner. The other has a garage bench and chooses a circular saw with a guide for long cuts. Both can make a shelf; the workspace changes what feels practical. The first avoids loud cutting and bulky storage but may spend longer sawing. The second gains speed on straight cuts but needs room to support the board and manage dust.
A drill and an impact driver also do different jobs. A drill can bore holes and drive screws with adjustable clutch control, which helps when you want a screw head to stop flush. An impact driver uses rotational impacts to drive many fasteners efficiently, but it does not replace a drill for every hole. For a beginner buying one tool first, a drill is often more versatile across holes and screws; if a project involves many long fasteners, an impact driver may save effort. Bits and technique still matter, and either tool can damage material if driven without control.
For long, straight cuts, a circular saw with a guide can handle many home projects without a table saw. A table saw can help with repeated rip cuts, though it needs room, careful setup, and safe operating habits. Its consistency can be useful when several boards need the same width, but the space and setup make it a poor fit for occasional cuts in a cramped shop. You can buy that tool later, once your projects make a clear case for it.
Compare a boxed kit by what’s inside, not its tool count
A woodworking tool kit is worth buying when its actual contents fit your needs and meet your quality expectations. The word “set” can mean a coordinated bundle of power tools, a collection of accessories, or a box of mixed items. Count the useful pieces and check the specifications before you compare prices. The advertised total can disguise the difference between tools you will use on your next project and small accessories that add little practical value.
| Check | Why it matters | Example |
|---|---|---|
| Included tools | Matching the kit to your work prevents paying for extras you will rarely use. | A drill-and-saw bundle may suit shelving better than a set built around outdoor tools. |
| Batteries and charger | Some bundles include tool bodies only. | Two cordless tools without a battery or charger may cost more to put to work. |
| Accessories | Bits, blades, and cases vary in usefulness and quality. | Check whether the drill kit includes bits for the screw sizes you plan to use. |
| Comfort and support | Weight, safety features, replacement parts, and warranty affect daily use. | A lighter saw may be easier to guide during a long cut. |
Suppose a low-cost bundle advertises 40 accessories but gives you a wobbly square and only one clamp. A smaller kit with a dependable drill, charger, and useful blades may serve your next project better. Tool count tells you very little about accuracy or comfort. If a bundled tool is inaccurate or awkward, it can slow the work and make results harder to repeat, even when the price per item looks low.
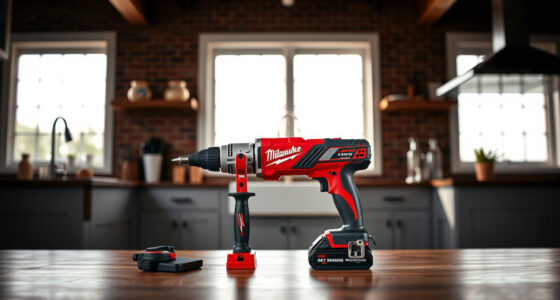
Battery platforms can make expansion simpler: many cordless tools within a product family share batteries. Still, batteries and chargers add to the starting cost, and brands usually do not share batteries across platforms. Read compatibility details for the exact product line before buying. A bundle can be good value if you will use several tools on the same platform; buying into one only for a single tool may tie future purchases to a system that costs more than expected.
Buy accuracy and comfort before buying more tools
A reliable square, sharp blades, steady clamps, and suitable drill bits can improve your results more than a large pile of inexpensive accessories. Accurate tools help you mark and cut cleanly; comfortable tools are easier to control through a whole task. If a square shifts while you mark a board, every later cut can inherit the error. That can leave joints with gaps or parts that do not fit, so accuracy at the start often saves more time than correcting a mismatch at assembly.
Before buying a combination square, check that its head locks securely and sits firmly against a straight edge. When you shop for clamps, picture the width of a box or shelf you want to assemble. A clamp that cannot span the joint will not help, no matter how bright its handle looks. Clamps also need enough reach and pressure for the job: too few or poorly sized ones can force you to assemble in awkward stages, while a couple of versatile sizes can support several early projects.
Power tools need a little more comparison. Look at weight, guards, dust collection, battery capacity, replacement parts, and warranty alongside price. Brushless cordless motors have become more common and can improve efficiency and runtime compared with brushed designs, but the benefit depends on the tool, workload, and added cost. For occasional short jobs, the lower price of a brushed model may matter more; frequent work away from an outlet can make extra runtime and efficiency more valuable.
Take a drill in your hand, if possible, and notice whether the grip feels stable and the controls are easy to reach. A heavy drill may feel fine for one screw, then tire your wrist during a dozen pilot holes. That small test offers a practical clue about how the tool will feel on a real project. Comfort affects control as well as endurance, so a tool that fits your hand can help you keep holes and fasteners where you intend them.
Make safety gear part of your woodworking set
Eye protection, hearing protection, dust control, and a first-aid kit belong in a DIY woodworking setup. Secure workpieces before cutting or drilling, keep guards in place, and follow each tool’s manual. Safety equipment is part of the work kit because a smooth project starts with a stable setup and a clear view. Planning for these protections before buying tools also helps you budget for the real cost of working, rather than treating safety as an optional extra.
Fine wood dust can harm your health, particularly during sanding or work with certain materials and finishes. Ventilation and an appropriately rated respirator may be needed for the task. A dust port or shop vacuum can help collect debris, but a port does not remove every risk; dust control varies across tools and setups. Think about how much dust the task creates and where it will go: sanding in a closed room can leave fine particles in the air and on nearby surfaces long after the tool stops. Match your controls to the work and the material, and check product guidance for suitable protection.
Picture cutting a narrow board on a cluttered garage bench. If the board shifts, the cut can wander; if a cord crosses your work area, it can catch your foot. Clear the space, support the stock, and check that the saw’s guard works before you start. A stable setup gives you more control and reduces the chance that you will need to correct a cut while the blade is moving.
Keep the wood steady, the guard in place, and your eyes protected before you make the cut.
Use electrical tools according to their instructions and check cords and batteries for damage. Electrical, gas, structural, and roof work can bring hazards and code or permit requirements beyond ordinary woodworking. Use licensed professionals for that work, and follow relevant safety steps such as turning off power and wearing suitable PPE when the task calls for it. Those jobs involve risks and rules that a basic woodworking kit cannot address, so treating them as separate work helps keep a DIY project within your training and equipment.
Grow your kit one project at a time
You can build a useful woodworking set in stages by buying tools for a project you are ready to make. Start with the measuring, clamping, cutting, drilling, sanding, and safety basics. Add a router, track saw, or more specialized clamps only when your plans call for the extra control or speed. This staged approach limits upfront cost and lets you learn what matters in your own workspace before committing to tools that may be bulky or used rarely.
For example, someone building three simple garage shelves might first buy a combination square and a circular saw guide to make repeatable cuts. If a later cabinet project needs a row of matching grooves, a router could then make sense. That purchase answers a real need instead of a vague hope of doing “more woodworking.” It also gives you a chance to compare the router’s learning curve, setup, and storage needs against the time it might save on repeated grooves.
Storage matters, too. A compact kit is easier to carry and tuck into a closet, though it may have less capacity or fewer adjustments. Give blades and measuring surfaces a protected place, keep tools clean and dry, and follow manufacturer guidance for maintaining cutting edges and checking batteries or cords. Good storage protects accuracy and readiness: a damaged blade or a misplaced square can turn a simple task into an avoidable delay.
Here is a straightforward way to choose your next purchase:
- Write down the first project and its cuts, holes, joints, and finish.
- Mark which tools you already own and which you can borrow or rent.
- Buy a dependable tool for the job that repeats most often.
- Try the project, then note what slowed you down before expanding the set.
Online plans and videos can help you prepare, but instructions vary. Check that a plan’s dimensions and methods suit your materials, tools, and skill level before you start cutting. A small practice cut or test assembly can reveal fit and technique issues while the stakes are low, helping you decide whether you need another tool or simply more familiarity with the one you have.
Frequently Asked Questions
What tools should a beginner buy first?
Start with a tape measure, combination square, pencil, clamps, a suitable saw, drill/driver, sanding supplies, and safety gear. For example, that setup can cover many steps in a small shelf or storage box project.
Is a woodworking tool kit worth buying?
It can be convenient if the included tools match your work and meet your quality needs. Check what the box includes, especially batteries, charger, useful bits, blades, and warranty, then compare that with buying tools individually.
Do I need a table saw for DIY woodworking?
No, many DIY projects can use a circular saw with a guide for controlled cuts. A table saw can help with repeated rip cuts, but it needs suitable space, setup, and safe operating practices.
What is the difference between a drill and an impact driver?
A drill is useful for boring holes and driving screws with adjustable clutch control. An impact driver delivers rotational impacts to drive many fasteners efficiently, though it is not a substitute for a drill for every task.
How many clamps do I need to start?
Buy enough to hold the first projects securely during assembly, with sizes that match the width of your work. A few versatile clamps can be a practical start; add more when a real project needs them.
What safety gear belongs in a woodworking kit?
Include eye protection, hearing protection, suitable dust control, and a first-aid kit. Secure the workpiece, keep guards in place, follow the tool manual, and use an appropriately rated respirator when the material or task calls for it.
Conclusion
Choose woodworking tools by the jobs you plan to do, then spend first on accuracy, secure workholding, and safety. A modest set that helps you finish a shelf cleanly is a stronger start than a big kit full of tools you cannot yet use.
Mark the line, clamp the board, and make one careful cut. The best collection grows from the projects you finish.