
To choose the best lighting for your workshop, focus on balancing task and ambient lighting to reduce eye strain and improve safety. Use energy-efficient LED fixtures with proper color temperatures—cool light (5000K-6500K) for clarity and warmer tones for ambiance. Maximize natural daylight through window placement and reflective surfaces. Layering overhead, task, and accent lighting creates even coverage, minimizes shadows, and boosts productivity. Keep learning about installation and maintenance to create a safer, more efficient workspace.
Key Takeaways
- Balance task lighting and ambient lighting to reduce eye strain and ensure overall workspace visibility.
- Choose durable, energy-efficient fixtures like LEDs with appropriate brightness and color temperature for detailed work.
- Incorporate layered lighting—overhead, task, and accent—to eliminate shadows and improve safety.
- Maximize natural light through window placement, skylights, and reflective surfaces for cost-effective illumination.
- Use controls such as dimmers and motion sensors to optimize lighting levels, energy use, and workspace comfort.
Understanding Your Workshop’s Lighting Needs

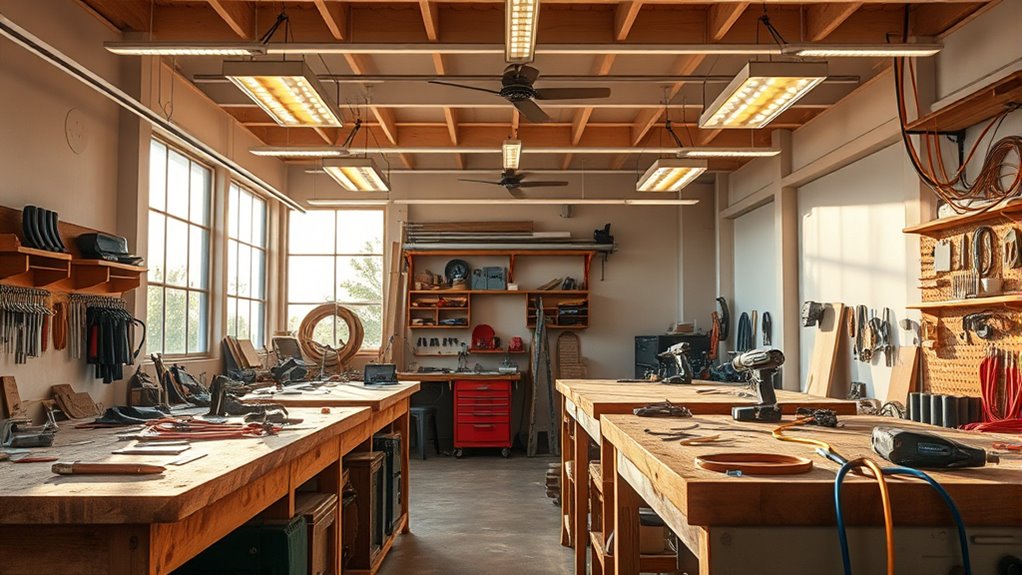
Understanding your workshop’s lighting needs is essential to creating a safe and efficient workspace. You need to consider both task lighting and ambient lighting to achieve this. Task lighting provides focused illumination directly where you work, helping you see fine details and reducing eye strain. It’s vital for activities like woodworking, soldering, or detailed assembly. Ambient lighting, on the other hand, offers overall brightness, ensuring the entire space feels well-lit and comfortable. Proper balance between these lighting types prevents shadows and glare, improving safety and productivity. Before choosing fixtures, evaluate the size of your workspace, the nature of your projects, and the existing natural light. This understanding helps you plan effective lighting that enhances your workflow and keeps your workshop safe. Incorporating vertical storage solutions can also help maximize space and improve overall organization, contributing to a more streamlined and effective work environment.
Types of Lighting Fixtures Suitable for Workshops

When selecting lighting fixtures for your workshop, it’s important to choose options that provide both durability and adequate illumination. Fixture styles vary from fluorescent, LED, to halogen lights, each offering different benefits. LED fixtures are energy-efficient and long-lasting, making them popular for workshops. Fluorescent fixtures provide bright, diffuse light suitable for detailed work, while halogen options deliver focused illumination. Consider lighting controls like dimmers or motion sensors to enhance functionality and energy savings. Recessed or track lighting offers flexibility in directing light exactly where you need it. Durable fixtures with sturdy housings are essential to withstand dust, vibrations, and potential impacts common in workshop environments. Selecting the right combination of fixture styles and controls guarantees a well-lit, efficient workspace. Incorporating professional equipment ensures high-quality lighting and reliable performance in demanding environments.
Brightness and Lumens: Finding the Right Level of Illumination

Choosing the right level of illumination in your workshop depends on how brightly your fixtures emit light, measured in lumens. Lumens measurement indicates the total light output, directly affecting light intensity in your workspace. Higher lumens mean brighter light, which is essential for detailed tasks like woodworking or fine crafts. To determine your needs, consider the size of your workshop and the activities performed. For general lighting, aim for a moderate lumens level that provides sufficient visibility without causing glare. For precision work, increase the lumens to ensure clear visibility of small details. Keep in mind that too much light can cause eye strain, so balance brightness with comfort. Proper lighting design can optimize light distribution and reduce shadows, enhancing overall visibility and safety. Finding the right lumen level helps create an efficient, safe, and comfortable environment for all your workshop projects.
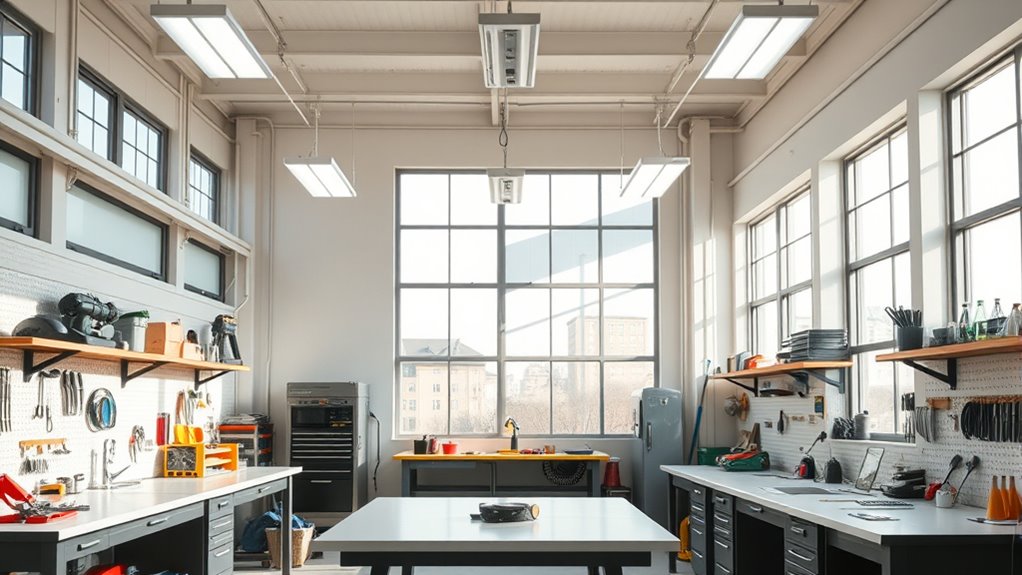
Color Temperature and Its Effect on Workspace Visibility

Choosing the right color temperature can markedly affect how clearly you see your work. Warm tones create a cozy atmosphere but may reduce color accuracy, while cool tones improve visibility and contrast. Understanding these differences helps you pick lighting that boosts both precision and comfort in your workspace. Additionally, selecting appropriate lighting safety measures can help prevent accidents and protect your eyesight during long hours of work.
Warm vs. Cool Tones
The color temperature of your workshop lighting greatly impacts how well you can see and differentiate materials. Warm tones, around 2700K-3000K, create a cozy light ambiance, making tasks feel inviting but sometimes dulls detail visibility. Cool tones, around 5000K-6500K, produce a crisp, energizing light that enhances clarity and precision. Consider this table:
| Warm Tones (2700K-3000K) | Cool Tones (5000K-6500K) |
|---|---|
| Creates cozy ambiance | Boosts alertness |
| Soft, yellowish hue | Bright, bluish hue |
| Suitable for relaxing tasks | Ideal for detailed work |
| Dulls some color differences | Enhances contrast |
| Less glare | Reduces eye strain |
Choosing between warm and cool tones depends on your workspace needs and preferred light ambiance. Additionally, lighting quality can influence overall visibility and comfort during extended work sessions.
Impact on Color Accuracy
Color temperature directly influences how accurately you perceive colors in your workspace, which is essential for tasks that require precise color matching or detailed inspection. Higher color temperatures, like daylight (around 5000K-6500K), enhance color rendering, making objects appear more natural and true to life. This improved color accuracy helps you distinguish subtle shades and details, reducing errors. Conversely, lower color temperatures can cause colors to look dull or distorted, hindering your ability to judge hues correctly. When selecting lighting, consider how the color temperature affects the workspace’s color rendering. Properly chosen lighting ensures you see true colors, minimizes mistakes, and boosts overall precision, especially in crafts, design, or quality control tasks where color accuracy is critical. Additionally, understanding lighting quality can help optimize your workspace for better performance and comfort.
Brightness and Contrast
Since brightness and contrast directly affect how well you can see details in your workspace, understanding their relationship with color temperature is essential. Higher color temperatures (cooler light) enhance contrast, making fine details pop, while lower temperatures (warmer light) create softer visibility. Good color rendering guarantees colors appear accurate under different lighting, aiding in precise work. When choosing fixtures, consider durability to ensure long-lasting performance in demanding environments. Here’s a quick comparison:
| Aspect | Effect |
|---|---|
| Higher color temp | Bright, crisp contrast; better detail visibility |
| Lower color temp | Soft, warm glow; reduces harsh shadows |
| Fixture durability | Ensures consistent brightness over time |
Matching brightness with contrast and color temperature helps optimize workspace visibility and accuracy, contributing to overall home decor & design effectiveness.
Energy Efficiency and Cost Considerations
Choosing energy-efficient lighting can substantially reduce your workshop’s operating costs over time. By investing in LED fixtures, you save on electricity and maintenance. Consider these options:
- Install solar panels to generate your own power, lowering utility bills.
- Use smart controls like motion sensors and timers to ensure lights turn off when not in use.
- Opt for fixtures with high lumens per watt to maximize efficiency.
- Combine energy-efficient lights with daylight harvesting to reduce artificial lighting needs.
- Regularly maintain and upgrade your lighting system to ensure optimal energy savings and performance.
These strategies help cut energy consumption and costs, making your workshop more sustainable. Integrating solar panels and smart controls guarantees you’re not just saving money but also reducing your environmental impact. It’s a smart approach that pays off in the long run.
Placement Strategies for Optimal Light Distribution
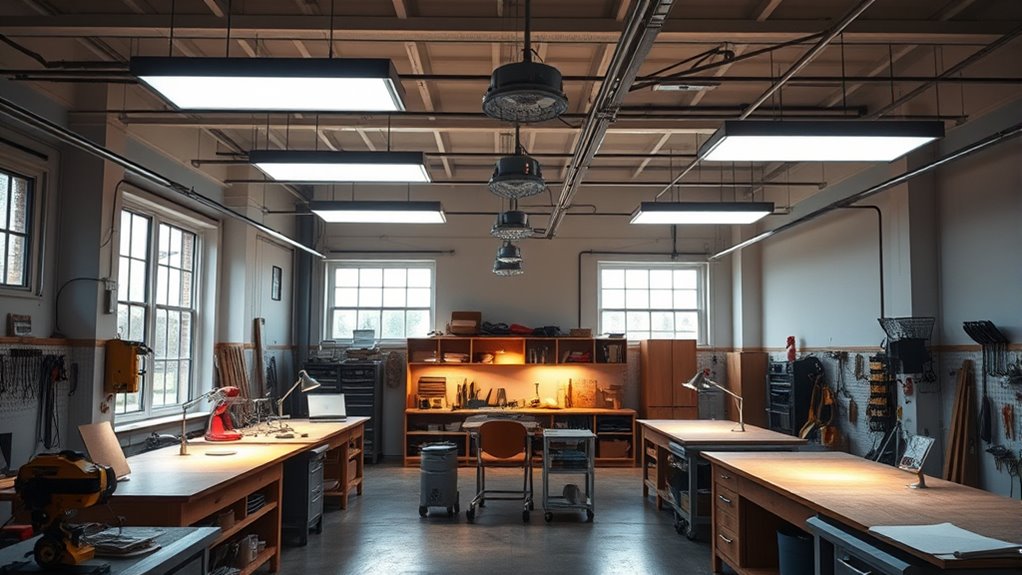
To guarantee your workshop is well-lit, focus on strategic fixture placement to cover all work areas evenly. Use layered lighting techniques, combining overhead, task, and accent lights for ideal visibility. Additionally, position fixtures carefully to avoid shadows and glare that can hinder your work. Incorporating necessary cookies ensures your lighting setup remains functional and responsive to your needs.
Strategic Fixture Placement
Strategic fixture placement is essential for achieving even and effective lighting throughout your workshop. Proper fixture positioning ensures an illumination balance, reducing shadows and dark spots. To optimize your setup, consider these steps:
- Place fixtures directly above workbenches for focused task lighting.
- Space ceiling lights evenly to distribute light uniformly across the space.
- Avoid placing fixtures near walls to prevent uneven illumination.
- Use adjustable fixtures to fine-tune fixture positioning as needed.
- Incorporate lighting design principles to maximize efficiency and coverage in your workshop.
Layered Lighting Techniques
Implementing layered lighting techniques enhances your workshop’s overall illumination by combining different light sources to suit various tasks and moods. Layered illumination involves strategically placing ambient, task-specific, and accent lighting to create a balanced environment. Start with ambient lighting to provide general brightness, then add task-specific lighting where detailed work occurs, ensuring the light is directed exactly where needed. Use adjustable fixtures or multiple light sources to tailor illumination levels for different activities. Proper placement guarantees even light distribution, reducing shadows and minimizing eye strain. By layering your lighting, you improve visibility, safety, and comfort. Focus on positioning fixtures to avoid glare and dark spots, making sure each layer complements the others for a cohesive, well-lit workspace. Additionally, understanding the types of lighting helps in selecting the right fixtures for each layer, further enhancing your workshop environment.
Avoiding Shadows and Glare
Ensuring your workshop lighting avoids shadows and glare requires careful placement of fixtures. Proper placement helps achieve shadow reduction and glare minimization, making your workspace safer and more comfortable. To optimize light distribution, consider these strategies:
- Position lights above and slightly in front of your work areas to reduce shadows cast by tools or hands.
- Use diffusers or frosted covers to soften bright spots and minimize glare.
- Install multiple light sources at different angles to balance illumination and eliminate harsh shadows.
- Avoid placing lights directly behind or in front of your workpiece to prevent glare from reflecting into your eyes.
- Be mindful of lighting placement to ensure an even distribution of light and reduce eye strain.
Implementing these placement strategies ensures even lighting, reduces eye strain, and creates a safer, more efficient workshop environment.
The Benefits of Natural Light and How to Incorporate It

Natural light offers numerous benefits for your workshop, including improved visibility, enhanced mood, and reduced energy costs. To maximize these advantages, consider building orientation and window placement that allow ample sunlight. Installing solar panels can further lower energy expenses, making your workspace more efficient. Choose light, neutral paint colors to reflect natural light and brighten the interior without additional fixtures. Keep windows unobstructed and use sheer curtains or blinds to control glare when needed. Incorporating skylights or larger windows can flood your workshop with daylight, reducing reliance on artificial lighting during the day. By thoughtfully integrating natural light, you create a more inviting, cost-effective, and productive environment for your projects.
Safety Standards and Regulations for Workshop Lighting
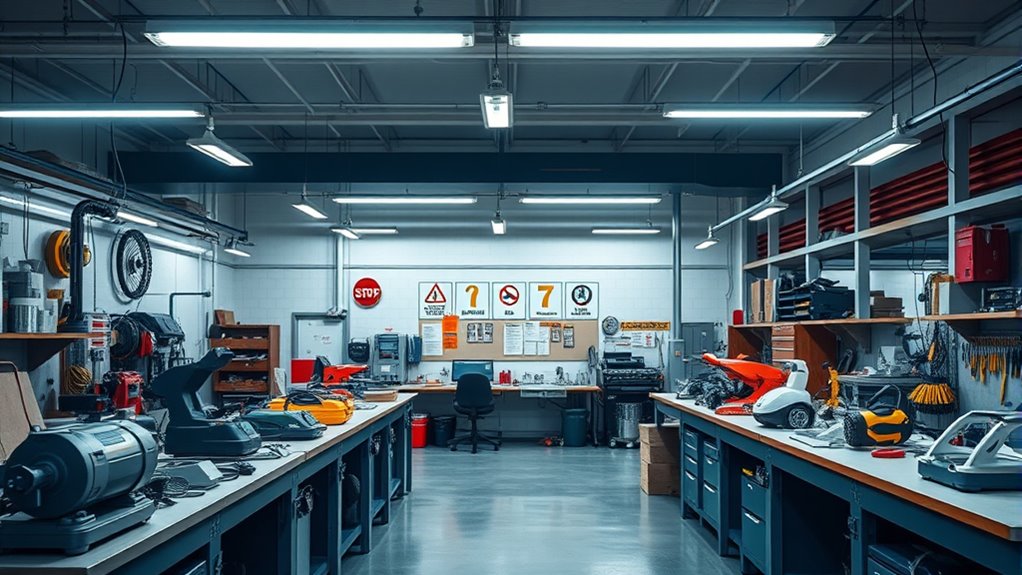
To create a safe and compliant workshop environment, you need to understand the key safety standards and regulations that govern lighting. First, guarantee your lighting regulation compliance by following local codes, which specify proper brightness levels and fixture types. Second, install emergency lighting to provide visibility during power outages, especially in critical areas. Third, check that all wiring and fixtures meet safety standards to prevent electrical hazards. Fourth, regularly inspect lighting systems for damage or malfunction, maintaining safety and compliance. Additionally, power consumption considerations should be taken into account to ensure energy efficiency and cost savings. Maintaining safety and adherence to these standards helps prevent accidents and legal issues. Remember, proper emergency lighting is essential for safety, and compliance ensures your workshop meets all legal requirements, creating a secure workspace for every project.
Installing and Maintaining Your Workshop Lighting System

Installing your workshop lighting correctly guarantees safety and ideal visibility, so pay close attention to proper techniques. Regular maintenance keeps your lights functioning efficiently and extends their lifespan. Additionally, incorporating AI-powered lighting controls can optimize energy use and adapt lighting conditions to your needs, enhancing both safety and efficiency. By following these steps, you’ll keep your workspace well-lit and safe for every project.
Proper Installation Techniques
Ensuring your workshop lighting system is properly installed and maintained is essential for safety and productivity. To do this effectively, follow these steps:
- Secure fixture mounting: Use appropriate brackets and hardware to ensure fixtures are firmly attached to ceilings or walls.
- Check wiring connections: Make sure all wiring connections are tight, correctly insulated, and comply with electrical codes.
- Confirm power sources: Verify that circuits are properly rated for the fixtures and that switches are functioning correctly.
- Test the system: Once installed, turn on the lights to check for proper illumination and absence of flickering or loose connections.
- Stay informed about electrical safety standards and updates to ensure ongoing compliance and safety in your workshop.
Routine Maintenance Tips
Regular maintenance is essential to keep your workshop lighting system functioning safely and efficiently. Check your decorative fixtures regularly for dust, dirt, or damage, and clean them gently to sustain brightness. Replace any burnt-out bulbs promptly, especially in smart lighting setups that rely on consistent power. Inspect wiring connections to prevent shorts or electrical hazards. Use a soft cloth to clean fixtures, guaranteeing maximum light output. When upgrading, consider smart lighting options for remote control and energy savings. Properly maintained systems reduce downtime and improve safety. Being aware of electrical safety guidelines helps prevent accidents and ensures your system remains reliable.
Tips for Creating a Comfortable and Productive Lighting Environment

Creating a comfortable and productive lighting environment in your workshop starts with understanding how proper illumination can boost both safety and efficiency. To achieve this, focus on these key tips:
Effective workshop lighting enhances safety and productivity through proper illumination strategies.
- Choose lighting with high color rendering to ensure true color visibility, making it easier to distinguish materials and reduce mistakes.
- Invest in fixtures with durability, so they withstand your workshop’s conditions and last longer.
- Use layered lighting—combine ambient, task, and accent lights—to eliminate shadows and reduce eye strain.
- Adjust lighting brightness and placement to prevent glare and ensure even coverage across your workspace.
- Incorporate self-watering plant pots into your workshop to add greenery that can improve air quality and create a more inviting environment.
Frequently Asked Questions
How Often Should I Replace or Upgrade Workshop Lighting Fixtures?
You should replace or upgrade your workshop lighting fixtures when they show signs of reduced brightness or fixture failure. Generally, LED lifespan lasts around 25,000 to 50,000 hours, so if your LEDs dim or flicker before then, consider replacement. Fixture durability also matters; if fixtures become damaged or corroded, upgrading guarantees safety and efficiency. Regular inspections help you determine the right time to upgrade, keeping your workspace well-lit and productive.
What Are the Best Lighting Options for Detailed or Precision Work?
For detailed or precision work, you should choose lighting that minimizes shadows and provides clear, bright illumination. LED panels are excellent because they offer even light distribution and energy efficiency. Task lamps are also essential, allowing you to focus light exactly where needed. Combining these options guarantees you have consistent, high-quality lighting that helps you work accurately and comfortably, reducing eye strain and improving your results.
How Can I Reduce Glare and Shadows in My Workspace?
Imagine your workspace as a stage, and glare and shadows are the unwanted spotlight and dark corners. To tame them, layer your lighting with soft ambient lighting to fill the room evenly, and add focused task lighting where you need precision. Position lights carefully to avoid direct reflections, and use diffusers or shades to soften harsh beams. This combo keeps your workspace bright, balanced, and free from distracting shadows.
Are There Specific Lighting Solutions for Different Workshop Environments?
You should consider specific lighting solutions tailored to your workshop environment to improve safety and efficiency. For example, brighter, focused lighting works well for detailed tasks, while softer ambient lighting enhances workshop aesthetics. Make certain to follow lighting regulations to ensure safety and compliance. By choosing the right lighting for your space, you can reduce glare, shadows, and create a comfortable, well-lit environment that boosts productivity and meets industry standards.
How Do I Troubleshoot Common Lighting Issues in My Workshop?
Imagine your workshop as a lighthouse—bright, steady, guiding your work. When troubleshooting lighting issues, check if your LEDs are flickering or dimming, which could signal aging or poor wiring. Verify wiring safety by inspecting connections for loose or frayed wires. Remember, LED longevity depends on proper installation and maintenance. Regularly clean fixtures, replace faulty bulbs promptly, and avoid overloading circuits to keep your workspace illuminated and safe.
Conclusion
By understanding your workshop’s lighting needs, choosing the right fixtures, and balancing brightness with energy efficiency, you create an environment that’s safe, functional, and comfortable. Incorporate natural light wisely, adhere to safety standards, and maintain your lighting system regularly. When you prioritize proper illumination, you enhance visibility, boost productivity, and foster a workspace that’s inviting, efficient, and inspiring. Ultimately, good lighting isn’t just about visibility; it’s about creating a space where your best work can thrive.