
To avoid cold spots and hot spots with radiant floor heating kits, carefully plan your layout with even wire or pipe spacing, typically 3-6 inches apart. Use proper insulation, thermal reflectors, and zone control for best results. Confirm your wiring is secure and evenly placed, and regularly calibrate your thermostats after installation. Taking these steps helps distribute heat uniformly. Keep exploring for expert tricks that can help you fine-tune your setup for maximum comfort.
Key Takeaways
- Plan wire or tubing spacing uniformly (3-6 inches) to ensure even heat distribution and prevent hot or cold spots.
- Incorporate thermal insulation and reflectors beneath the heating elements to direct heat upward effectively.
- Divide the system into zones with separate thermostats for precise temperature control and consistent warmth.
- Properly prepare and level the subfloor to avoid installation errors that cause uneven heating.
- Conduct post-installation testing, calibration, and regular maintenance to optimize system performance and avoid temperature inconsistencies.
How Radiant Floor Heating Works and Why Proper Layout Matters
Understanding how radiant floor heating works begins with recognizing that it uses heated water or electrical cables installed beneath your floor surface to distribute warmth evenly throughout a space. The effectiveness depends on the thermal conductivity of the materials used; high thermal conductivity materials transfer heat efficiently from the cables or pipes to your floor surface. Proper layout ensures consistent heat distribution, preventing cold spots and hot spots. Insulation materials beneath the heating elements play a pivotal role by directing heat upward into the room instead of wasting energy downward. When you plan your system, consider how the floor composition affects heat transfer. Additionally, thermal conductivity of the flooring materials directly influences how well heat is transferred across the surface. A well-thought-out layout maximizes comfort and energy efficiency, making sure every part of your space gets the right amount of warmth. Incorporating insulation layers can further enhance energy efficiency by reducing heat loss through the subfloor. Properly system zoning can also help optimize heating performance by controlling different areas independently. Understanding heat transfer mechanisms allows for better system design and improved overall performance.
Planning Your Space to Avoid Cold and Hot Spots
To guarantee your radiant floor heating system works efficiently, careful planning of your space is key. Start by considering furniture placement to prevent blocking heat flow, which can create cold spots. Use heavy or strategically placed furniture to direct heat evenly. Window treatments also play a role; install curtains or blinds that minimize heat loss during colder months. Additionally, choosing the right flooring materials can influence heat transfer and distribution throughout your space. Properly insulating floors enhances heat retention and prevents uneven temperature zones. Recognizing the importance of thermal insulation in achieving consistent warmth can make a significant difference. Moreover, conducting regular system maintenance checks ensures optimal performance and longevity of your radiant heating setup. Here’s a visual guide:
| Zone Planning | Furniture Placement | Window Treatments |
|---|---|---|
| Avoid blocking radiators | Keep furniture off heated areas | Use thermal curtains |
| Balance room zones | Arrange for even coverage | Insulate windows |
| Use rugs strategically | Do not cover vents | Consider double-glazing |
This approach helps ensure consistent warmth and prevents hot spots or cold spots in your space. Additionally, incorporating hydrotherapy techniques like warm water treatments can enhance overall comfort and relaxation in your environment.
Designing Layout Patterns for Even Heat Distribution

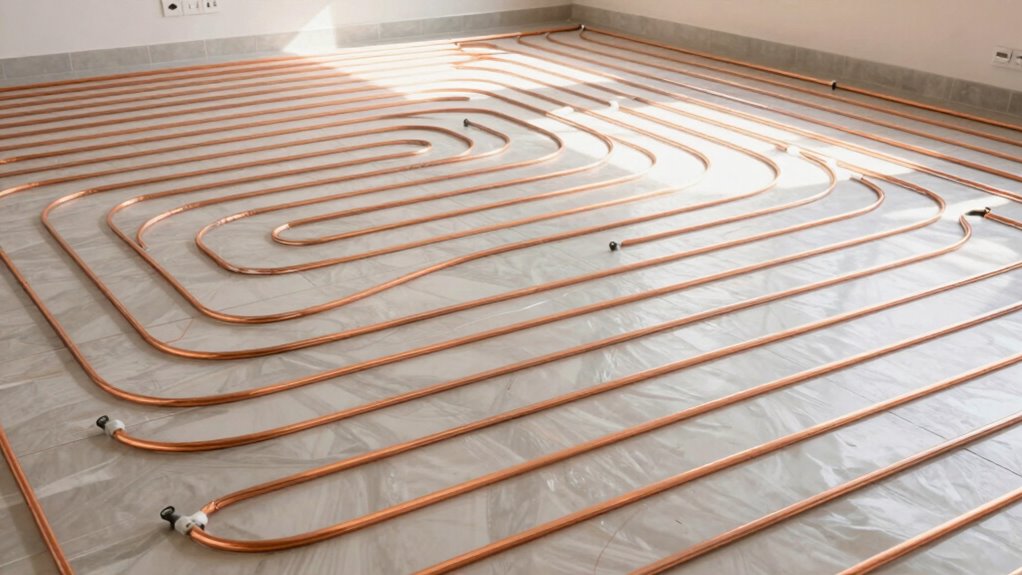
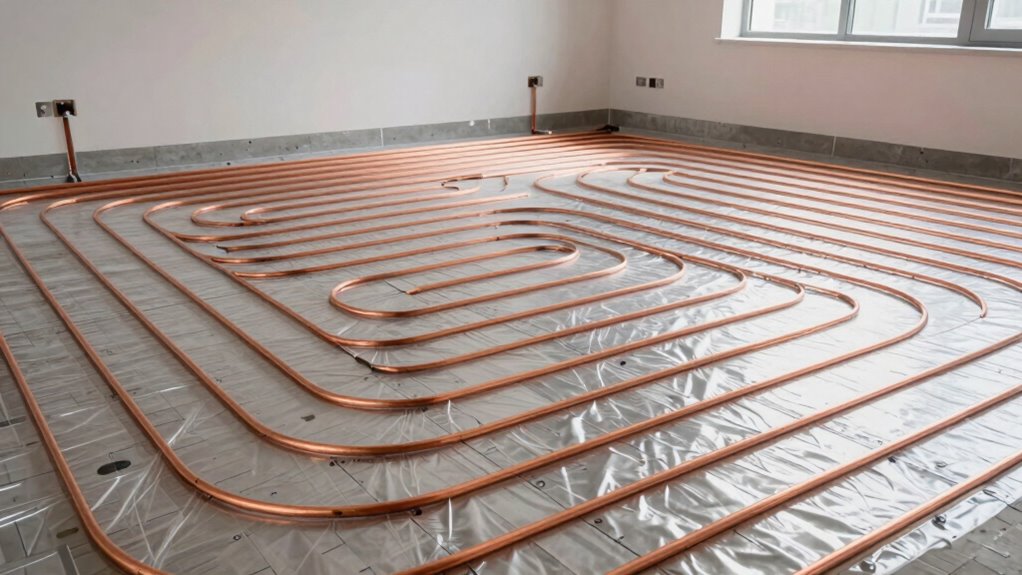
Have you considered how the layout pattern of your radiant floor heating system impacts its performance? An effective pattern ensures even heat distribution and prevents cold or hot spots. To achieve this, plan your layout around thermal insulation that directs heat upward rather than downward, reducing heat loss. Incorporate moisture barriers to prevent moisture buildup, which can interfere with heat transfer and damage the system. Use serpentine or spiral patterns for consistent coverage, avoiding tight loops or uneven spacing that can cause uneven heating. Keep in mind that the layout should complement wall and furniture placements, ensuring the heat spreads smoothly across the entire floor. Proper planning at this stage helps maximize efficiency and comfort while protecting your investment. Additionally, understanding storage and backup solutions can help ensure your heating system remains reliable during power outages or maintenance periods. Incorporating thermal management techniques can further optimize system performance and longevity, especially when considering energy efficiency and sustainable operation. Being aware of system zoning options allows for better control and customization of heat distribution across different areas. Considering system controls can also enhance user convenience and energy savings by adjusting zones independently.
Spacing and Wire Placement Tips for a Balanced System
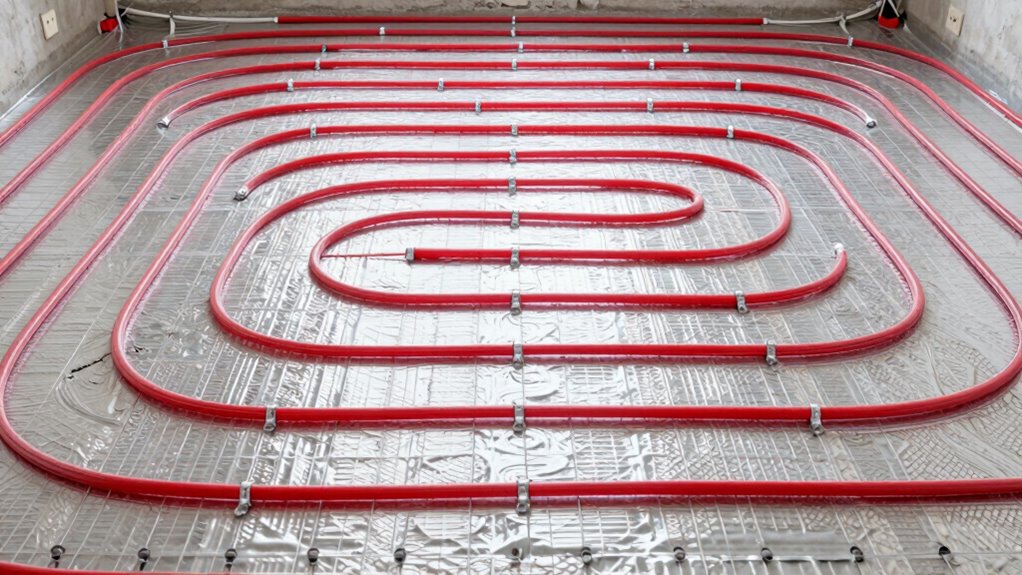
Proper wire spacing and placement are essential to guarantee your radiant floor heating system heats evenly. To achieve this, follow insulation strategies that minimize heat loss and prevent uneven temperatures. Keep wires uniformly spaced, typically 3 to 6 inches apart, to promote consistent heat distribution. Use wiring color codes to distinguish different circuits, making installation and troubleshooting easier. Be mindful of insulation layers beneath the wire to prevent heat from escaping downward, which can cause cold spots. Secure wires firmly in place, avoiding overlaps or crossings that could lead to hot spots. Consistent spacing and correct placement ensure the system works efficiently and safely. Additionally, utilizing mount leveling kits can help ensure the wire layout remains even and precise across uneven subfloors, preventing hot or cold spots. Incorporating proper insulation layers beneath the wiring further enhances heat retention and distribution, ensuring your system performs optimally. Remember that system calibration during installation can also help optimize performance and prevent uneven heating issues.
Setting Up Zones and Thermostats for Better Control

Setting up zones and thermostats allows you to customize heating control across different areas of your space, improving comfort and efficiency. Effective zoning strategies help prevent hot and cold spots by dividing your radiant floor system into manageable sections. Proper thermostat placement is key—install them in central locations, away from drafts or direct sunlight, to ensure accurate readings. Additionally, considering waterpark safety guidelines when planning your setup can help prevent system malfunctions and ensure safe operation. Implementing energy-efficient zoning practices can further optimize your system’s performance and reduce overall energy costs. Using heat buffering techniques during installation can also improve temperature stability across zones. Applying template compatibility tips when planning your control system can streamline installation and future adjustments. Proper zone design ensures balanced heating and avoids uneven temperature distribution.
- Use separate thermostats for living rooms, bedrooms, and bathrooms to target specific needs
- Group similar spaces to simplify control and maintenance
- Place thermostats at eye level and away from heat sources for reliable temperature sensing
This approach gives you better control over each zone’s temperature, reduces energy waste, and creates a more comfortable environment throughout your home.
Common Mistakes to Avoid During Installation

One common mistake during installation is neglecting to thoroughly prepare the subfloor, which can lead to uneven heating and damage to the system. Poor subfloor preparation often results in common installation errors, such as unlevel surfaces or debris interfering with the heat transfer. Additionally, ignoring insulation considerations can cause heat loss downward, reducing efficiency and increasing energy costs. Make sure to inspect and level the subfloor before laying out the heating elements. Use proper insulation beneath the system to direct heat upward, ensuring consistent coverage. Skipping these steps can create hot spots or cold spots and strain the system prematurely. Proper planning, including addressing insulation and subfloor readiness, helps avoid costly mistakes and guarantees ideal performance of your radiant floor heating kit. Being aware of emerging trends in digital publishing can also provide innovative solutions to enhance installation documentation and support. Also, paying attention to installation guidelines provided by the manufacturer can help prevent common errors and ensure safety during setup. Taking the time to properly document each step of the installation process can further reduce errors and streamline troubleshooting if issues arise. Additionally, utilizing quality tools and materials can significantly improve the accuracy and longevity of your installation.
Testing and Adjusting Your Floor Heating System After Installation
Once your system is installed, it’s important to check the pressure to guarantee there are no leaks or blockages. Next, calibrate the temperature settings so your floors heat evenly and efficiently. Properly testing and adjusting these points helps your system perform at its best and last longer.
System Pressure Checks
After installing your radiant floor heating system, it’s essential to perform a pressure check to make sure everything is working correctly. Use a pressure gauge to monitor the system’s pressure levels, ensuring they stay within the recommended range. Check for any drops in pressure, which could indicate leaks or air trapped in the lines. You may need to perform system bleeding to remove air pockets that can cause uneven heating or noise. As you work, visualize the process:
- Reading the pressure gauge for stability
- Using a valve to release trapped air during system bleeding
- Confirming the pressure remains steady after adjustments
Keeping an eye on the pressure gauge and managing system bleeding ensures your radiant floor heats evenly without cold or hot spots, delivering ideal comfort.
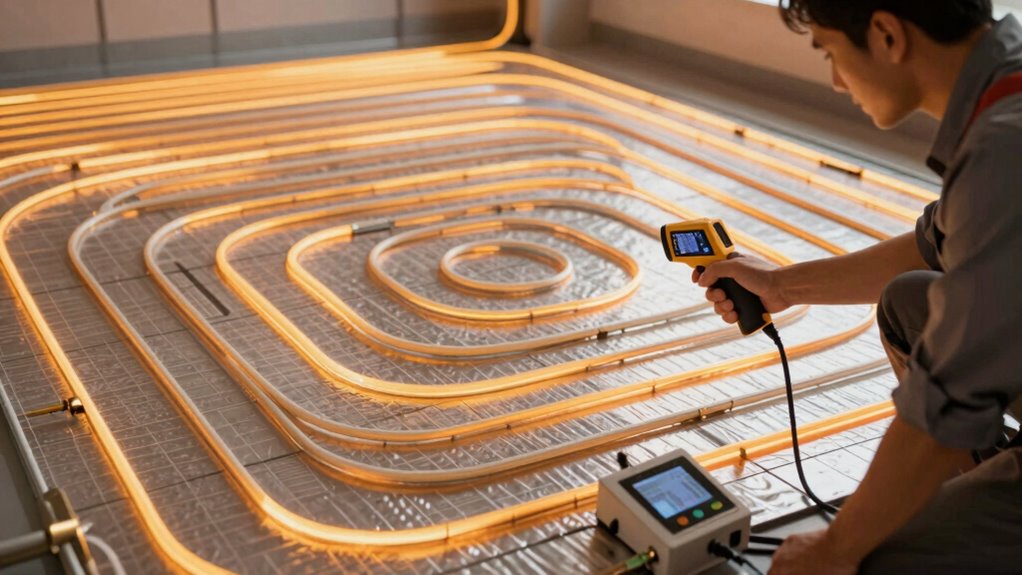
Temperature Calibration Techniques
To guarantee your radiant floor heating system operates at its optimum temperature, you need to perform accurate calibration tests and make necessary adjustments. Proper sensor placement is essential; place sensors evenly across zones for accurate readings. Calibration methods include using a surface thermometer or infrared thermometer to compare actual floor temperatures against your thermostat settings. Adjust your system’s controls based on these readings to ensure consistent heat distribution and avoid cold or hot spots. Keep in mind that sensor placement influences calibration accuracy, so position sensors away from heat sources and reflective surfaces. To streamline the process, follow a systematic approach:
| Calibration Step | Description |
|---|---|
| Measure Floor Temp | Use infrared thermometer at sensor locations |
| Compare with Settings | Match measured temp with thermostat target |
| Adjust Controls | Fine-tune system settings accordingly |
| Repeat for Consistency | Confirm uniform temperature across zones |
Expert Tricks to Fine-Tune Your Layout for Maximum Comfort
To maximize your comfort, focus on strategic pipe spacing to guarantee even heat coverage. Optimizing zone control lets you customize temperatures for different areas, enhancing efficiency and comfort. Precise heat distribution is key to avoiding cold spots and maintaining a cozy, consistent environment throughout your space.
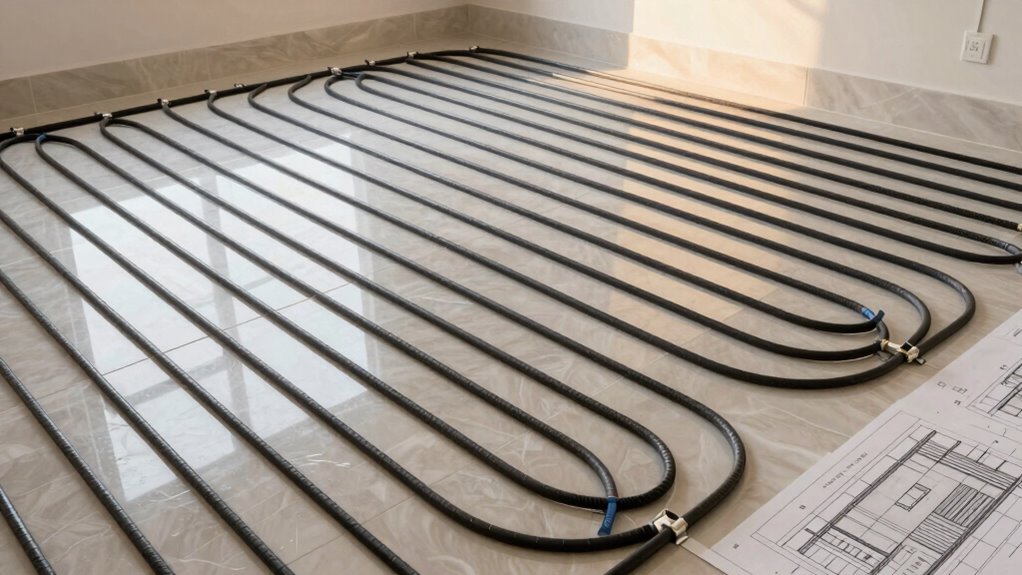
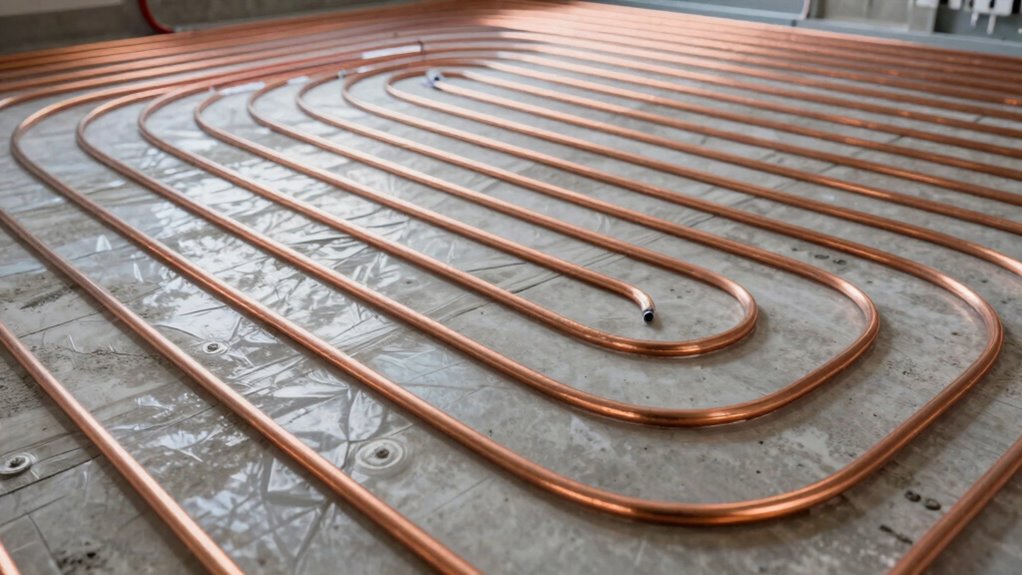
Strategic Pipe Spacing
Have you considered how pipe spacing impacts the efficiency and comfort of your radiant floor heating system? Proper spacing ensures even heat distribution and prevents cold or hot spots. When planning your layout, think about maintaining consistent distances between pipes, typically 6 to 12 inches apart, depending on room size and insulation levels. Using pipe insulation around the pipes minimizes heat loss, helping to keep floors warm. Also, avoid sharp pipe bends that can restrict flow and cause uneven heating. By carefully spacing your pipes, you maximize heat delivery, reducing energy waste and increasing comfort. Keep these factors in mind:
- Maintain uniform spacing to ensure even heat coverage
- Use pipe insulation to prevent heat loss
- Minimize sharp pipe bends for optimal flow
Zone Control Optimization
Optimizing your radiant floor heating system involves more than just proper pipe spacing; it also requires effective zone control. By dividing your system into zones, you can target specific areas, preventing hot or cold spots. Use high-quality thermal insulation between zones to minimize heat loss and improve efficiency. Ensuring material compatibility among pipes, manifolds, and controls is essential for seamless operation and durability. Proper zone control allows you to adjust temperatures independently, matching room usage and occupancy. Consider installing programmable thermostats for each zone, giving you precise control over comfort levels. Here’s a quick overview:
| Zone Type | Best Practices |
|---|---|
| Living Areas | Use thermal insulation, compatible materials |
| Bedrooms | Minimize heat loss, optimize comfort |
| Bathrooms | Fast response heating, insulation |
| Open-Plan Spaces | Zone based on activity zones |
| Basement/Storage | Insulate well, avoid heat loss |
Precise Heat Distribution
Achieving uniform heat distribution across your radiant floor system requires careful layout adjustments and expert techniques. To fine-tune your setup for maximum comfort, focus on controlling heat flow precisely. Proper thermal insulation beneath the heating elements minimizes heat loss, ensuring warm floors without wasting energy. Always verify flooring compatibility; some materials, like tile or stone, conduct heat better, while carpets may insulate too much, creating cold spots. Adjust the spacing of your tubing or heating cables based on room size and heat requirements. Consider adding thermal reflectors or insulation barriers to direct heat upward. Keep these key points in mind:
- Use thermal insulation strategically to prevent heat loss
- Ensure flooring compatibility to optimize heat transfer
- Adjust tubing spacing for even distribution
Frequently Asked Questions
What Are the Best Materials for Radiant Floor Heating Mats?
You should opt for aluminum or composite heating mats because they offer excellent floor mat durability and installation flexibility. Aluminum mats distribute heat evenly, reducing cold and hot spots, while composite options are lightweight and easy to install in various spaces. Both materials resist warping and damage over time, ensuring reliable performance. Choose the right material based on your flooring type and installation needs to maximize comfort and efficiency.
How Do Insulation Choices Affect Heat Distribution?
Insulation choices dramatically influence heat distribution, so don’t overlook their impact. When you select insulation with high effectiveness, you enhance heat flow regulation, ensuring warmth stays where you want it. Poor insulation can cause uneven heat spread, leading to cold or hot spots. By opting for quality insulation, you create a more uniform, efficient heating system, keeping your floors consistently warm and comfortable—no surprises, just perfect warmth.
Can Radiant Heating Systems Be Installed Under Existing Flooring?
Yes, you can install radiant heating systems under existing flooring. You’ll need to remove the current flooring carefully and guarantee proper surface preparation to create a smooth, clean base. This process might involve flooring removal and possibly repairing the subfloor. Once prepared, you can lay the heating mats or tubes, making sure they’re evenly spaced to prevent hot or cold spots, ensuring efficient and uniform heat distribution throughout your space.
How Often Should I Service or Inspect the System?
You should perform a maintenance schedule check at least once a year to guarantee your radiant floor heating system runs smoothly. Inspection frequency depends on usage, but it’s recommended to visually inspect for leaks, test controls, and listen for unusual noises every 6 to 12 months. Regular inspections help catch issues early, extend system life, and maintain efficient heating performance, saving you money and preventing cold spots or hot spots.
What Are the Energy Efficiency Benefits of Different Layout Patterns?
You’ll find that strategic layout patterns, like thermal zoning, enhance energy efficiency by allowing you to control heat distribution precisely. This means you can turn off or lower zones when not in use, saving power. Proper layout also promotes power optimization, reducing energy waste and lowering your utility bills. By designing your system with these principles, you guarantee consistent comfort while maximizing efficiency and minimizing unnecessary energy consumption.
Conclusion
To guarantee your radiant floor heating system works flawlessly, proper layout is key. Did you know that uneven heating can waste up to 20% of energy and cause discomfort? By planning your wire placement, spacing, and zones carefully, you’ll enjoy a cozy, uniform warmth without cold or hot spots. Take your time during installation and testing—your comfort and energy savings will reward you for years to come.