TL;DR
Choosing a cordless drill set for beginners means focusing on lightweight design, moderate voltage (12V-20V), and good battery life. This guide highlights top models, recent advances, and practical tips to kickstart your DIY projects.
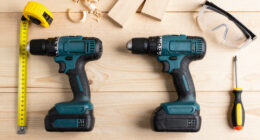
Choose a lightweight, 12V–14V drill for most home projects to keep handling easy and fatigue low.
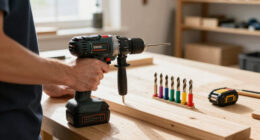
Look for a set that includes multiple bits and at least one extra battery to avoid downtime.
Modern beginner drills feature LED lights and variable speed, making tasks clearer and more controlled.
Start with small, simple projects to build confidence before tackling tougher tasks.
Always follow safety rules: wear eye protection, secure your work, and handle tools carefully.
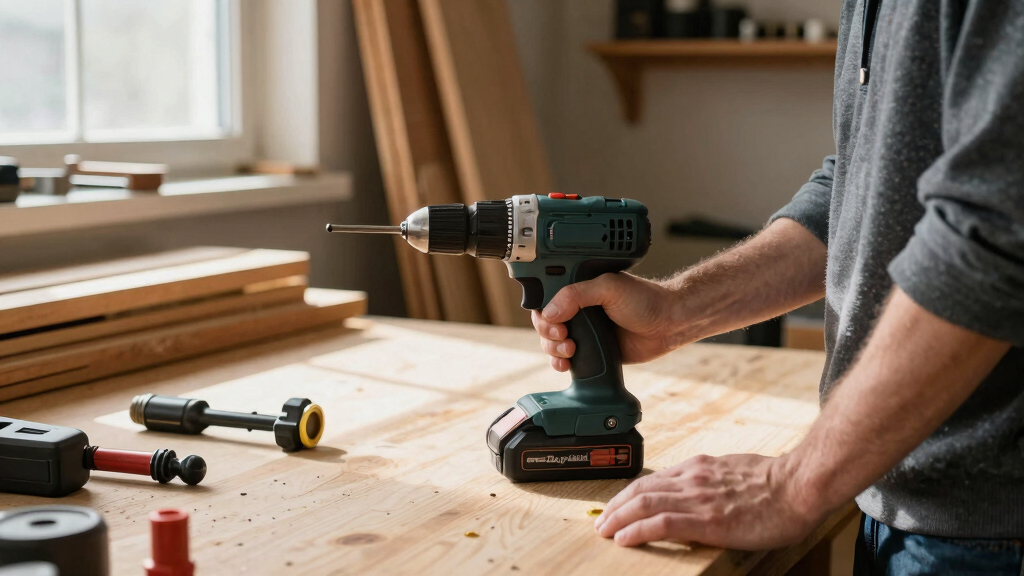
What Makes a Great Beginner Cordless Drill Set?
For beginners, a cordless drill should be a friendly, straightforward tool. Think lightweight — around 2 to 3 pounds — with an ergonomic grip that doesn’t strain your hand after a few minutes.
Power matters, but more isn’t always better. A 12V or 14V drill provides enough torque for assembling furniture, drilling into wood or plastic, without feeling like a heavy weapon in your hand. Look for models with simple controls, like a single speed or clutch, to avoid confusion.
Battery life is a key. Lithium-ion batteries are the gold standard, offering quick charges and longer runtimes. A 1.3Ah or 2.0Ah capacity is perfect for most home projects, giving you about 30-60 minutes of use per charge.
Choosing the right balance between power, weight, and ease of use is crucial because it determines how comfortable and efficient your DIY experience will be. A lightweight drill with just enough power prevents fatigue during extended use and reduces the risk of mishandling, which can lead to accidents or damage to your work. Conversely, opting for a more powerful drill that’s too heavy can make tasks cumbersome, discouraging regular use. Understanding these tradeoffs helps you pick a drill that encourages confidence and consistency, rather than frustration.
cordless drill set for beginners
As an affiliate, we earn on qualifying purchases.
As an affiliate, we earn on qualifying purchases.
Latest Trends That Make Beginner Drills Smarter and Easier
In recent years, drill makers have introduced gadgets that make DIY more approachable. Lithium-ion batteries now pack higher capacities, meaning fewer charges needed during a project. Some entry-level drills even feature brushless motors, which last longer and run cooler — a real bonus for beginners tackling multiple projects over time.
Design improvements have also made drills more comfortable. Compact, lighter models with soft grips reduce fatigue. Plus, features like built-in LED lights brighten up dark workspaces, making it easier to see what you’re doing.
Smart features are creeping into beginner sets, like adjustable speed settings and clutch controls. These let you control how much torque you deliver, protecting delicate materials and preventing stripped screws.
Understanding these innovations is important because they directly impact your experience. For example, a brushless motor, while more expensive, offers durability and efficiency that can save you money in the long run by reducing maintenance and replacements. Similarly, LED lights and variable speed controls make tasks more precise and less frustrating, especially for beginners still mastering technique. Recognizing these trends helps you choose a drill that adapts to your growing skills and projects, making DIY more manageable and enjoyable.
lightweight 12V cordless drill
As an affiliate, we earn on qualifying purchases.
As an affiliate, we earn on qualifying purchases.
How to Pick the Best Cordless Drill Set — 4 Simple Steps
- Set Your Budget: Decide how much you’re willing to spend — good beginner sets start around $30, with quality options up to $100.
- Choose the Right Voltage: For light projects, 12V–14V is enough. For more power, go for 18V, especially if you plan to do a lot of drilling or heavier work.
- Check What’s Included: Look for sets with a variety of drill and screwdriver bits, a carrying case, and extra batteries if possible.
- Read Reviews & Brand Reputation: Stick with trusted brands like BLACK+DECKER, DEWALT, or Ryobi. Check user reviews to spot common issues or high praise.
Following these steps ensures you choose a drill that fits your specific needs and budget while also providing peace of mind through reliable brands and comprehensive accessories. Recognizing that the right set isn’t just about initial cost but also about long-term usability helps prevent buyer’s remorse and encourages consistent, safe use of your new tool.
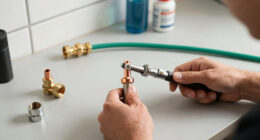
cordless drill with extra battery
As an affiliate, we earn on qualifying purchases.
As an affiliate, we earn on qualifying purchases.
Compare Top 3 Beginner-Friendly Cordless Drills
| Model | Voltage | Weight | Battery Capacity | Price |
|---|---|---|---|---|
| BLACK+DECKER LDX120C | 12V | 3 pounds | 1.5Ah | $50 |
| DEWALT DCD771C2 | 20V | 3.4 pounds | 1.3Ah | $100 |
| Ryobi P1819 | 18V | 3.3 pounds | 1.5Ah | $60 |
Notice how each balances power with weight. The BLACK+DECKER is lightweight and ideal for small tasks, while DEWALT offers more power for slightly tougher jobs. Ryobi hits a sweet spot with decent power and affordable price.
Understanding these differences helps you weigh the tradeoffs between portability, power, and price. A lightweight drill like the BLACK+DECKER is easier to handle for extended periods, reducing fatigue but might lack the muscle for more demanding projects. Conversely, the DEWALT’s higher voltage offers greater torque but can be heavier, potentially tiring your hand during prolonged use. Ryobi’s mid-range specs provide a balance, making it suitable for a variety of tasks without being cumbersome. Recognizing these tradeoffs allows you to select a drill that aligns with your typical projects and comfort level, ultimately making your DIY experience more successful and enjoyable.
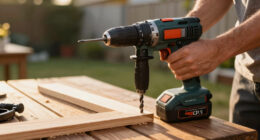
DIY cordless drill kit
As an affiliate, we earn on qualifying purchases.
As an affiliate, we earn on qualifying purchases.
Safety Tips Every Beginner Must Know
Safety first. Always wear eye protection and gloves when drilling. Keep your work area clear of clutter, and secure the material you’re working on.
Before starting, double-check that the battery is properly attached, and make sure the drill bit is tight. Never force the drill — let it do the work. And always unplug or remove the battery when changing bits or not in use.
Remember: power tools are not toys. Respect their strength, and don’t rush. A little patience saves you from accidents and broken bits.
Understanding and following safety protocols is essential because it directly impacts your well-being and the longevity of your tools. Proper safety practices reduce the risk of injuries such as cuts, eye injuries, or electrical hazards. Additionally, safe handling preserves the condition of your drill and bits, ensuring they perform reliably over time. Recognizing that safety isn’t just a set of rules but a mindset helps you develop good habits that protect you and extend your tool’s lifespan, making your DIY journey safer and more enjoyable.
Your First Project? Keep It Simple and Fun
Start with something small — like hanging a picture frame or assembling a small shelf. Use the drill to make pilot holes, then switch to screwdriver bits to drive screws. This builds confidence without overwhelming you.
For example, installing a new curtain rod involves measuring, marking, drilling tiny holes, and screwing in brackets. It’s straightforward but teaches you how to handle your drill properly.
Gradually, you can take on bigger projects — like building a garden bench or fixing a loose door hinge. The key is to keep it fun and manageable.
Engaging in simple projects initially is important because it allows you to develop fundamental skills and understand your tool’s capabilities without the pressure of complex tasks. Successfully completing these projects boosts confidence and motivates further learning. Recognizing that each small project is a stepping stone helps you appreciate progress, encourages patience, and fosters a safe, enjoyable DIY environment. As skills grow, you’ll be better prepared for more challenging tasks, making your DIY journey sustainable and rewarding.
Frequently Asked Questions
Is a 12V drill powerful enough for home use?
Yes, a 12V drill is usually enough for light tasks like hanging pictures, assembling furniture, or drilling into wood and plastic. For more demanding projects, consider an 18V model.
How long does a typical battery last?
Most lithium-ion batteries in beginner drills last around 30 minutes to an hour per charge. To keep working without interruption, opt for sets with extra batteries.
Should I get a drill with brushless motors?
Brushless motors last longer and run cooler, offering better efficiency. However, they tend to cost more. For casual DIYers, brushed motors are often sufficient and more budget-friendly.
Can I use these drills for heavy-duty projects?
Beginners’ drills excel at light to medium tasks. For heavy-duty or professional work, look into higher-end models designed for tougher conditions.