
To use a stud finder correctly, start by calibrating it on a flat section of wall away from metal or wiring, following the manufacturer’s instructions. Keep the device flat against the wall and move it slowly to detect studs, verifying signals by scanning both edges of each mark. Adjust sensitivity for different wall materials and double-check your findings before drilling to avoid mistakes. Keep practicing these steps, and you’ll master accurate stud detection quickly.
Key Takeaways
- Turn on the device and perform calibration on a flat, obstacle-free section of the wall per manufacturer instructions.
- Adjust sensitivity settings based on wall material and switch modes if available for accurate detection.
- Slowly slide the stud finder across the wall, marking edges of detected studs to confirm their positions.
- Verify stud locations by scanning again and consider visual clues or alternative methods for confirmation.
- Regularly check and recalibrate the device during use to maintain accuracy and prevent false readings.

Finding the right spot to hang a heavy picture or install a shelf can be tricky, but using a stud finder makes the job much easier. Before you start, it’s crucial to understand how to calibrate your device correctly. Calibration tips are essential because a poorly calibrated stud finder can give false readings, leading you to miss a stud or drill into an unintended location. Many users forget to calibrate their device properly or skip this step altogether, which is a common mistake. To avoid this, always turn on your stud finder and follow the manufacturer’s instructions. Typically, it involves placing the device flat against the wall and pressing a calibration button or sliding it across the surface until it signals that it’s ready. Ensuring the wall is free of obstacles or irregularities during calibration can help you get more accurate results. Proper calibration is especially important when working with different wall materials, such as drywall or plaster, which can affect readings.
Another common mistake is relying solely on the stud finder’s initial signal without confirming its accuracy. Once calibrated, always verify the location by slowly sliding the device across the wall, listening for the signal that indicates a stud’s edge. Mark the spot and then scan again to find the other edge, confirming the width of the stud. This double-checking helps prevent errors caused by device inaccuracies or wall anomalies like pipes or wiring. Keep in mind that some stud finders can pick up electrical wiring or metal pipes, which can lead to false positives. So, when you detect a stud, always consider the context—look for visual clues or use a different method to verify your findings. Additionally, understanding stud size and spacing can help you anticipate where to find studs more reliably.
It’s also important to understand that walls aren’t always uniform. Drywall, plaster, or lath and plaster walls may produce different readings. In such cases, adjusting the sensitivity settings on your device can improve accuracy, but this is another calibration tip you should keep in mind. If your stud finder has multiple modes, switch to the one best suited for your wall type. Regularly checking your device’s calibration during a project is a good habit, especially if you’re working on a large wall where multiple readings are necessary.
Remember that calibration tips and avoiding common mistakes can greatly influence your success. Properly calibrated, your stud finder will provide reliable guidance, making your project safer and more efficient. Taking a few extra moments to calibrate and verify your readings helps prevent mistakes like drilling into electrical wires or missing the stud entirely. With patience and attention to calibration, you’ll find hanging heavy objects becomes straightforward, accurate, and stress-free.
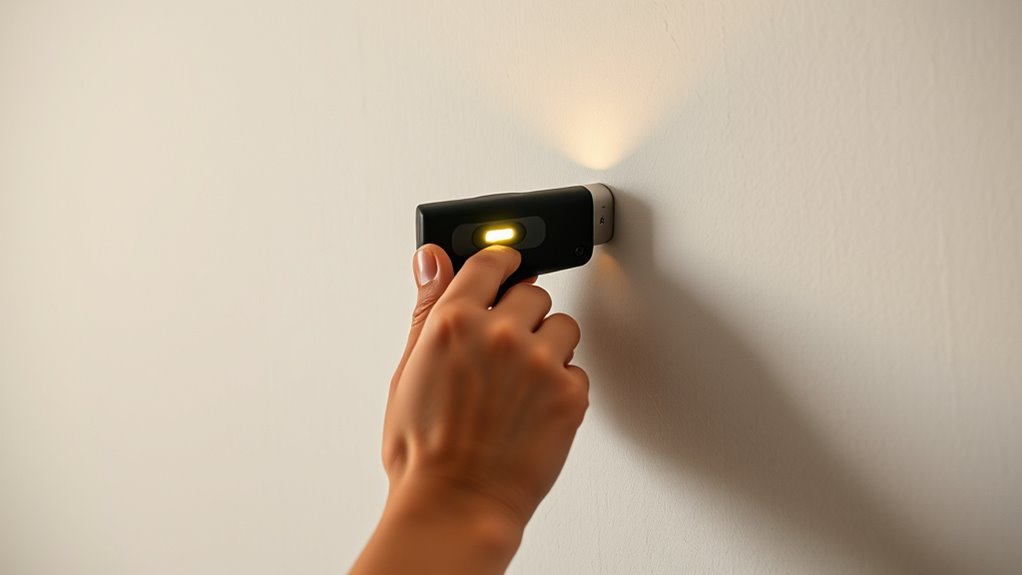
digital stud finder with calibration
As an affiliate, we earn on qualifying purchases.
As an affiliate, we earn on qualifying purchases.
Frequently Asked Questions
Can Stud Finders Detect Live Electrical Wires?
You might wonder if your stud finder can detect live electrical wires. Many modern stud finders include wire detection features, helping you identify live wires during home projects. These devices use specialized sensors for live wire identification, reducing the risk of accidents. However, not all stud finders have this capability, so check your model’s features. Always exercise caution and verify with additional tools when working near potential electrical wiring.
How Deep Can a Typical Stud Finder Scan?
You wonder how deep a typical stud finder can scan. Well, most models detect studs up to 1.5 inches deep, but some can go as far as 3 inches. To get accurate readings, you need to make certain proper stud finder calibration and account for stud spacing variability. You should also remember that dense materials may limit depth. So, always test your device before starting your project to ensure reliable results.
Are There Differences Between Wall Types for Stud Finders?
When it comes to different types of walls, you’ll notice that stud finders may work better on some than others. For example, drywall usually makes detection easier, while plaster or brick walls can be more challenging. You should calibrate your stud finder specifically for each wall type to improve accuracy. Always test on a small area first to guarantee reliable readings, especially with thicker or denser materials.
How Do Temperature and Humidity Affect Stud Finder Accuracy?
Temperature and humidity can substantially impact your stud finder’s accuracy by affecting its material sensitivity and calibration techniques. When it’s hot or humid, your device might struggle to detect studs correctly because moisture can interfere with sensors. To guarantee reliable readings, keep your environment stable, regularly calibrate your stud finder, and be mindful of material sensitivity variations caused by changing climate conditions. Proper calibration and awareness help you find studs precisely every time.
Can a Stud Finder Be Used on Ceilings?
Yes, you can use a stud finder on ceilings for ceiling installation, but keep in mind its limitations. Stud finders are typically designed for walls, so detecting studs in ceilings might be trickier due to angle and material differences. Make sure to use a suitable type of stud finder, like a magnetic or electronic one, and follow the manufacturer’s instructions carefully. This helps guarantee accurate results despite some stud finder limitations.
electric wall scanner for studs and wiring
As an affiliate, we earn on qualifying purchases.
As an affiliate, we earn on qualifying purchases.
Conclusion
Now that you know the secrets to using a stud finder correctly, you’re ready to tackle your project with confidence. But remember, every wall holds its surprises—hidden nails, pipes, or wires could still be lurking beneath the surface. Will your next find be exactly where you expect it? Keep your eyes sharp, stay cautious, and trust your skills. The perfect spot is just waiting to be discovered—are you ready to uncover it?
heavy-duty wall stud finder
As an affiliate, we earn on qualifying purchases.
As an affiliate, we earn on qualifying purchases.
multi-mode stud finder for drywall and plaster
As an affiliate, we earn on qualifying purchases.
As an affiliate, we earn on qualifying purchases.