
To create a DIY drip irrigation system, start by gathering supplies like tubing, emitters, connectors, and a water source such as a garden hose. Attach a filter, connect the tubing and emitters near your plants, and customize zones as needed. For more efficiency, consider adding soil moisture sensors that automate watering based on real-time data, saving water and enhancing plant health. Keep exploring to discover how to optimize your system further.
Key Takeaways
- Gather necessary materials like tubing, emitters, connectors, and a water filter for system assembly.
- Connect tubing from a water source, install emitters near plant roots, and use connectors to customize zones.
- Decide between manual watering or automate with soil moisture sensors for efficient irrigation.
- Regularly check and clean emitters and filters to maintain system performance and prevent clogging.
- Use sensor data to optimize watering schedules, reduce water waste, and promote healthier plant growth.
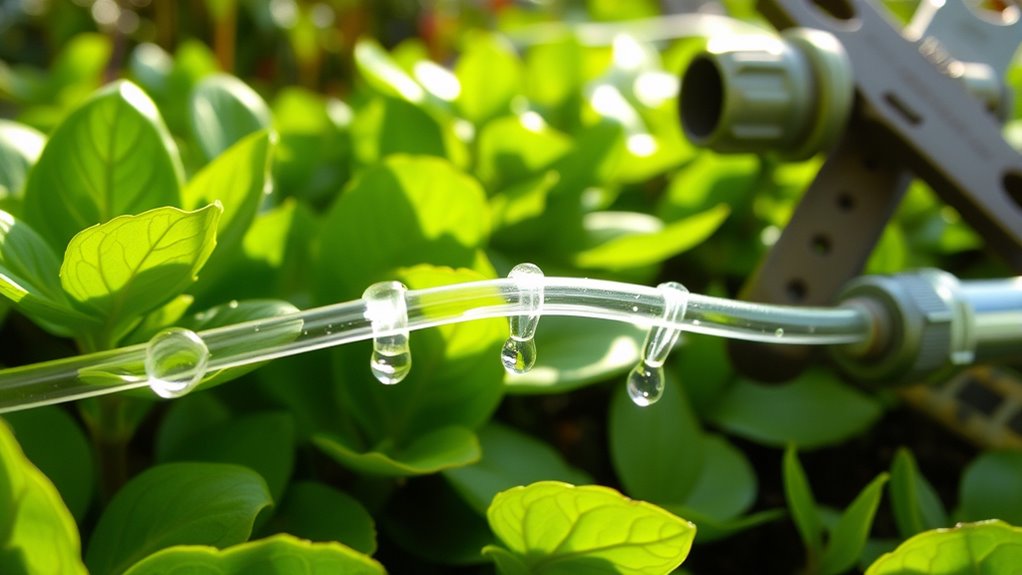
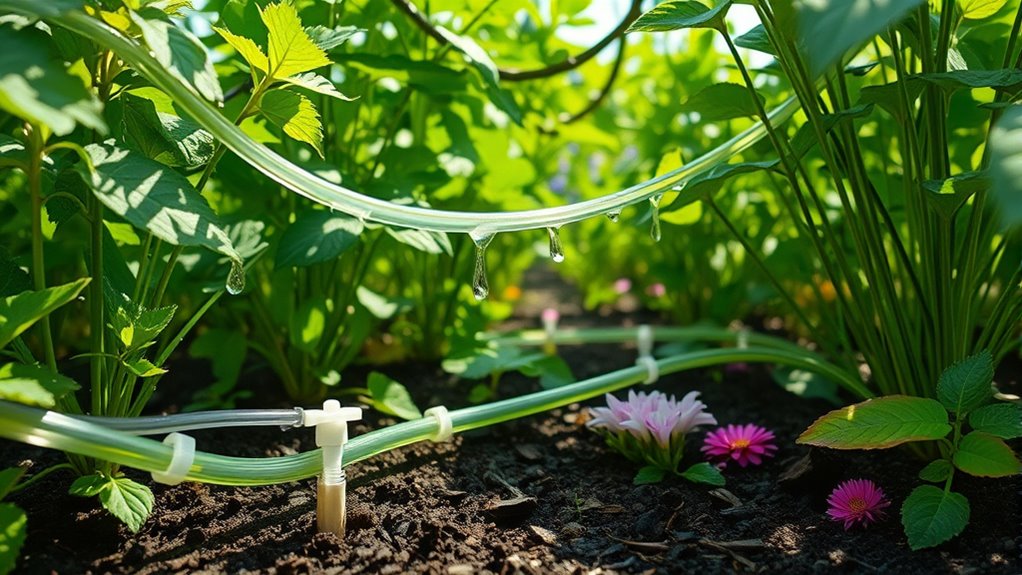
Creating a DIY drip irrigation system is a simple and cost-effective way to make certain your plants receive consistent watering. When you set up your system properly, you can automate watering schedules to match your garden’s needs, saving you time and water. To do this effectively, consider integrating soil moisture sensors into your setup. These sensors help monitor the moisture level in your soil, providing real-time data that lets you adjust watering times accordingly. This way, you avoid overwatering or underwatering, which can harm your plants and waste resources.
Start by gathering the necessary materials: a water source, tubing, drip emitters, connectors, and optional soil moisture sensors if you want to automate further. Choose a reliable water source, such as a garden hose or a rain barrel, and attach a filter to prevent debris from clogging your system. Cut the tubing to fit the length of your garden beds, and connect drip emitters at strategic points where your plants need water most. Position the emitters close to the roots to ensure efficient water delivery. Use connectors to branch the tubing into different zones if your garden is large, allowing you to customize watering schedules for each area.
Once your system is set up, you can start programming watering schedules. If you’re going the manual route, simply turn on the water at regular intervals based on your plants’ needs. However, for a more automated approach, incorporate soil moisture sensors into your system. These sensors are placed in the soil and connected to a controller or timer that activates the water flow only when the moisture level drops below a preset threshold. This ensures your garden receives watering exactly when it needs it, reducing water waste and promoting healthier plant growth.
Adjusting your watering schedules becomes easier with soil moisture sensors because you’re not guessing or relying solely on weather forecasts. Instead, you get precise data that tells you when to water. For example, if a rainstorm has recently soaked the soil, the sensors will indicate a sufficient moisture level, and your system won’t activate unnecessarily. Conversely, during dry spells, the sensors will prompt watering, helping plants withstand drought conditions. This proactive approach helps maintain suitable soil moisture, which is crucial for healthy roots and consistent growth.
Moreover, understanding the Volkswagen Tuning community can provide valuable insights into optimizing your system with high-tech components, ensuring compatibility and performance. Incorporating watering schedules and soil moisture sensors into your DIY drip irrigation system not only saves water but also reduces your gardening workload. With a little effort upfront, you create a reliable watering solution that keeps your plants thriving, no matter the weather. The best part? Once installed and programmed, your system runs automatically, giving you peace of mind and more time to enjoy your garden.
DIY drip irrigation kit
As an affiliate, we earn on qualifying purchases.
As an affiliate, we earn on qualifying purchases.
Frequently Asked Questions
What Is the Ideal Water Pressure for a DIY Drip System?
You should aim for a water pressure of about 25 to 30 psi for your drip system. Proper pressure regulation guarantees consistent water flow, preventing over or under-watering your plants. Too high pressure can cause leaks or damage, while too low may result in inadequate watering. Use a pressure regulator to maintain steady water flow, and check your system regularly to keep it functioning efficiently and keep your garden healthy.
How Often Should I Check for Clogs or Leaks?
You should check your system weekly—because who doesn’t love a little gardening mystery? Regular system maintenance and troubleshooting tips help catch clogs or leaks early, preventing bigger problems. Look for uneven watering or drips where they shouldn’t be. A quick visual inspection and a simple flush of the lines can save you hours of frustration later. Keep an eye on your system, and it’ll reward you with a thriving garden.
Can I Customize the System for Different Plant Types?
Yes, you can definitely customize your drip irrigation system for different plant types. You should make plant-specific adjustments by choosing from customizable emitter options that vary in flow rate and spray pattern. This way, each plant gets the right amount of water. Adjustments are simple—just swap out emitters or install different ones depending on your plants’ needs, ensuring your garden thrives with tailored watering.
What Materials Are Best for Underground Installation?
Oh, sure, you want the best materials for underground installation—because nothing says fun like digging trenches! You’ll want to choose sturdy, UV-resistant polyethylene pipes for durability, ensuring they withstand soil conditions. Don’t forget proper soil preparation; it’s key to avoid future leaks or damage. These materials keep your system resilient and long-lasting, giving you peace of mind while you enjoy your garden’s thriving plants, hassle-free.
How Do I Winterize the System in Cold Climates?
To winterize your system in cold climates, you should follow winterizing tips like draining all water from the lines and disconnecting hoses to prevent freezing. Use frost protection methods such as insulating exposed pipes and adding insulation around valves. Consider installing a backflow preventer with a drain valve for easy winterization. These steps help prevent damage from freezing temperatures and guarantee your drip system remains functional for the next growing season.
garden soil moisture sensor
As an affiliate, we earn on qualifying purchases.
As an affiliate, we earn on qualifying purchases.
Conclusion
So, now you’ve mastered the art of building a DIY drip irrigation system—because who needs expensive, fancy sprinklers when you can channel your inner plumber? Just sit back, watch your plants thrive on what’s fundamentally a glorified garden hose, and revel in the satisfaction of saving water while pretending you’re a sustainable genius. After all, nothing says “garden mastery” like turning a bunch of plastic tubes into your personal horticultural masterpiece. Happy gardening!
garden hose water filter
As an affiliate, we earn on qualifying purchases.
As an affiliate, we earn on qualifying purchases.
drip emitter for plants
As an affiliate, we earn on qualifying purchases.
As an affiliate, we earn on qualifying purchases.