To install a peel-and-stick kitchen backsplash, start by cleaning and smoothing the wall surface to guarantee good adhesion. Measure carefully and mark a straight baseline using a level and pencil. Begin from the center or a prominent edge, peeling the backing as you press each tile into place, maintaining alignment. Smooth out air bubbles with a squeegee and trim tiles as needed. Following these steps will help you achieve an attractive, professional look—if you continue, you’ll master every detail of the process.
Key Takeaways
- Prepare the wall by cleaning, sanding, and smoothing the surface for optimal adhesion.
- Measure and mark a straight baseline using a level to ensure proper tile alignment.
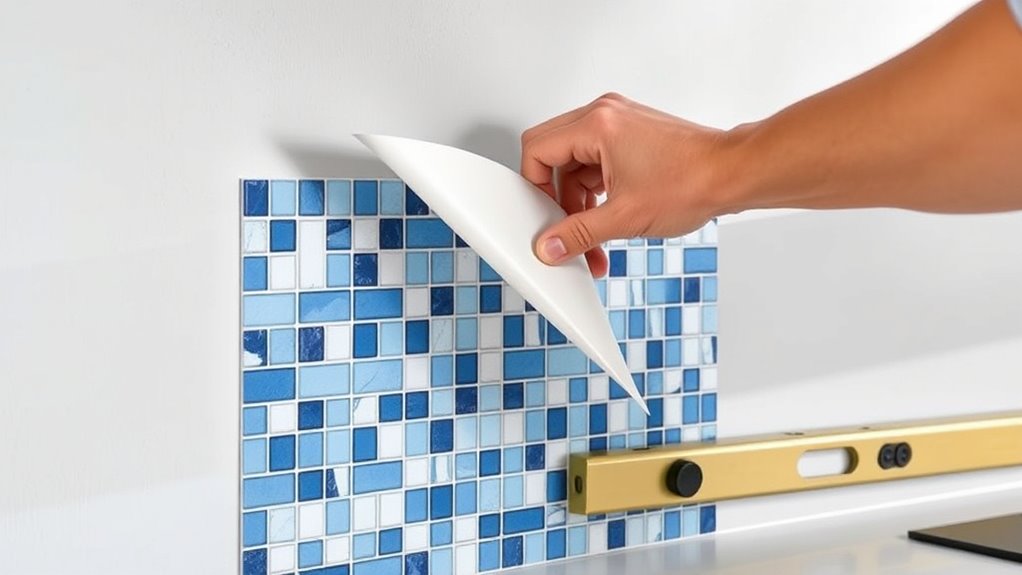
- Peel off the backing and carefully stick tiles, starting from the center or a designated edge.
- Use a utility knife for cuts and a squeegee to remove air bubbles for a seamless finish.
- Double-check alignment and fit before pressing tiles fully into place for a professional look.

Installing a peel-and-stick kitchen backsplash is a quick and affordable way to refresh your space without professional help. Before you start, it’s vital to focus on tool selection and surface preparation. Choosing the right tools makes the process smoother, while preparing the surface guarantees your new backsplash adheres properly and looks seamless.
Begin by gathering your tools. You’ll need a measuring tape, a level, a utility knife or scissors, a squeegee or a plastic putty knife, and a pencil for marking. Having these tools ready beforehand prevents interruptions and helps you work efficiently. When selecting your tools, opt for sharp utility knives to make clean cuts and a level to ensure your tiles are straight. If your peel-and-stick tiles come with specific instructions, follow those recommendations for best results.
Gather essential tools like a measuring tape, level, utility knife, squeegee, and pencil before starting.
Next, surface preparation is vital. You want a clean, smooth, and dry surface to guarantee good adhesion. Start by removing any grease, grime, or residue from the wall. Use a mild detergent or a degreaser if needed, then rinse and dry thoroughly. If your wall has bumps, holes, or uneven patches, sand those areas lightly and fill any gaps with spackle or joint compound. Once the surface feels smooth, wipe it down with a damp cloth to remove dust and debris, then let it dry completely. Any imperfections or moisture can cause the tiles to peel or not stick evenly, so take your time with this step. Proper surface preparation aligns with surface adhesion principles to ensure durability.
After surface prep, measure the area carefully. Use your measuring tape and level to mark a straight baseline where you’ll start installing the tiles. It’s best to begin in the center of the space or along a prominent edge, depending on your design. Use a pencil to lightly mark where each tile will go, ensuring your layout is balanced and aligned. Double-check your measurements and marks before peeling the backing off the tiles. This preparation guarantees that your installation is precise and looks professional.
peel and stick kitchen backsplash tiles
As an affiliate, we earn on qualifying purchases.
As an affiliate, we earn on qualifying purchases.
Frequently Asked Questions
Can Peel‑And‑Stick Backsplash Be Removed Without Damaging Walls?
Yes, you can remove a peel‑and‑stick backsplash without damaging walls if you follow the proper removal process. Start by gently loosening the edges with a plastic scraper or your fingers to minimize wall damage. Slowly peel it back, applying even pressure, and avoid ripping. To protect your walls, use a hairdryer on low heat to soften adhesive if needed. Take your time, and your walls should stay intact.
What Is the Best Way to Clean the Wall Surface Beforehand?
Think of your wall as a canvas needing a clean slate. To guarantee proper surface preparation, use gentle cleaning techniques like wiping with a mixture of mild soap and water. Avoid harsh abrasives that can damage the surface. Make sure to remove grease, dust, and grime thoroughly, so your peel‑and‑stick backsplash adheres smoothly and lasts longer. A clean wall is the foundation for a flawless, lasting result.
Are There Heat Restrictions for Peel‑And‑Stick Tiles?
Peel-and-stick tiles generally have good heat resistance, but you should always check the manufacturer’s temperature limits. Most tiles can withstand typical kitchen heat, around 150°F, but prolonged exposure to higher temperatures might cause warping or adhesive failure. Keep your backsplash away from direct heat sources like burners or ovens, and avoid placing hot pots directly on the tiles. Staying within the recommended temperature limits guarantees your backsplash stays intact and looks great.
How Do I Handle Corners or Uneven Wall Surfaces?
Like a modern-day knight tackling a dragon, you handle corners or uneven surfaces by carefully trimming tiles with a utility knife and using a heat gun to gently mold them. For corner transition, cut tiles at a 45-degree angle for a seamless fit. For irregular surfaces, apply extra pressure and use a smoothing tool to conform the tiles. Patience and precision will guarantee your backsplash looks flawless, even on tricky walls.
Can I Cut Peel‑And‑Stick Tiles With Household Scissors?
Yes, you can cut peel-and-stick tiles with household scissors. Use sharp, sturdy scissors and focus on precise scissor techniques to guarantee clean cuts and maintain tile integrity. For best tile precision, hold the tile firmly and cut slowly along your marked lines. Keep your scissors straight and steady, especially around curves or corners. This method works well for small, simple cuts, but for intricate shapes, a utility knife might be better.
utility knife for tile cutting
As an affiliate, we earn on qualifying purchases.
As an affiliate, we earn on qualifying purchases.
Conclusion
Installing a peel-and-stick backsplash is a quick, affordable way to refresh your kitchen—over 70% of homeowners say it boosts their space’s appearance instantly. With simple steps and minimal tools, you can achieve a professional look in just a few hours. Remember, proper surface prep guarantees durability. So, go ahead and give your kitchen a stylish upgrade today—it’s easier than you think and highly rewarding!
squeegee for backsplash installation
As an affiliate, we earn on qualifying purchases.
As an affiliate, we earn on qualifying purchases.
level for wall tiling
As an affiliate, we earn on qualifying purchases.
As an affiliate, we earn on qualifying purchases.