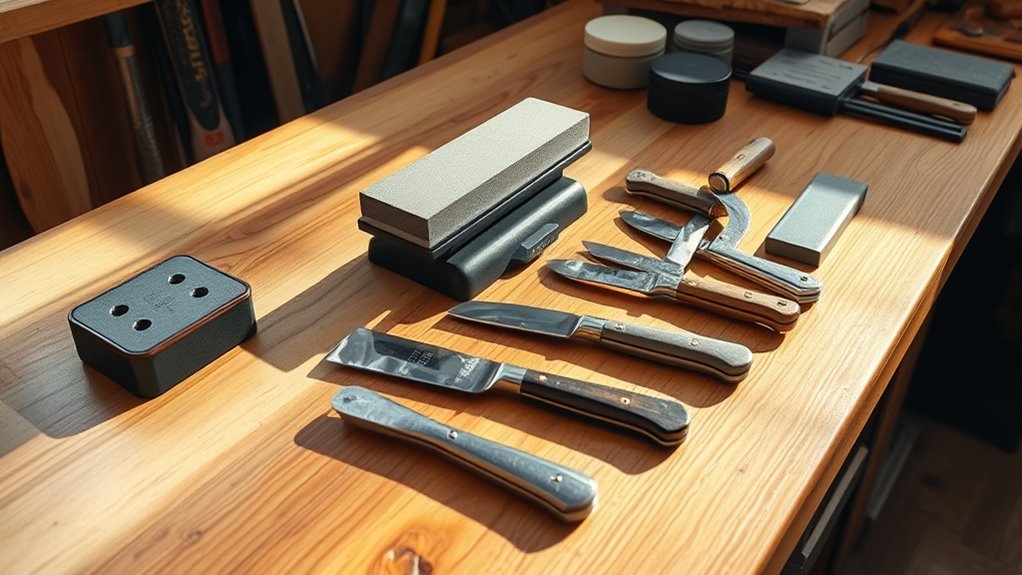

To create a sharpening station for blades and chisels, start by finding a stable, flat surface to accommodate your diamond stones and honing guides. Keep your tools organized in containers for quick access, and use a non-slip mat for safety. Set up your guides and stones within easy reach to streamline the process. Developing this organized space will improve your sharpening routine and tool performance—keep exploring for more tips to perfect your setup.
Key Takeaways
- Select a stable, flat surface and use a non-slip mat to ensure safety and stability for your sharpening tools.
- Organize diamond stones, honing guides, and other supplies within easy reach for efficient workflow.
- Use various grit diamond stones for coarse reshaping and fine polishing to maintain tool sharpness.
- Keep honing guides accessible to achieve consistent bevel angles during sharpening.
- Regularly clean and maintain your sharpening station to promote precision, safety, and long-term tool performance.

Creating a dedicated sharpening station for your blades and chisels guarantees they stay in top condition and ready for any project. Setting up a specific area helps you develop a consistent routine, ensuring your tools are always sharp and reliable. To do this effectively, you need the right equipment, and two essential components are diamond stones and honing guides. Diamond stones provide fast, efficient sharpening, especially when working with dull or damaged edges. Their abrasive surface remains flat over time, ensuring even sharpening every time. These stones come in various grits; starting with a coarse grit to reshape edges and progressing to finer grits for polishing. This versatility makes diamond stones ideal for maintaining a range of blades and chisels, saving you time and effort.
A dedicated sharpening station with diamond stones and honing guides keeps tools sharp, precise, and ready for any project.
Honing guides are equally important, as they help you achieve precise, consistent angles during sharpening. Without a guide, it’s easy to vary your approach, resulting in uneven edges or a loss of sharpness over time. Using a honing guide ensures you maintain the correct bevel angle, which is essential for peak cutting performance. When setting up your station, position your diamond stones on a stable, flat surface, and keep your honing guides within easy reach. This setup minimizes disruptions, so you can focus on the task at hand and sharpen with confidence.
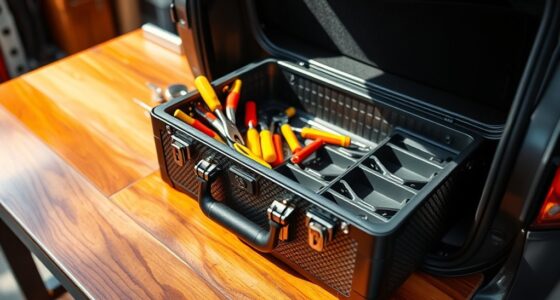
In addition to the stones and guides, consider investing in a good work surface. A sturdy, non-slip mat underneath your sharpening station keeps everything stable, preventing accidents and ensuring safety. Keep your tools organized with dedicated containers or trays, so you don’t waste time searching for the right blade or chisel. Regularly cleaning your diamond stones is also indispensable for maintaining their effectiveness. A simple process of cleaning with water and a brush will remove debris and restore their abrasive qualities, ensuring consistent results.
Creating a well-organized and dedicated Waldorf toy inspired workspace can also foster patience and mindfulness during your sharpening routine, making the process more enjoyable. A well-organized sharpening station encourages a disciplined approach, making it easier to develop a routine. As you sharpen, check your progress frequently by testing the edge on a piece of scrap wood or paper. This allows you to fine-tune your process and avoid over-sharpening or damaging your tools. Over time, your blades and chisels will develop a keen edge, improving your work quality and reducing fatigue. Creating a dedicated sharpening station isn’t just about convenience; it’s about investing in your tools and your craft. With diamond stones, honing guides, and a proper setup, you’ll sharpen efficiently and enjoy the satisfaction of always having a razor-sharp edge at your fingertips.
diamond sharpening stones set
As an affiliate, we earn on qualifying purchases.
As an affiliate, we earn on qualifying purchases.
Frequently Asked Questions
What Safety Gear Should I Wear During Sharpening?
You should always wear personal protective equipment to guarantee workspace safety during sharpening. Safety goggles protect your eyes from flying debris, while gloves prevent cuts from sharp blades. Consider a dust mask to avoid inhaling metal or stone particles, and wear hearing protection if the noise level is high. These precautions help keep you safe, maintain focus, and make your sharpening process more secure and efficient.
How Often Should I Sharpen My Blades and Chisels?
You should sharpen your blades and chisels when they start to feel dull or lose their edge, which varies with use but generally means every few weeks. Regular blade maintenance ensures clean cuts and smooth work. Keep an eye on their performance, and don’t wait too long—sharpening frequency helps maintain their sharpness and longevity, making your projects safer and more enjoyable. Consistent upkeep keeps your tools in top shape.
Can I Use a Household Item as a Makeshift Sharpening Tool?
Yes, you can use household alternatives as makeshift sharpening tools with some DIY hacks. For example, a ceramic mug or a smooth stone can serve as a sharpening surface, and a fine-grit nail file or sandpaper can help touch up edges. Just guarantee you maintain the correct angle and apply gentle pressure. While these hacks work temporarily, investing in proper sharpening tools ensures better, more consistent results.
What’s the Best Storage Method for Sharpened Tools?
Imagine discovering your perfectly sharpened tools dulled overnight—heart-stopping, isn’t it? To prevent this, you should use dedicated storage containers that keep blades and chisels protected and organized. Opt for soft-lined cases or compartments that prevent contact damage. Proper tool organization not only preserves your tools’ sharpness but also makes your workspace safer and more efficient. Don’t leave your tools exposed; secure them with thoughtful storage solutions.
How Do I Troubleshoot Uneven or Damaged Edges?
To troubleshoot uneven or damaged edges, start with a damage assessment to identify chips or cracks. Check edge alignment by carefully inspecting the blade or chisel under light. Use a straight edge or magnifier if needed. If the edge is misaligned or damaged, re-align or regrind it on a sharpening stone, maintaining consistent angles. Regularly assess and adjust your technique to prevent future issues and guarantee a sharp, even edge.
woodworking honing guides
As an affiliate, we earn on qualifying purchases.
As an affiliate, we earn on qualifying purchases.
Conclusion
Setting up your sharpening station is like building a trusty workshop companion—you’ll rely on it daily, just like a favorite tool. I remember the first time I brought my dull chisel back to life; it felt like giving it a second chance. With your own station, you’ll turn frustration into satisfaction, transforming rough edges into smooth perfection. Soon, you’ll find that sharpening becomes not just a chore, but a gratifying part of your woodworking journey.
blade and chisel sharpening station
As an affiliate, we earn on qualifying purchases.
As an affiliate, we earn on qualifying purchases.
non-slip work surface for sharpening
As an affiliate, we earn on qualifying purchases.
As an affiliate, we earn on qualifying purchases.