
To turn an empty corner into a high-function DIY repair hub, start by installing a pegboard for customizable tool storage and hang your frequently used tools on magnetic strips. Add a sturdy work surface like a fold-down bench or small table and incorporate clear bins underneath for small hardware, labeling each for quick access. Keep everything organized and mobile with a rolling cart or toolbox. If you keep organizing and maintaining your space, you’ll create a highly efficient repair station — so stay tuned for more tips.
Key Takeaways
- Install wall-mounted pegboards with hooks and shelves for customizable, visible tool storage.
- Add a sturdy, compact work surface like a fold-down bench for versatile workspace.
- Incorporate labeled bins or containers beneath the work area for small hardware and parts.
- Use a rolling cart or portable toolbox for frequently used tools for easy access and mobility.
- Keep the area clean and organized with regular maintenance, tool cleaning, and space adjustments.
If you have an empty corner in your home, transforming it into a high-function DIY repair hub can save you time and money on small projects. The key to making this space work is smart tool organization and effective storage solutions. You want a setup that’s easy to access, organized, and adaptable to different types of projects. Start by evaluating the tools you frequently use. Gather screwdrivers, pliers, hammers, drills, and other essentials, then think about how to keep them visible and within arm’s reach. Using pegboards mounted on the wall is one of the best storage solutions because they allow you to hang tools in a way that’s both accessible and orderly. Pegboards can be customized with hooks, bins, and shelves, so you can tailor the organization to your specific needs. This way, you won’t waste time searching for a tool buried in a box or drawer.
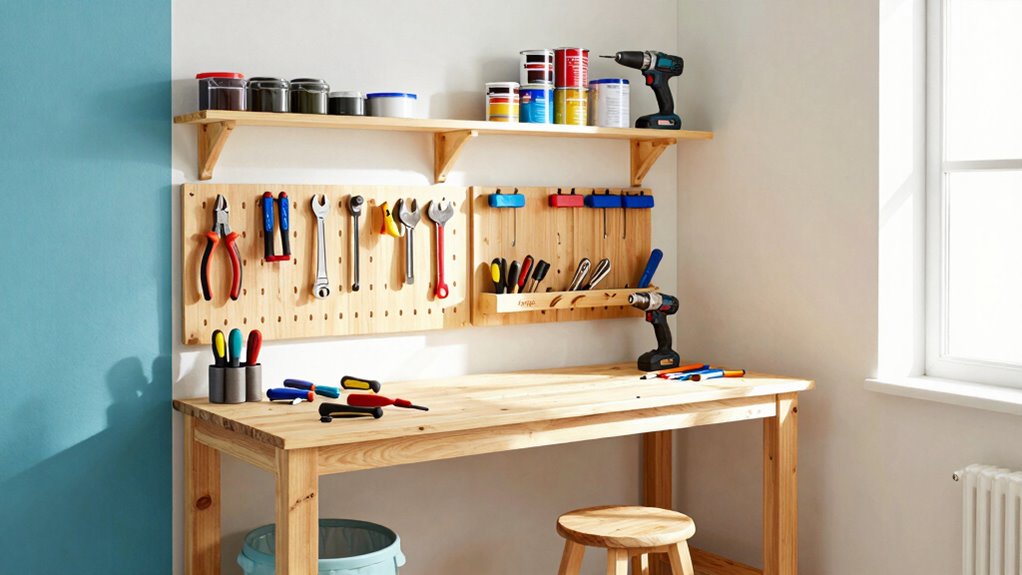
Transform an empty corner into an organized DIY repair station with smart storage and easy access tools.
Next, consider adding a sturdy work surface. A fold-down workbench or a small table can serve as your primary workspace without taking up too much room. To keep everything tidy, incorporate storage bins or containers beneath the work surface for small hardware like nails, screws, bolts, and washers. Clear plastic bins are especially helpful because you can see what’s inside at a glance. Label each bin for easy identification, making it quicker to find what you need when you’re in the middle of a project. For larger power tools, invest in wall-mounted shelves or cabinets that keep your workspace clutter-free while still providing easy access. These storage solutions not only keep your tools organized but also protect them from dust and damage. Additionally, having organized storage can extend the lifespan of your tools and equipment. Regular maintenance and cleaning of your tools are crucial to keeping your workspace efficient and ensuring safety during repairs. Implementing tool maintenance routines can help prevent unexpected breakdowns and extend tool longevity. Incorporating storage solutions that are flexible and customizable can further enhance your workspace’s adaptability as your collection of tools grows or your needs change.
You might also want to add a small rolling cart or portable toolbox. These allow you to move your most-used tools around your home, especially if you tend to do repairs in different rooms. Keep frequently used items on the cart, and store less-used tools elsewhere. To maximize space, hang some of your hand tools on a magnetic strip attached to the wall, freeing up drawer space and keeping everything within reach. Incorporating flexible organization strategies will help you adapt your workspace as your projects evolve or your tool collection grows.
Finally, keep your DIY repair hub neat and maintained. Regularly review your tool organization and storage solutions to ensure everything remains functional. Clean your tools after use, and replace any worn-out or missing items immediately. This way, your repair space stays efficient and ready whenever inspiration strikes. By focusing on smart tool organization and practical storage solutions, you turn that empty corner into a well-organized, high-function DIY repair hub that makes tackling projects easier and more enjoyable.
wall mounted pegboard tool organizer
As an affiliate, we earn on qualifying purchases.
As an affiliate, we earn on qualifying purchases.
Frequently Asked Questions
What Tools Are Essential for a DIY Repair Hub?
You need essential tools like a versatile drill, screwdrivers, pliers, and a hammer for your DIY repair hub. Incorporate power tool storage to keep your drills and saws organized, and don’t forget to include a workspace for tool cleaning to maintain their longevity. Having a well-stocked, organized setup makes repairs faster, safer, and more efficient, turning your empty corner into a true hub of productivity.
How Much Space Do I Need for This Setup?
You’ll need about 4×4 feet of space for a functional DIY repair hub, giving you enough room to work comfortably. An interesting statistic shows that organized storage solutions can increase productivity by 20%. Make sure your setup includes good lighting options to prevent eye strain and improve precision. This size allows for storage, workspace, and easy access to tools, making your repair corner efficient without taking up too much room.
How Do I Organize Small Repair Parts Effectively?
You should use versatile storage solutions like small bins, drawer organizers, and wall-mounted shelves to keep repair parts accessible. Label each container clearly with labeling techniques such as waterproof labels or color codes, so you can quickly find what you need. Regularly declutter and reevaluate your organization system to guarantee it stays efficient. This approach keeps your repair hub tidy, saves time, and makes your DIY projects more enjoyable.
What Safety Precautions Should I Consider?
Did you know over 30% of DIY injuries happen due to neglecting safety precautions? You should always wear safety gear like goggles, gloves, and masks to protect yourself. Be aware of hazards such as sharp tools, chemicals, or unstable surfaces. Keep your workspace well-ventilated and organized to prevent accidents. By practicing hazard awareness and using proper safety gear, you’ll create a safe environment, making your DIY repairs both effective and injury-free.
Can This Setup Be Customized for Specific Projects?
Absolutely, you can customize your DIY repair hub for specific projects. Use decorating inspiration to personalize the space with functional storage, pegboards, or magnetic strips for tools. Incorporate budget-friendly ideas like repurposing old furniture or using inexpensive containers. Tailor the setup to your needs by adding project-specific stations or organizing shelves, making your space efficient and inspiring. This way, every repair becomes more enjoyable and less cluttered.
fold-down workbench for small spaces
As an affiliate, we earn on qualifying purchases.
As an affiliate, we earn on qualifying purchases.
Conclusion
Transforming that empty corner into a DIY repair hub is like turning a blank canvas into a masterpiece—you’ll gain a space that’s organized, practical, and uniquely yours. With a little planning and effort, you’ll create a dedicated spot where tools and supplies are always within reach. Before you know it, that once-empty corner will become your go-to workspace, making repairs feel as satisfying as finishing a rewarding project. Just start, and watch your space come to life.
labeled plastic storage bins for hardware
As an affiliate, we earn on qualifying purchases.
As an affiliate, we earn on qualifying purchases.
rolling tool cart
As an affiliate, we earn on qualifying purchases.
As an affiliate, we earn on qualifying purchases.