
To install floating shelves, start by gathering your tools like a drill, level, screws, anchors, and a measuring tape. Choose a sturdy, accessible spot and mark where you want the shelves. Find wall studs or use wall anchors for better support. Drill pilot holes, install your brackets, and then carefully mount the shelves. make certain everything is level and secure. If you follow these steps, you’ll get a sleek, stable look—and there’s more to ensure perfect results.
Key Takeaways
- Choose a suitable wall location considering aesthetics, accessibility, and wall material.
- Locate wall studs or use appropriate wall anchors for secure mounting.
- Mark shelf and bracket positions precisely with a level and measuring tape.
- Drill pilot holes, then mount brackets securely, ensuring they are level and stable.
- Place shelves onto brackets, check for levelness, and tighten all screws for stability.

Starunder 6 Pack Floating Shelf Brackets, 6 Inch Heavy Duty Industrial Shelf Bracket, Black Metal L Brackets for Shelves Support DIY(1/5 Inch Thicked)
Real Hidden Brackests: These black shelf brackets have no lips and can be truly hidden. The base can…
As an affiliate, we earn on qualifying purchases.
As an affiliate, we earn on qualifying purchases.
Gather Your Tools and Materials
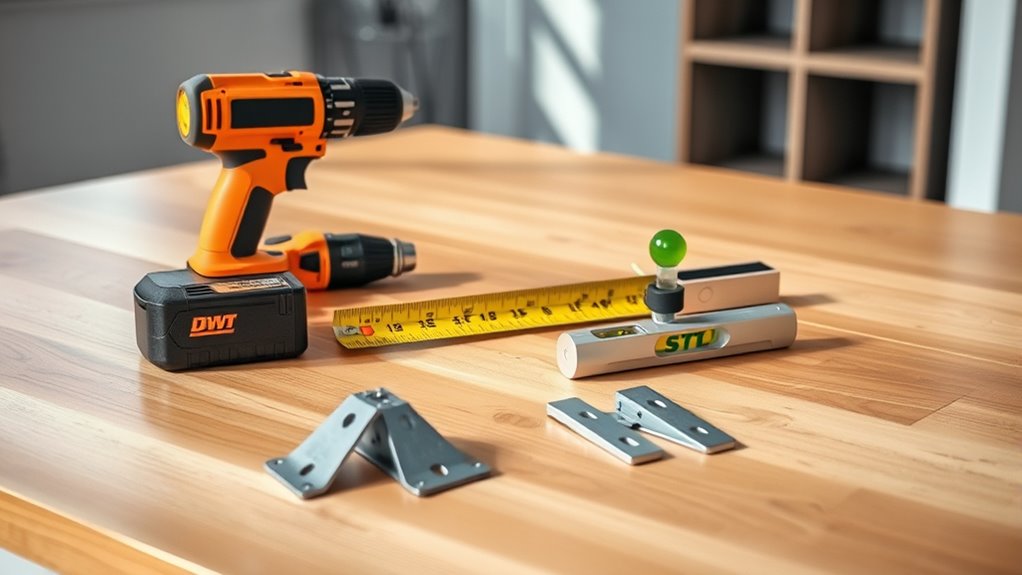
Before you begin installing your floating shelves, it’s important to gather all the necessary tools and materials. Having everything ready guarantees a smooth process and helps maintain decor safety by avoiding rushed or unsafe installations. Check that your drill, level, screws, anchors, and a measuring tape are in good condition—this is part of tool maintenance that prevents accidents and guarantees accuracy. Double-check your shelves and hardware for any damage before starting. Keep a dust cloth or damp rag nearby to clean surfaces during installation. Using the right tools and materials keeps the project efficient, minimizes mistakes, and keeps your space safe. Proper preparation also helps you stay organized, making the entire installation quicker and more enjoyable. Additionally, understanding the importance of emotional support can help you stay patient and focused during the process, especially if you encounter challenges.

Ougourim Furniture Anchors (10 Packs) Anti Tip Furniture Anchors for Baby Proofing, Furniture Wall Anchor Earthquake Straps for Furniture Dresser Wall Safety Anchor Furniture Fasteners to Wall, White
Baby Safety Guard: Let your little one explore and climb to their heart's content! Baby proof furniture anchors…
As an affiliate, we earn on qualifying purchases.
As an affiliate, we earn on qualifying purchases.
Choose the Perfect Location for Your Shelves

Start by thinking about how the shelves will complement your room’s overall look and feel. Check the wall material to guarantee your chosen location can support the shelves securely. Also, pick a spot that’s easy to access, so you can enjoy your new storage or display space every day. Considering the wall material can help prevent damage and ensure your shelves stay secure over time.
Assess Room Aesthetics
Choosing the right spot for your floating shelves requires you to evaluate your room’s overall aesthetics. Consider how the shelves will blend with your existing decor themes—whether modern, rustic, or eclectic. Pay attention to color schemes; shelves should complement or contrast thoughtfully with wall colors and furniture. Think about the visual balance in the space—avoid cluttered areas or spots that feel busy or distracting. Look for blank walls or empty nooks that can serve as focal points or enhance the room’s flow. Your goal is to create harmony between the shelves and your room’s style, making sure they enhance the overall aesthetic without overwhelming it. Proper placement guarantees your shelves become a seamless part of your decor. Additionally, understanding room aesthetics can help you make more informed decisions about placement and design choices.
Consider Wall Material
Once you’ve identified the ideal spot for your floating shelves, it’s important to take into account the wall material to guarantee secure installation. Different wall surfaces require different mounting methods, so understanding your wall surface is key. For drywall, use appropriate anchors and screws designed for hollow walls. If you have brick or concrete, you’ll need masonry anchors and a drill with a masonry bit. Wood walls can often support heavier shelves with simple screws, but always verify material compatibility. Avoid using the same hardware across incompatible wall surfaces to prevent damage or instability. By considering your wall material, you can choose the right hardware and mounting technique, ensuring your shelves are secure and safe for everyday use. Additionally, knowing the appropriate hardware for each wall type can help prevent potential damage and ensure long-term stability.
Prioritize Accessibility
To guarantee your floating shelves are both functional and convenient, you need to prioritize accessibility when selecting their location. Think about ergonomic placement—position shelves at heights that are easy to reach without straining. Consider accessibility features, such as avoiding areas blocked by furniture or obstructions. Mounting shelves near frequently used spaces, like the kitchen or bathroom, ensures you can access items quickly. Keep in mind the needs of all users, including children or those with mobility challenges. Proper placement reduces the risk of accidents and makes your shelves more practical. Take time to visualize the ideal spot, balancing convenience and safety. Prioritizing accessibility guarantees your floating shelves will serve their purpose effectively and comfortably. Additionally, understanding effectiveness of eye patches can help you choose the best spot for frequently used items, ensuring both safety and efficiency.

DEKOPRO 8V Cordless Drill, Drill Set with 3/8"Keyless Chuck, 42pcs Acessories, Built-in LED, Type-C Charge Cable, Pink Power Drills for Drilling and Tightening/Loosening Screws
【Efficient Drilling&Screwing】This electric drill may be used for drilling in wood and plastic(Not suitable for hard objects such…
As an affiliate, we earn on qualifying purchases.
As an affiliate, we earn on qualifying purchases.
Measure and Mark the Placement
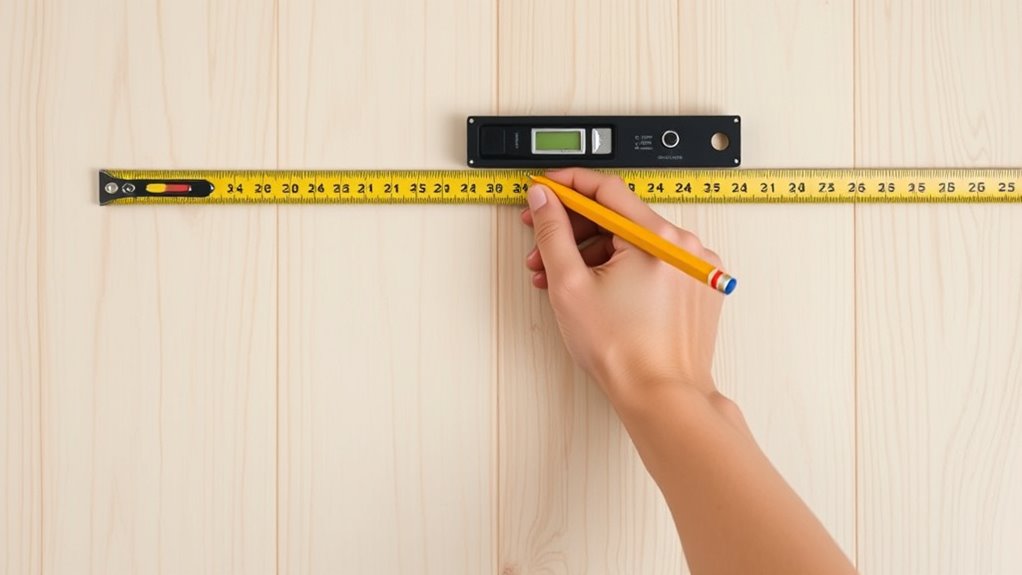
Before you start drilling, it’s essential to accurately measure and mark where your shelves will go. Consider wall textures that might affect your markings and account for shelf thickness to ensure a flush fit. Use a level and tape measure to determine the height and spacing, then mark the wall with a pencil. To make this easier, refer to the table below:
| Step | Action |
|---|---|
| Decide shelf height | Mark points at your desired height on both sides |
| Measure spacing | Ensure even distance between shelves |
| Check wall texture | Adjust markings for textured surfaces if needed |
Accurate measurements prevent misalignment and help your floating shelves look professional. Incorporating precision in measurement techniques can further enhance your results.

GDMINLO Soft Tape Measure Double Scale Body Sewing Flexible Tailor Craft Vinyl Ruler for Weight Loss Medical Body Measurement, Has Centimetre Scale on Reverse Side 60-inch(White)
Measuring range: 0 to 60 inches and 0 to 150 centimeters. There is a centimeter scale on the…
As an affiliate, we earn on qualifying purchases.
As an affiliate, we earn on qualifying purchases.
Locate the Wall Studs or Use Anchors
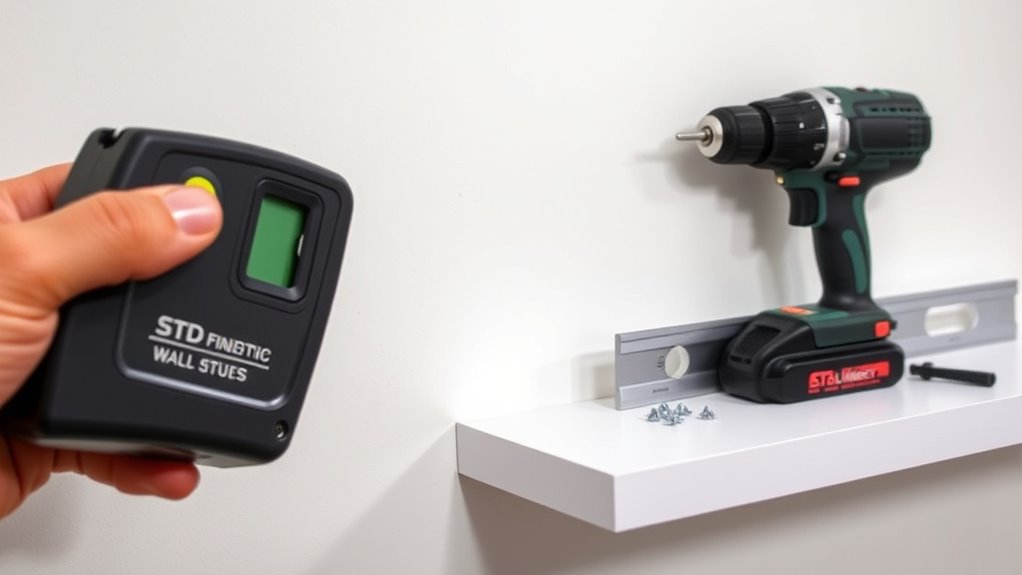
Locating the wall studs is essential for securely mounting your floating shelves. Use a stud finder to scan your wall and identify the stud locations, which provide the strongest support. If you can’t find studs in the desired spot, don’t worry—you can use wall anchors instead. Wall anchors are designed to distribute weight and hold the shelf securely when mounting into drywall or plaster. Mark the stud positions clearly with a pencil, or note where you plan to use anchors. Avoid mounting entirely on drywall alone, as it may not support the weight over time. Ensuring you hit studs or use appropriate wall anchors guarantees your shelves stay firmly in place and prevents damage. For added confidence, choosing high-quality wall anchors can improve load capacity and stability.
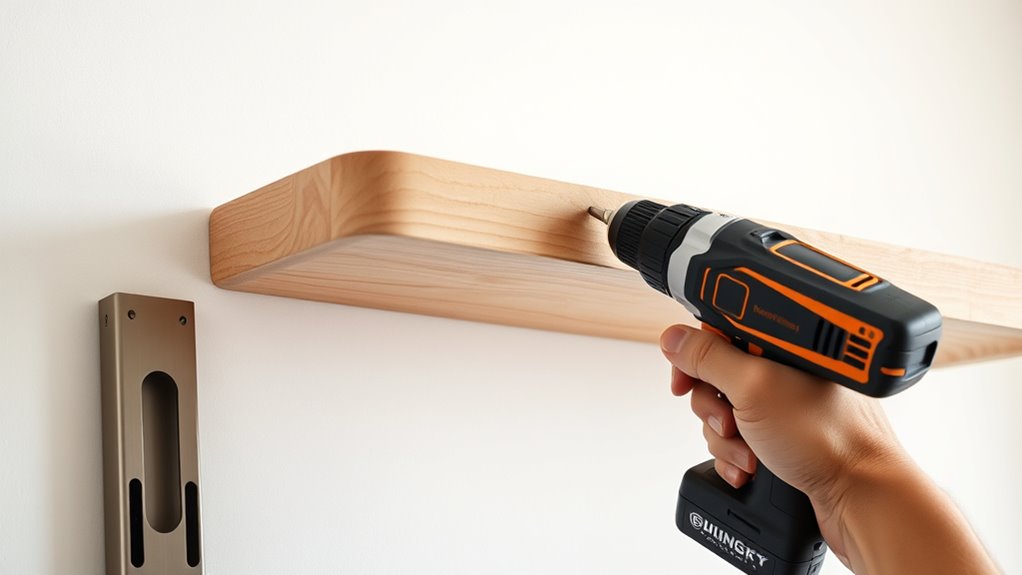
Drill Pilot Holes and Install Mounting Brackets

Once you’ve identified the wall studs or chosen appropriate anchors, it’s important to drill pilot holes for your mounting brackets. This step guarantees stability and prevents wall damage. Use a level to mark the bracket positions, especially if you’re adding decorative accents. When drilling, follow safety precautions: wear safety goggles and keep your hands clear. Here’s a quick guide:
| Step | Details |
|---|---|
| Mark Pilot Holes | Use a pencil and level for accuracy |
| Drill Pilot Holes | Use a drill bit slightly smaller than screws |
| Install Brackets | Secure brackets firmly, avoiding over-tightening |
Proper pilot holes make installation easier and safer, ensuring your floating shelves are both functional and visually appealing. Additionally, understanding weight capacity can help you determine the appropriate brackets and spacing for your shelves.
Prepare the Floating Shelves for Installation

To guarantee a smooth installation, start by inspecting your floating shelves carefully. Check for any damage, warping, or defects that could affect stability or appearance. Consider your decor selection and how the shelves will complement your space. Think about the shelf design—whether it’s sleek, rustic, or modern—so you can match it to your existing style. Measure the shelves to ensure they fit your desired location and align properly once installed. If needed, clean the shelves thoroughly to remove dust or fingerprints. This preparation helps prevent surprises during installation and assures your shelves look great and function well. Taking the time now to prepare will save you effort later and give you a polished, professional finish. Additionally, understanding the best tools and materials for installation can ensure a secure and durable setup.
Mount the Shelves Onto the Brackets

Start by aligning the brackets carefully with your marks to guarantee they’re straight. Then, secure them with screws, making sure they’re tight and stable. Finally, check that the shelves are level before fully attaching them to finish the installation smoothly. To ensure the stability and safety of your shelves, consider outdoor space design trends that emphasize durability and eco-friendly materials.
Align Brackets Precisely
Before mounting the shelves onto the brackets, it is essential to verify the brackets are aligned precisely. Start by checking the bracket alignment against your marked wall lines or level. Use a level tool to ensure each bracket is perfectly horizontal. Proper bracket alignment guarantees even shelf spacing, which not only looks neat but also supports weight evenly. Take your time to adjust each bracket until they’re aligned perfectly before attaching the shelves. Misaligned brackets can cause uneven shelf placement or wobbling. Double-check all brackets with your level, and make small adjustments as needed. Confirming precise alignment now prevents issues later, providing a sturdy, professional finish to your floating shelves. Accurate bracket alignment is key to achieving a clean, balanced look. Additionally, understanding the importance of contrast ratio can help you select the best projector for your home cinema setup, ensuring vibrant images and enhanced viewing experiences.
Secure With Screws
Once the brackets are securely mounted and aligned, you can proceed to attach the shelves. Use wall anchors if you’re anchoring into drywall to ensure stability. Select the appropriate screw types—wood screws for wood brackets or drywall screws for drywall anchors. Insert the screws through the pre-drilled holes in the brackets and into the shelf. Tighten them firmly, but avoid over-tightening, which could crack the shelf or damage the brackets. Double-check that the shelf sits flush and securely on the brackets. This step ensures your floating shelf is stable and safe for use. Properly securing the shelves with the right screws and anchors guarantees a professional, lasting finish. Additionally, choosing the right screw size and type can improve the overall stability and durability of your installed shelves.
Level the Shelves
To guarantee your floating shelf sits perfectly level, it’s important to check its alignment before fully securing it. Use a bubble level or a straightedge across the shelf to ensure it’s even. Adjust the brackets slightly if needed until the bubble or line indicates levelness. Proper leveling helps balance weight evenly and keeps decorative elements from tilting. Once satisfied, tighten all screws securely. Keep in mind that uneven shelves can cause items to slide or fall, especially if you plan to display fragile or decorative elements. Double-check the level after tightening to confirm stability. Incorporate vintage decor elements to enhance the rustic charm and authenticity of your farmhouse-inspired space. Here’s a quick visual guide:
| Step | Tip |
|---|---|
| Check with a level | Ensure the shelf is perfectly level |
| Adjust brackets | Fine-tune for evenness |
| Secure screws | Tighten fully |
| Verify again | Confirm stability and levelness |
Check for Level and Adjust as Needed

Ensuring your shelves are level is essential for both appearance and stability. Wall imperfections can make the shelves appear crooked, so double-check with a level tool after your initial measurements. Place the level on the shelf or mounting brackets and look for bubbles centered between the lines. If it’s uneven, gently adjust the brackets or reposition the mounting points until the bubble is centered. Take your time to check multiple points along the shelf’s length. Properly leveled shelves not only look polished but also prevent items from sliding off or leaning. Remember, even minor adjustments can make a big difference in the final look, especially when displaying decorative accents. Accurate leveling ensures your shelves are both functional and visually appealing. Be mindful of wall anchor types to ensure your shelves stay securely mounted over time.
Style and Organize Your New Shelves
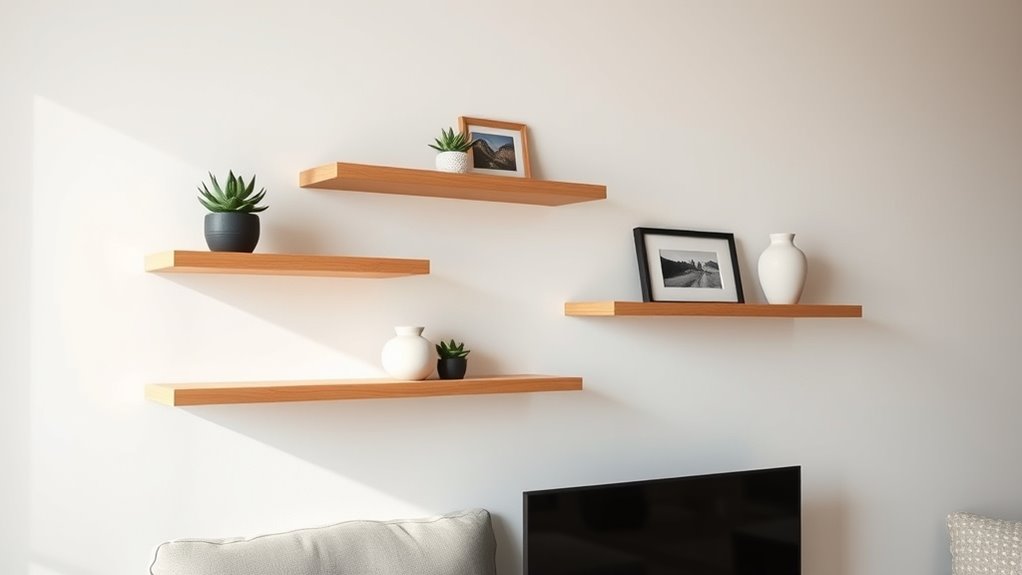
After installing your floating shelves, it’s time to think about how to style and organize them to create an appealing display. Start by selecting decorative accessories that match your room’s theme, like small plants, picture frames, or candles. Arrange items with varying heights and textures for visual interest. Keep clutter to a minimum for a clean look. Regular maintenance tips include dusting weekly and avoiding overloading to preserve stability. Consider grouping similar items or creating symmetry for a balanced appearance. Use the table below as a quick guide to organizing your shelves:
| Item Type | Placement Tip | Maintenance Tip |
|---|---|---|
| Decorative accessories | Mix heights for variety | Dust weekly |
| Books | Arrange vertically or horizontally | Avoid overloading |
| Photos | Keep at eye level | Handle carefully |
| Plants | Place near light sources | Water as needed |
| Small collectibles | Cluster for impact | Clean gently |
This approach ensures your shelves stay stylish and functional. Additionally, incorporating vertical storage solutions can maximize space and keep your shelves organized.
Frequently Asked Questions
What Weight Can Floating Shelves Typically Hold?
You’re wondering about the weight capacity of floating shelves. Typically, shelf materials like wood or metal influence how much weight they can hold. Most floating shelves support between 15 to 50 pounds, but heavy-duty ones made from sturdy materials can hold even more, sometimes up to 100 pounds or more. Always check the specific weight capacity for your shelf, and guarantee proper installation to safely support your items.
Can I Install Floating Shelves on Brick or Concrete Walls?
You can definitely install floating shelves on brick or concrete walls—just don’t forget, you’re playing with the big boys now. To do this, you’ll need sturdy wall anchors and the right drill bits. First, mark your spots, then drill holes carefully. Insert wall anchors, and finally, screw in the brackets. With patience and the right tools, your shelves will hold up beautifully, even on tough surfaces.
How Do I Hide the Mounting Hardware for a Seamless Look?
You want a seamless look with your floating shelves, so consider concealed mounting options. Use a mounting bracket that hides behind the shelf or install the hardware inside the shelf itself. Decorative hardware can also add a stylish touch while concealing the mounting points. When done correctly, this approach creates a clean, modern appearance, making your shelves look like they’re floating effortlessly without visible brackets or screws.
What Safety Precautions Should I Take During Installation?
When installing floating shelves, you should prioritize safety by using proper tools and wearing safety goggles. Make certain you locate wall studs using a stud finder to securely anchor shelves with wall anchors, preventing them from falling. Be cautious of electrical hazards; turn off power when drilling near outlets or switches. Keep your workspace clear of clutter, and handle tools carefully to avoid injuries. Taking these precautions helps ensure a safe and successful installation.
Are There Specific Tools Recommended for Different Wall Types?
Choosing the right tools for different wall types is like picking the right keys for a lock. You need to match tool compatibility with wall preparation to make certain a secure fit. For drywall, use a drill and anchors; for concrete, a hammer drill and masonry bits are best. Measure carefully, prep surfaces properly, and select tools suited to your wall material for a smooth, safe installation.
Conclusion
Now that your floating shelves are installed, you can showcase your favorite items with pride. Remember, the true beauty of your space lies in the details you choose to highlight. Will these shelves become a backdrop for memories or a display of your style? Whatever you decide, enjoy the satisfaction of creating something both functional and stylish yourself. Your space is a reflection of you—so why not make it uniquely yours?