
To install vinyl plank flooring, start by preparing your subfloor—remove old flooring and clean thoroughly. Acclimate the planks in the room for 48 hours, then follow the manufacturer’s instructions using either click-lock or adhesive methods. Carefully space the planks, stagger seams, and cut to fit tightly. Using proper tools and techniques guarantees a professional look. Keep going to discover detailed steps and tips for a smooth installation process.
Key Takeaways
- Prepare the subfloor by removing existing flooring and ensuring a clean, level surface.
- Acclimate vinyl planks in the room for 48 hours to prevent expansion or contraction.
- Follow manufacturer instructions for click-lock or glue-down installation, and stagger seams for stability.
- Use spacers along edges to allow for expansion gaps, and cut planks precisely for a tight fit.
- Finish by applying baseboards or molding to conceal expansion gaps and ensure a professional look.
Installing vinyl plank flooring is a straightforward project that can transform a room with minimal effort. Whether you’re upgrading a kitchen, living room, or basement, vinyl planks offer a versatile and cost-effective solution. Before diving in, it’s helpful to understand how vinyl compares to other flooring options in terms of cost. In a cost comparison, vinyl plank flooring typically costs less than hardwood or tile, both in material expenses and installation. While hardwood can be expensive and labor-intensive, vinyl offers affordability without sacrificing style. You’ll find that the upfront investment in vinyl is generally lower, and many options are designed for DIY installation, saving you additional costs on professional labor. Once installed, vinyl flooring requires minimal ongoing expenses, making it a budget-friendly choice for long-term use.
Vinyl plank flooring is an affordable, DIY-friendly option that offers style and durability for any room.
To guarantee your vinyl plank flooring maintains its beauty and longevity, you should follow some simple maintenance tips. Regular sweeping or vacuuming keeps dirt and debris from scratching the surface. When it comes to cleaning, use a damp mop and a gentle cleaner designed for vinyl floors—avoid harsh chemicals that can damage the finish. Also, place protective pads under furniture legs to prevent dents or scratches when moving items around. Spills should be wiped up promptly to prevent staining or warping, especially if the vinyl has a wood-like appearance. Keep in mind that while vinyl is water-resistant, excessive moisture or standing water can cause issues over time, so quick cleanup is essential. Incorporating proper flooring maintenance practices can significantly extend the lifespan of your vinyl floors.
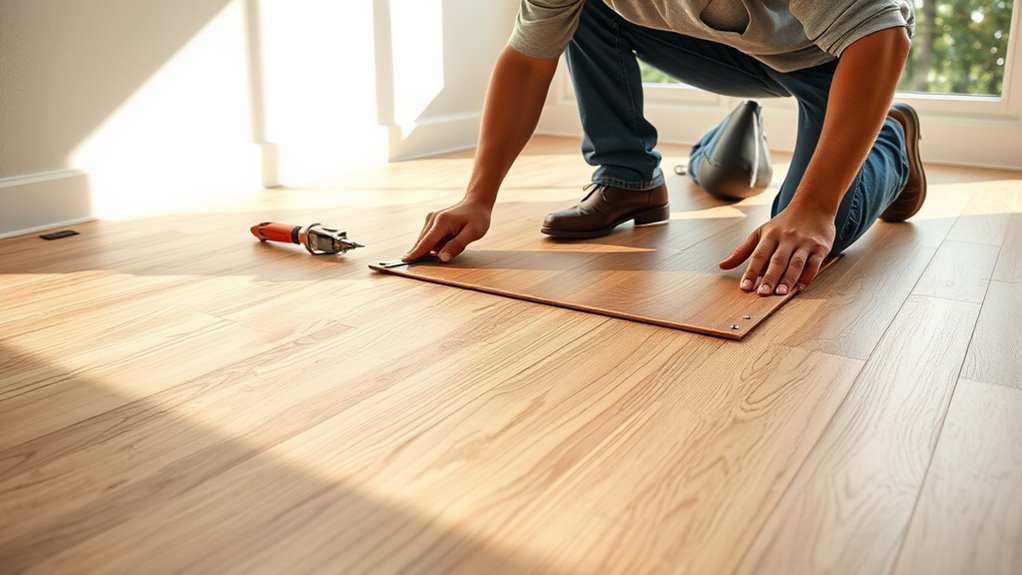
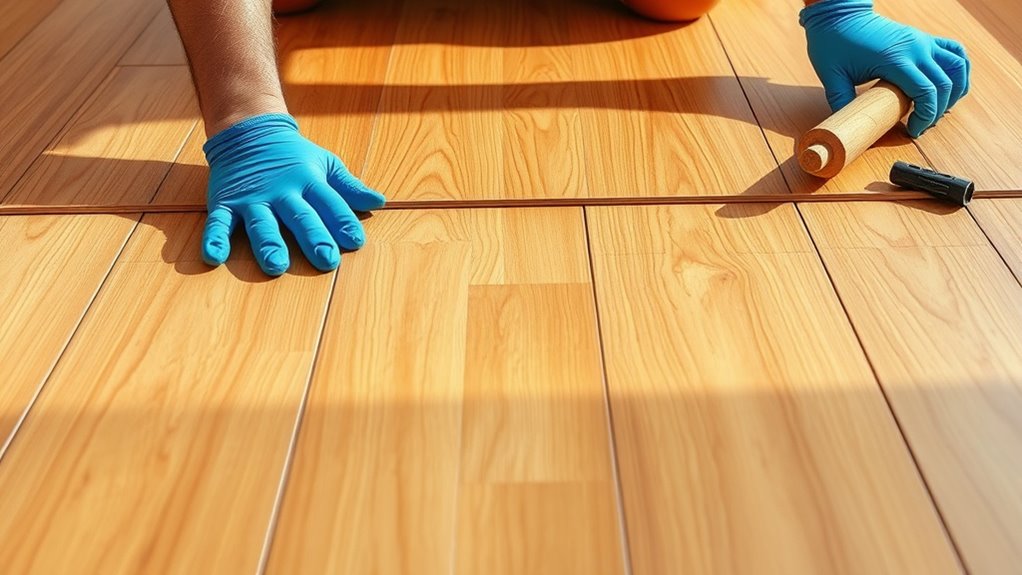
Installing vinyl plank flooring involves preparing the subfloor, measuring accurately, and carefully laying out the planks to ensure a seamless look. You’ll want to start by removing existing flooring and cleaning the surface thoroughly. Acclimate your vinyl planks to the room’s temperature and humidity for at least 48 hours before installation. When laying the planks, follow the manufacturer’s instructions for either click-lock or glue-down methods. Properly spacing the planks and staggering the seams will enhance stability and appearance. Use spacers along the edges to allow for expansion, and make sure to cut the planks precisely for tight fits. With patience and attention to detail, you’ll find that installing vinyl plank flooring is manageable, even for beginners.
Once finished, your new vinyl floor will be durable and easy to care for, provided you follow the maintenance tips. Its resilience makes it suitable for high-traffic areas, and the initial cost comparison shows you’re getting a lot of value for your money. As you enjoy your updated space, remember that regular upkeep will keep your vinyl flooring looking its best for years to come. Overall, vinyl plank flooring combines affordability, style, and ease of maintenance—making it an excellent choice for your next home improvement project.
Frequently Asked Questions
Can Vinyl Plank Flooring Be Installed Over Carpet?
You can install vinyl plank flooring over carpet, but you should first remove the old carpet and prepare the surface. Carpet removal is essential to avoid unevenness, and surface preparation guarantees the vinyl sticks properly. You might need to add a thin underlayment for stability. Keep in mind, this method may affect the flooring’s lifespan and comfort, so weigh the pros and cons before proceeding.
What Is the Best Underlayment for Vinyl Planks?
Did you know that choosing the right underlayment can reduce noise by up to 20%? When selecting underlayment options for vinyl planks, consider foam, cork, or felt options, each offering different benefits. Foam is budget-friendly, cork provides excellent soundproofing solutions, and felt adds cushioning. Your choice depends on your needs for comfort, soundproofing, and moisture resistance, making your space more comfortable and quiet.
How Do I Fix a Damaged Vinyl Plank?
When you notice a damaged vinyl plank, start by carefully removing the damaged section. Use a utility knife to cut around it and lift it out. For vinyl plank repairs, replace it with a matching plank, pressing it firmly into place. To prevent future damage, guarantee proper damage prevention techniques like using furniture pads and avoiding excessive moisture. Taking these steps keeps your flooring looking great and extends its lifespan.
Is Vinyl Plank Flooring Suitable for Bathrooms?
You might worry about bathroom moisture damaging flooring, but vinyl plank flooring is actually a great choice. Its vinyl durability makes it resistant to water, preventing warping or swelling from bathroom humidity. As long as you properly seal and install it, vinyl planks can handle the moisture levels typical in bathrooms. So, you can confidently use vinyl flooring in your bathroom without concern, enjoying its stylish look and resilience.
How Long Does Vinyl Plank Flooring Typically Last?
When asking how long vinyl plank flooring lasts, consider durability factors like quality, installation, and maintenance. Typically, it has a lifespan estimation of 10 to 20 years, but high-quality options can last even longer with proper care. Regular cleaning, avoiding heavy impacts, and using mats can extend its durability. So, your flooring’s longevity depends on these factors, ensuring you get the most out of your investment.
Conclusion
Installing vinyl plank flooring might seem tricky at first, but once you get started, it’s like assembling a puzzle—you see the pieces come together and the room transform. I once helped a friend redo her living room, and by the end, she couldn’t believe how easy it was. Just like laying down each plank, every step builds toward a beautiful finish. Stick with it, and you’ll have a stunning new floor that’s both durable and stylish.