Sealing gaps around your doors and windows with the right weather stripping can boost your home’s energy efficiency, cut bills, and keep your space more comfortable. Evaluate door and window gaps using a candle or incense stick, then choose appropriate weather stripping materials like foam tape, V-strips, or door sweeps. Proper installation and regular upkeep guarantee lasting effectiveness. Keep going to discover detailed tips on selecting, applying, and maintaining weather stripping for maximum savings and comfort.
Key Takeaways
- Proper weather stripping seals gaps around doors and windows, preventing air leaks and improving energy efficiency.
- Different materials like foam tape, V-strip, and door sweeps are suited for various gap sizes and surfaces.
- Regular inspection and maintenance ensure weather stripping remains effective and continues to save energy.
- Correct installation and sealing techniques are essential for maximizing draft prevention and comfort.
- Effective draft sealing reduces heating and cooling costs while enhancing indoor comfort and sustainability.
Weather-stripping your doors and windows is one of the simplest and most effective ways to improve your home’s energy efficiency. When you focus on draft sealing techniques, you prevent hot or cold air from sneaking in and out, which helps maintain a consistent indoor temperature. This means your heating and cooling systems don’t have to work as hard, saving you money on energy bills and reducing your carbon footprint. To get started, it’s essential to understand the different types of weather stripping available, as choosing the right one depends on the specific gaps and the surface you’re sealing.
Sealing gaps around doors and windows boosts energy efficiency and saves money.
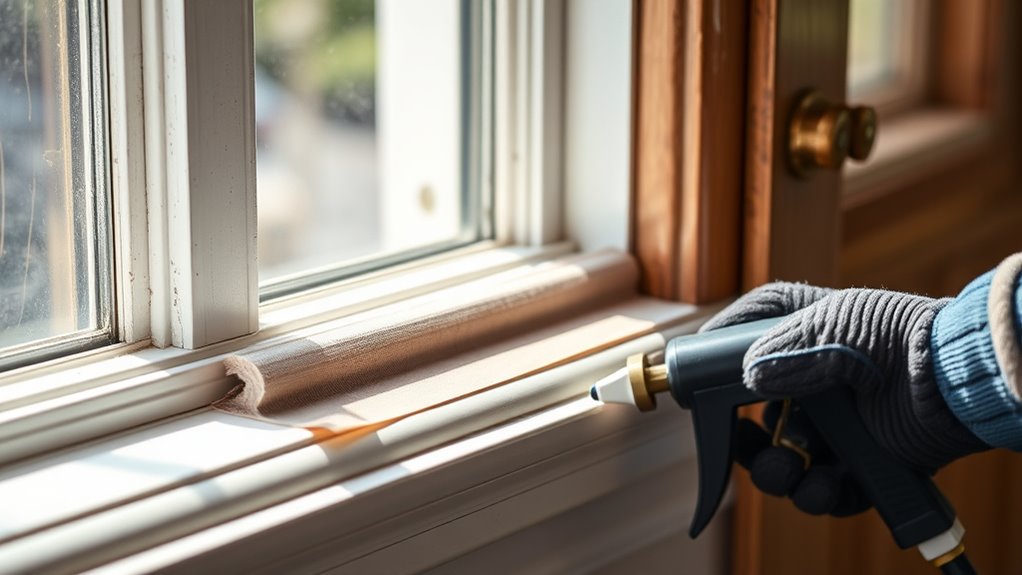
There are several common types of weather stripping, including V-strip, foam tape, door sweeps, and bulb or gasket seals. V-strip, made of vinyl or metal, is flexible and works well along door jambs and window sashes. Foam tape, which is adhesive-backed, is easy to install and ideal for sealing small gaps around windows that are slightly warped or ill-fitting. Door sweeps are attached at the bottom of doors, blocking drafts from entering underneath, especially during winter months. Bulb or gasket seals, often made of silicone or rubber, provide a tight seal around the edges of doors and windows where gaps are larger or uneven.
Once you understand the types of weather stripping, you can select the appropriate material for each application. When applying draft sealing techniques, start by inspecting your doors and windows closely. Use a candle or a lit incense stick to detect drafts—hold it near the edges and watch for flickering or movement of the flame or smoke. This helps identify the exact locations where drafts are entering. After pinpointing the gaps, clean the surfaces thoroughly to ensure proper adhesion. For foam tape, peel off the backing and press firmly along the edges, making sure it seals tightly without gaps. For door sweeps, measure the width of the door bottom and cut the sweep accordingly before attaching it with screws or adhesive. Regular maintenance is essential to keep your draft sealing effective, as weather stripping can wear out, become brittle, or fall off over time.
In addition to visual inspection, conducting a simple draft test can help you identify leaks more accurately, ensuring you target the most problematic areas for sealing. Proper sealing not only improves comfort but also enhances your home’s overall energy efficiency, making it a worthwhile investment. By understanding the draft sealing techniques and types of weather stripping, you take simple yet impactful steps toward a more energy-efficient and comfortable home environment.
Frequently Asked Questions
How Often Should Weather-Stripping Be Replaced?
You should replace weather-stripping every 1 to 3 years for ideal energy efficiency. Regular seasonal checks help you identify signs of wear, such as cracks or gaps, that indicate it’s time for replacement. Keep up with lifetime maintenance by inspecting your weather-stripping periodically, especially before winter and summer, to guarantee your doors and windows stay sealed and energy bills stay low. Proper upkeep extends its effectiveness and saves you money.
Can Weather-Stripping Be Installed on Existing Doors and Windows?
Did you know that properly installed weather-stripping can reduce energy bills by up to 15%? Yes, you can definitely install weather-stripping on existing doors and windows. Use effective installation techniques to ensure a snug fit, and choose durable materials like foam, rubber, or vinyl for long-lasting results. This simple upgrade keeps drafts out and saves you money, making your home more comfortable and energy-efficient.
What Materials Are Best for Weather-Stripping?
You should choose materials like foam tape, V-strip, or rubber for weather-stripping, as they offer good insulation and ease of installation. Foam tape is affordable and simple to apply, while V-strip provides a tight seal for gaps. Rubber or silicone weather-stripping offers durability. When installing, make certain the material compresses properly without hindering door or window operation. Comparing these materials helps you find the best fit for your energy efficiency needs.
Does Weather-Stripping Affect Door and Window Operation?
Weather-stripping can feel like a hero saving your home from endless drafts, but it might slightly impact door and window operation if not installed correctly. Proper drafting techniques and ensuring weather stripping compatibility are vital. When done right, it seals gaps without hindering movement, keeping your space cozy without sacrificing ease of use. If you notice sticking or difficulty opening, adjustments are needed to keep everything functioning smoothly.
Are There Cost-Effective Options for DIY Weather-Stripping?
Yes, there are cost-effective solutions for DIY weather-stripping. You can use foam tape, felt strips, or door sweep brushes, which are affordable and easy to install. To guarantee proper sealing, follow DIY installation tips like cleaning surfaces beforehand and pressing firmly to secure the strips. These options help improve energy efficiency without breaking the bank, making it simple to upgrade your home yourself.
Conclusion
Remember, a stitch in time saves nine. By properly weather-stripping your doors and windows, you not only boost your home’s energy efficiency but also save money on heating and cooling costs. Don’t wait until drafts become a nuisance—take action now. Small improvements can make a big difference. Keep your home snug and efficient, and you’ll enjoy comfort all year round. After all, an ounce of prevention is worth a pound of cure.