To calibrate your drill press, secure a dial indicator to the spindle or worktable and slowly rotate the spindle to check for wobble or deviation. Adjust the table or spindle using the calibration screws until the dial shows minimal movement within specified tolerances. Recheck frequently during the process to guarantee accuracy, and make small adjustments as needed. Proper calibration maintains precision and extends your drill press’s lifespan—continue exploring for detailed steps and tips.
Key Takeaways
- Securely attach a dial indicator to the spindle or worktable to measure runout accurately.
- Manually rotate the spindle or table to check for wobble or deviation using the dial indicator.
- Adjust calibration screws or knobs to align the spindle and table, minimizing deviations.
- Recheck measurements with the dial indicator after adjustments to ensure proper alignment.
- Repeat the calibration process regularly, especially after transporting or noticing inconsistent drilling results.

Calibrating your drill press guarantees accurate and precise drilling, preventing mistakes and improving safety. When you focus on maintaining drill press accuracy, you ensure that every hole you drill is exactly where it needs to be, which is essential for projects requiring precision. To achieve this, you’ll need to use calibration tools designed specifically for this purpose. These tools help you measure and adjust the alignment of your drill press, making sure the spindle and table are perfectly aligned before you start working. Proper calibration not only enhances the quality of your work but also extends the lifespan of your equipment by reducing unnecessary wear caused by misalignment.
Start by gathering the necessary calibration tools, such as a dial indicator, a carpenter’s square, and a straight edge. A dial indicator is especially useful because it provides precise measurements of the spindle’s runout, which is critical for drill press accuracy. Positioning the dial indicator correctly involves attaching it securely to the spindle or the worktable, depending on what you’re calibrating. Once set up, manually rotate the spindle or the table to check for any wobble or deviation. If the dial indicator shows movement, it indicates that the spindle or table isn’t perfectly aligned, and adjustments are needed. This step allows you to identify the specific areas that require realignment, ensuring that your drill press can deliver consistent and accurate results.
Next, adjust the table or spindle using the calibration tools. Most drill presses come with adjustment screws or knobs that allow you to fine-tune the alignment. Carefully make small adjustments, then re-check with the dial indicator to see if the wobble or deviation has decreased. Keep tweaking until the measurements show minimal movement, ideally within the manufacturer’s specified tolerances. This process ensures your drill press’s accuracy is restored, and your holes will be drilled in the correct locations every time. Remember, calibration isn’t a one-time task; it’s something you should repeat regularly, especially if you notice inconsistencies or after transporting the machine. Regular calibration helps maintain the alignment and prevents uneven wear on the components.
Throughout this process, take your time to make precise adjustments and double-check your work. Calibration tools provide the measurements needed to achieve a high level of accuracy, but it’s your careful attention to detail that makes the difference. By routinely calibrating your drill press, you enhance safety and ensure your projects meet the highest standards of precision. In the end, a well-calibrated drill press becomes a reliable tool that helps you produce professional-quality results every time you work.
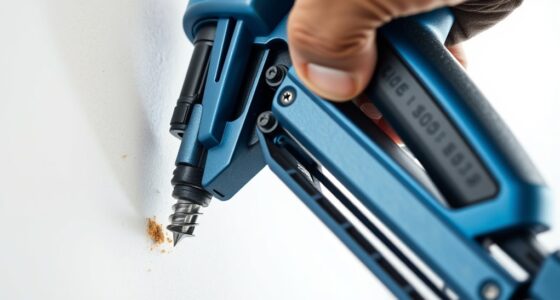
dial indicator for drill press calibration
As an affiliate, we earn on qualifying purchases.
As an affiliate, we earn on qualifying purchases.
Frequently Asked Questions
How Often Should I Calibrate My Drill Press?
You should calibrate your drill press regularly to guarantee safety and precision. The calibration frequency depends on how often you use it; typically, check monthly if used frequently or after any impact or maintenance. Proper calibration maintains drill press safety, helps prevent accidents, and ensures accurate drilling. Always follow the manufacturer’s guidelines for calibration intervals, and perform checks before critical projects to keep your equipment functioning correctly and safely.
Can I Calibrate a Drill Press Myself?
Yes, you can calibrate a drill press yourself. Start by checking the drill press alignment using a calibration checklist to guarantee everything’s straight and true. Carefully adjust the table, spindle, and quill if needed. Regular calibration helps maintain accuracy and prevents uneven holes. Just follow safety procedures, use the right tools, and take your time to ensure precise calibration, saving you money and time on professional repairs.
What Tools Are Needed for Calibration?
To calibrate your drill press, you need measurement tools like a dial indicator or a precision square to guarantee accurate alignment. Calibration standards, such as known gauge blocks or certified reference materials, help verify the accuracy of your measurements. These tools allow you to identify any deviations and make precise adjustments. Having the right measurement tools and calibration standards ensures your drill press operates accurately and safely.
How Do Temperature Changes Affect Calibration Accuracy?
Temperature changes can impact calibration accuracy because thermal expansion causes materials to expand or contract. When it gets too hot or cold, parts of your drill press may deform slightly, leading to misalignment or inaccurate measurements. You should monitor temperature fluctuations in your workspace and allow the machine to reach a stable temperature before calibration. This helps prevent material deformation and guarantees your drill press remains precisely calibrated over time.
What Are Common Signs of a Misaligned Drill Press?
Think of your drill press like a finely tuned orchestra—any misalignment can throw off the harmony. Common signs of a misaligned drill press include uneven holes, wobbling bits, or drill bits not staying straight. Misalignment indicators also include the drill bit drifting from the intended path or inconsistent hole depths. Regularly checking your drill press alignment guarantees precision and prevents damage, keeping your work smooth and accurate.
drill press alignment tool
As an affiliate, we earn on qualifying purchases.
As an affiliate, we earn on qualifying purchases.
Conclusion
Now that you’ve calibrated your drill press, you’re basically a machining superhero! With precision so sharp, even a laser would be jealous. No more wobbling or crooked holes—your projects will be flawless enough to impress royalty. Just imagine the envy of your friends when they see your perfectly drilled holes—you’re now the drill press wizard they never knew they needed. So go ahead, crank that lever and conquer the world of woodworking—one perfect hole at a time!
calibration gauge for drill press
As an affiliate, we earn on qualifying purchases.
As an affiliate, we earn on qualifying purchases.
precision dial indicator
As an affiliate, we earn on qualifying purchases.
As an affiliate, we earn on qualifying purchases.