
To organize a tool chest effectively, start by emptying it out to evaluate each tool for condition and necessity. Group similar items together and remove duplicates or broken tools. Use clear containers for small parts and dedicate compartments for larger tools, labeling them for quick identification. Maximize space with magnetic strips for frequently used metal tools and place essential tools at the front for easy access. Continue exploring for more tips to keep your system efficient and long-lasting.
Key Takeaways
- Empty and evaluate all tools, removing duplicates, broken items, and unnecessary tools for streamlined storage.
- Use designated containers, drawers, and labels to organize tools by type and frequency of use.
- Attach magnetic strips to store frequently used metal tools for quick access and reduced clutter.
- Place the most-used tools at the front or in easy-to-reach areas, while less-used items are stored further back.
- Regularly maintain and reassess your organization system to ensure efficiency and tool longevity.
Organizing a tool chest might seem intimidating at first, but a well-structured approach makes the task manageable and even satisfying. You want your tools accessible, well-protected, and easy to find, which means choosing the right tool storage solutions is essential. Start by emptying the entire chest, so you can see what you have and evaluate each item. As you sort through your tools, consider grouping similar items together—screwdrivers with screwdrivers, pliers with pliers, and so on. This initial step helps you identify duplicates, broken tools, or items you no longer need, streamlining your collection.
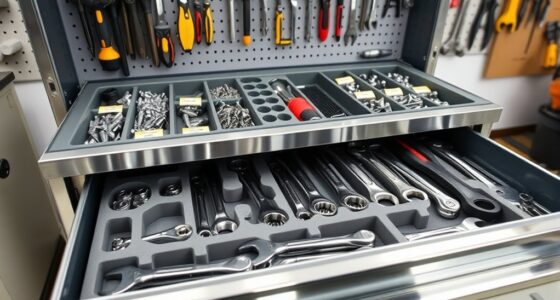
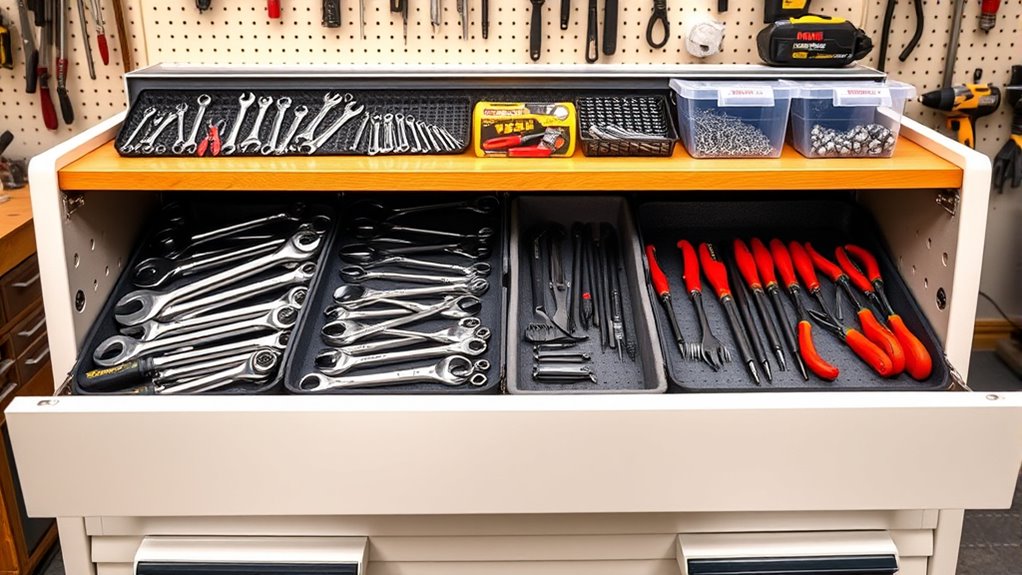
Once you’ve sorted your tools, think about the best way to store them efficiently. Tool storage solutions like drawers, bins, and trays can help you keep everything organized and visible. Use clear containers for small parts, such as nails, screws, and bolts, so you can see what’s inside at a glance. For larger tools, consider dedicated compartments or foam inserts that keep everything snug and prevent damage. Don’t forget to label sections or containers, especially if multiple people use the chest, so everyone knows exactly where to find and return tools.
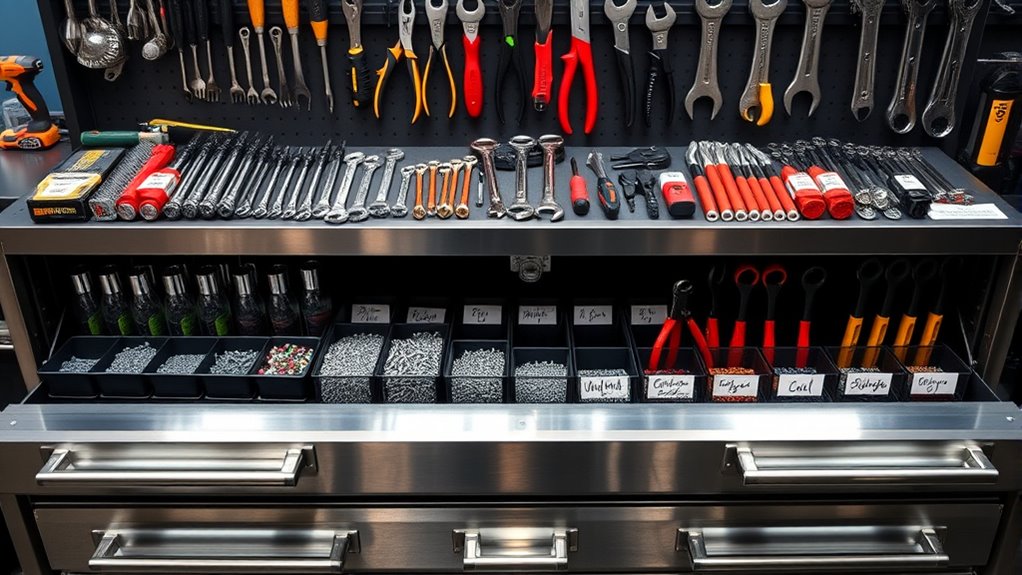
A game-changing addition to organizing your tool chest is magnetic tool holders. These are perfect for frequently used metal tools like screwdrivers, wrenches, or even small hammers. Magnetic strips attach easily to the interior of the chest or to side panels, creating a horizontal or vertical storage surface. They help you quickly grab what you need without rummaging through drawers, saving time and reducing clutter. Plus, magnetic holders keep your tools visible and accessible, which is especially handy when you’re working on quick projects.
As you place tools back into the chest, prioritize accessibility. Keep your most-used tools at the front or in designated quick-access spots. Less frequently used items can go in the back or in dedicated bins. Regularly maintaining your organized setup is key—set aside time every few months to reassess and tidy up, removing broken or unused tools and adjusting your storage as your collection grows or changes. Incorporating organized storage strategies into your routine can significantly improve your efficiency and tool longevity.
Ultimately, the goal is to create a system that works for you, making your workflow smoother and less frustrating. By integrating versatile tool storage solutions and smart accessories like magnetic tool holders, you turn your tool chest into a well-oiled, efficient workspace. With a little effort upfront, you’ll find that locating the right tool becomes faster, your tools stay in better condition, and your entire project experience improves.
Frequently Asked Questions
What Are the Best Labels for Tool Storage?
You should choose clear, descriptive labels for your tool storage. Use simple labeling techniques like printed or handwritten tags to identify each section. Incorporate color coding to make it even easier—assign specific colors to different tool categories, like red for power tools or blue for hand tools. This way, you’ll quickly find what you need and keep your chest organized, saving time and reducing frustration.
How Often Should I Reorganize My Tool Chest?
Did you know that tools can lose up to 20% of their effectiveness if neglected? You should revisit your maintenance schedule and reorganize your tool chest every 3 to 6 months to keep everything in top shape. Use organizational tips like labeled compartments and designated spaces for frequently used items. Regular reorganization prevents clutter and makes your tools easier to find, saving you time and effort during your projects.
Which Tools Should Be Kept in a Portable Box?
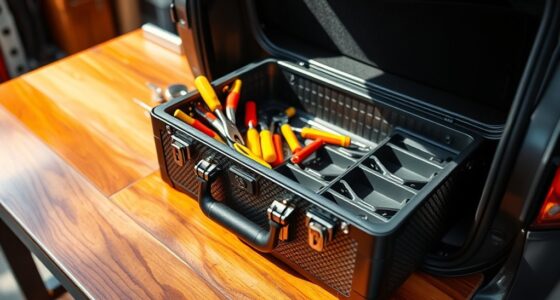
You should keep essential tools in a portable box for quick access and efficient power tool organization. Focus on hand tool selection like screwdrivers, pliers, and tape measures, plus frequently used power tools such as drills and saws. This way, you can easily transport what you need for projects without sifting through your entire chest. Prioritize tools you use often to streamline your workflow and reduce clutter.
How Do I Prevent Rust on My Tools?
Your tools are more valuable than gold, so rust prevention is essential. To keep rust at bay, always dry your tools thoroughly after use and apply protective coatings like oil or specialized rust inhibitors. Store them in a dry, climate-controlled environment, and consider using silica gel packs to absorb moisture. Regularly inspect your tools for early signs of rust, ensuring they stay in top shape and ready for any project.
What Is the Ideal Size for a Home Workshop Tool Chest?
The ideal size for your home workshop tool chest depends on your needs, but aim for one with ample tool chest capacity to hold all essentials. Focus on storage optimization by choosing a chest with multiple drawers and compartments for easy access and organization. Consider your space constraints and plan for future tool additions, ensuring the chest isn’t too small or oversized, so you keep your workspace efficient and clutter-free.
Conclusion
By organizing your tool chest, you’re planting seeds for efficiency and growth. When everything has its place, your workspace becomes a well-tuned instrument, ready to play the symphony of your projects. Think of your tools as the notes—you hold the power to create harmony or chaos. Keep your chest tidy, and you’ll find that every task becomes a melody, turning chaos into a masterpiece. A well-organized tool chest is the key to revealing your true craftsmanship.