
To repair drywall holes and cracks, start by evaluating the damage and gathering the necessary supplies like spackle, patch kits, or drywall pieces. Prepare the area by cleaning and sanding the surface, then fill small holes with spackle and larger ones with a drywall patch, securing it with screws if needed. Sand smooth, prime, and paint for a seamless finish. Keep your walls in great shape by following these simple steps—you’ll find more helpful tips as you continue.
Key Takeaways
- Assess damage size and type to select appropriate repair materials and techniques.
- Prepare the area by cleaning, sanding, and protecting surrounding surfaces before patching.
- Use suitable patches, joint compound, and reinforcement for larger holes; spackle for small cracks.
- Sand the dried repair smoothly, then prime and paint to match the existing wall finish.
- Regularly inspect and maintain walls to prevent future damage and moisture issues.
Assessing the Damage and Gathering Supplies
Before you begin repairing drywall holes and cracks, it’s important to assess the damage carefully. Start by examining the area to determine the extent of the damage, whether it’s small cracks or larger holes. This damage assessment helps you decide which drywall materials you’ll need, such as joint compound, patch kits, or drywall tape. Take note of the size and shape of the damage to choose the right tools and supplies. Inspect the surrounding wall for any additional weak spots that may require attention. Gathering your supplies beforehand ensures you won’t interrupt the repair process later. Proper damage assessment also helps you estimate the amount of materials needed, saving time and avoiding multiple trips to the store. Additionally, understanding the effects of damage on the wall’s integrity can help you choose the most effective repair method.
Preparing the Area for Repair
Start by clearing the damaged spot of any debris or loose material so your repair will stick properly. Next, remove any loose drywall or paint around the area to create a clean surface. Finally, protect the surrounding area with drop cloths or tape to keep dust and debris contained during the repair process. Incorporating mindfulness during preparation can also help you stay focused and reduce stress while working. sound vibrations are believed to enhance cellular regeneration and overall health.
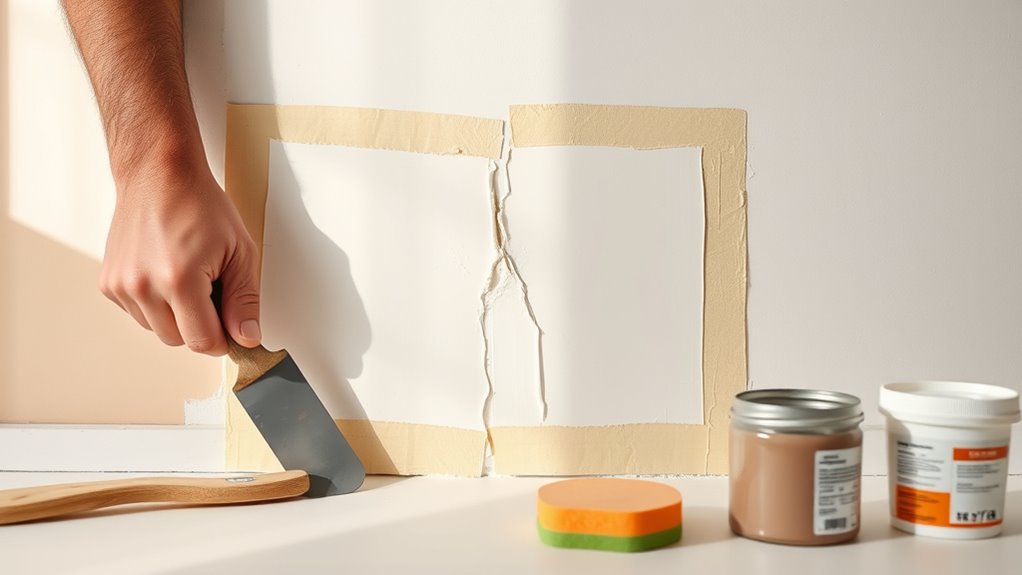
Clear the Damaged Spot
To guarantee a smooth drywall repair, you need to clear the damaged area completely. Start by cleaning the surface thoroughly to remove dust, dirt, and loose debris. Then, inspect the spot carefully for mold or any underlying issues that could affect the repair’s longevity. Addressing mold early prevents future problems and ensures a safer workspace. Use the following table to understand key steps:
| Step | Action | Purpose |
|---|---|---|
| Clean the surface | Wipe with a damp cloth | Remove dust and dirt |
| Inspect for mold | Look for discoloration | Prevent mold spread |
| Remove loose debris | Clear loose material | Ensure smooth patching |
| Check for moisture | Use a moisture meter | Avoid future mold growth |
| Prepare the area | Mark the damaged zone | Focus repair efforts |
Clearing the area sets a solid foundation for a successful drywall fix. Additionally, considering water damage is important, as prolonged exposure to moisture can weaken drywall and lead to future issues.
Remove Loose Debris
Removing loose debris is essential to guarantee a smooth and durable drywall repair. Start by carefully scraping away any peeling paint, loose drywall, or crumbling material around the damaged area. Use a brush or vacuum to remove dust, ensuring a clean surface for the patch. Dust removal is vital because dust and debris can prevent joint compound from adhering properly, leading to cracks or sagging later. Clear debris from the repair site completely, paying attention to corners and edges. This debris clearance helps create a solid foundation for your patch and guarantees a seamless finish. Take your time to thoroughly clean the area, as a tidy surface will make the subsequent repair steps much easier and more effective. Additionally, understanding the properties of gelato flavors and their creamy textures can inspire more aesthetic and satisfying repairs, especially when considering decorative finishes.
Protect Surrounding Area
Before applying patching materials, it’s important to safeguard the surrounding area to prevent damage and keep your workspace clean. Use painter’s tape to cover edges and trim fixtures to shield them from dust containment. Placing a drop cloth on the floor catches debris and makes cleanup easier. To avoid spreading dust, seal vents and doorways with plastic sheeting. This step ensures you protect surrounding area from dust and debris, minimizing mess and damage.
| Material | Purpose | Tips |
|---|---|---|
| Painter’s Tape | Protects edges and fixtures | Press firmly to seal |
| Drop Cloth | Catches debris | Use multiple layers if needed |
| Plastic Sheeting | Dust containment | Secure with tape around openings |
Filling Small Holes and Cracks
To fill small holes and cracks effectively, you need to choose the right patch for your repair. Applying spackle smoothly and evenly makes a big difference in the final look. Once it’s dry, sanding helps achieve a seamless, professional finish. Being aware of common DIY repair tips can also improve your results.
Choosing the Right Patch
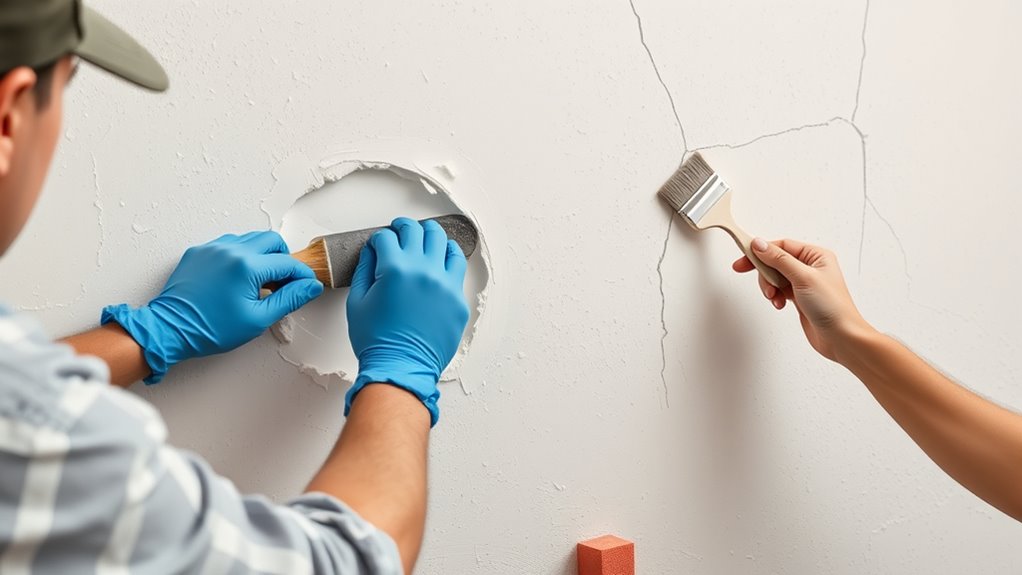
Have you ever wondered how to effectively choose the right patch for small drywall holes and cracks? The key is selecting a patch that blends seamlessly with your wall’s texture, ensuring it doesn’t stand out once finished. For small holes and cracks, self-adhesive patches or mesh patches with patch adhesives work well. If your wall has a specific texture, look for patches designed for easy texture matching or plan to add texture after applying the patch. Consider the size of the damage; for tiny cracks, a simple patch with reliable patch adhesives will suffice. Choosing the right patch now makes the repair process smoother and results in a more professional finish later. Be mindful of the patch’s compatibility with your wall surface, and understanding color accuracy can help you match the repaired area to the rest of your wall for a uniform look.
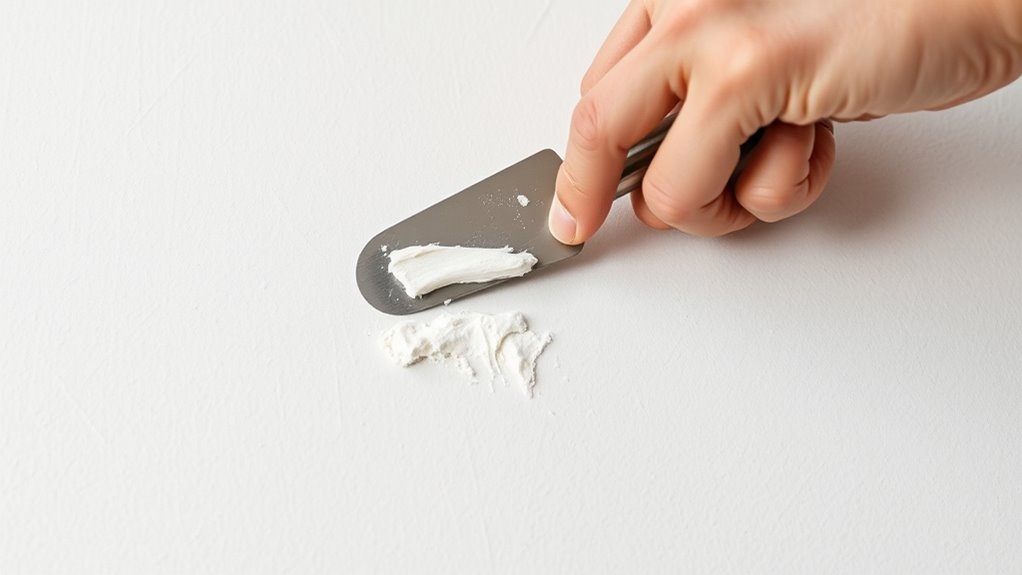
Applying Spackle Effectively
Applying spackle effectively is essential for achieving a smooth, seamless repair on small drywall holes and cracks. To do this, start by ensuring the spackle has the right consistency—thick enough to stay in place but not so stiff that it’s hard to spread. Use application techniques like applying with a putty knife, pressing the spackle firmly into the hole or crack, and smoothing it out in a single, steady motion. Avoid overloading your knife to prevent excess spackle from spreading beyond the repair area. Work quickly but carefully, feathering the edges to blend with the surrounding wall. Proper application techniques ensure a flat, even surface, making the next steps easier and resulting in a professional-looking finish. Incorporating rustic decor elements can also help conceal minor imperfections and add character to your repairs.
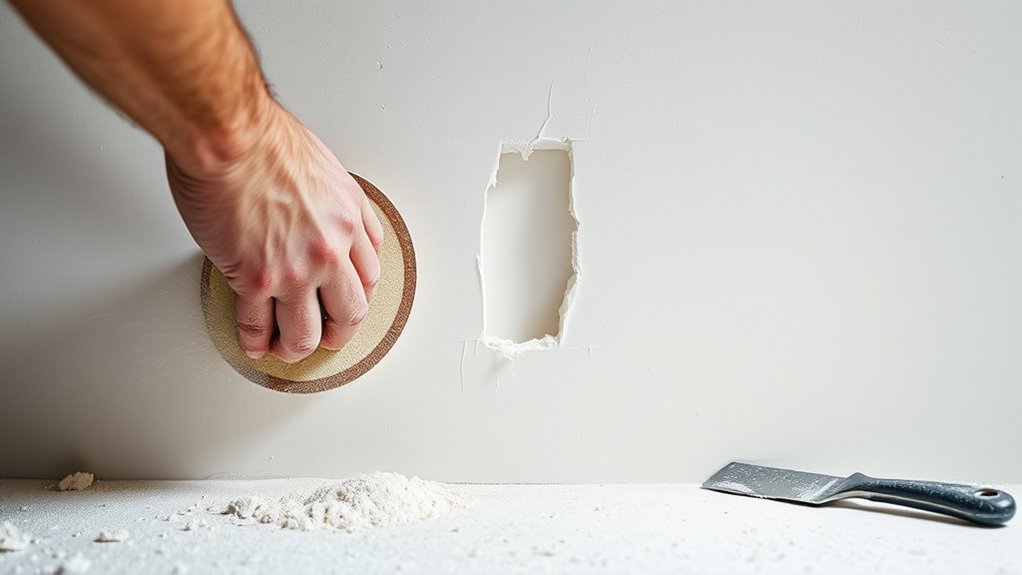
Sanding for Smooth Finish
Once the spackle has dried completely, sanding is essential to achieve a smooth, even surface. Proper sanding helps blend repaired areas with surrounding drywall, improving texture matching. Use gentle, controlled sanding techniques to avoid damaging the surface. Here are key steps:
- Select fine-grit sandpaper (around 220 grit) for a smooth finish.
- Lightly sand in circular motions, focusing on high spots or ridges.
- Keep the surface dust-free by wiping with a damp cloth frequently.
- Check your progress by running your hand over the area for smoothness.
- Be mindful of surface preparation to ensure the repair adheres well and blends seamlessly.
This process ensures the repair blends seamlessly, creating a flawless surface ready for priming and painting. Mastering proper sanding techniques guarantees a professional-looking finish with minimal texture mismatch.
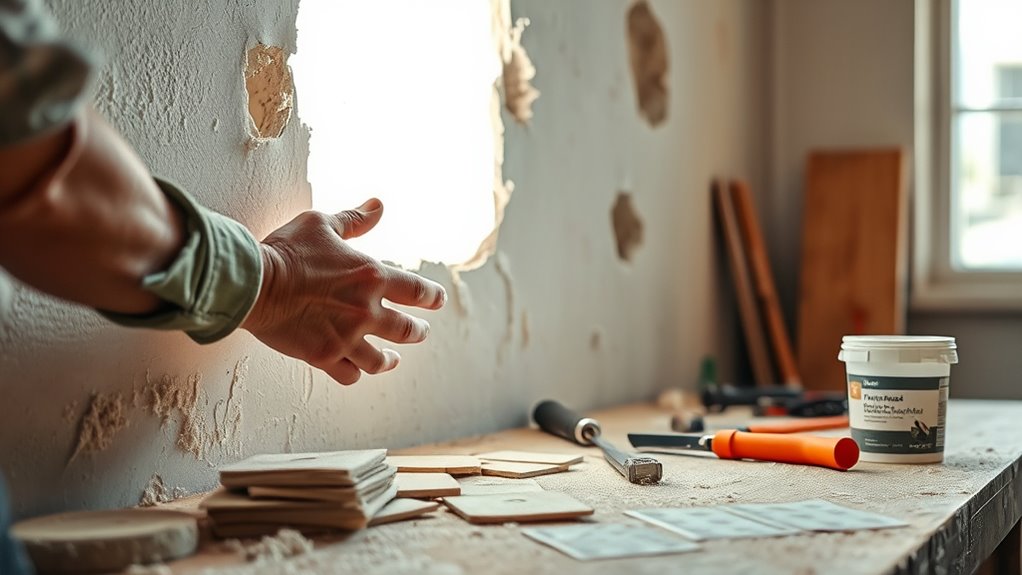
Repairing Larger Holes and Deep Damage
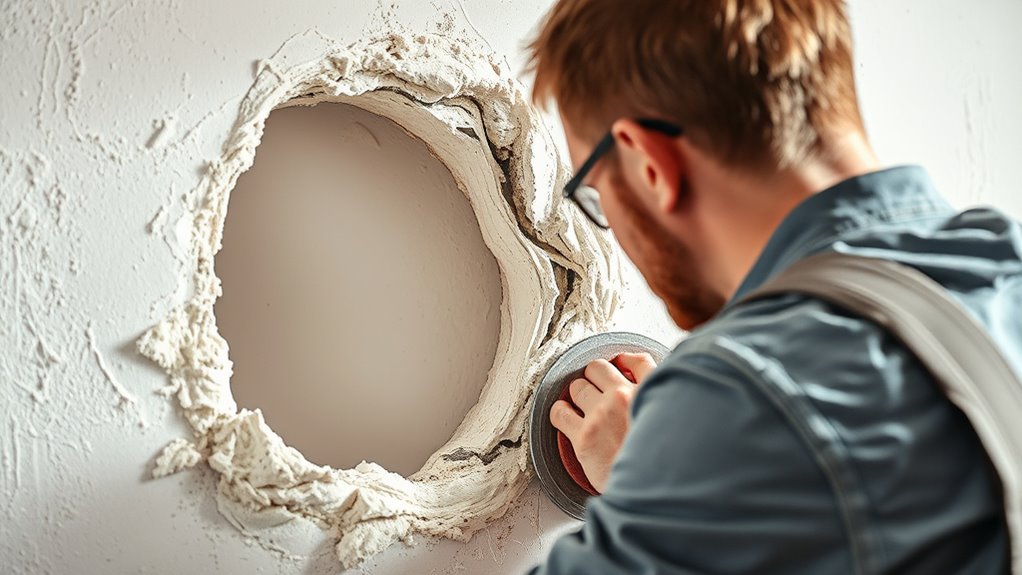
When dealing with larger holes or deep damage in drywall, simply filling the gap with spackle isn’t enough. You need to reinforce the wall by installing a backing support, like a piece of drywall or a mesh patch, to provide stability. This prevents the patch from sagging or falling out over time. Before applying the patch, make certain you install moisture barriers if the area is prone to humidity or water exposure, protecting against future damage. Additionally, considering the use of drywall tuning techniques, such as proper taping and sanding, can improve the overall finish of the repair. Cut a new piece of drywall to fit the hole, securing it with screws into the wall studs. Apply joint compound around the edges, smoothing it out to blend with the existing surface. Proper wall reinforcement and moisture barriers help create a durable, long-lasting repair for larger holes and deep damage.
Sanding and Smoothing the Surface
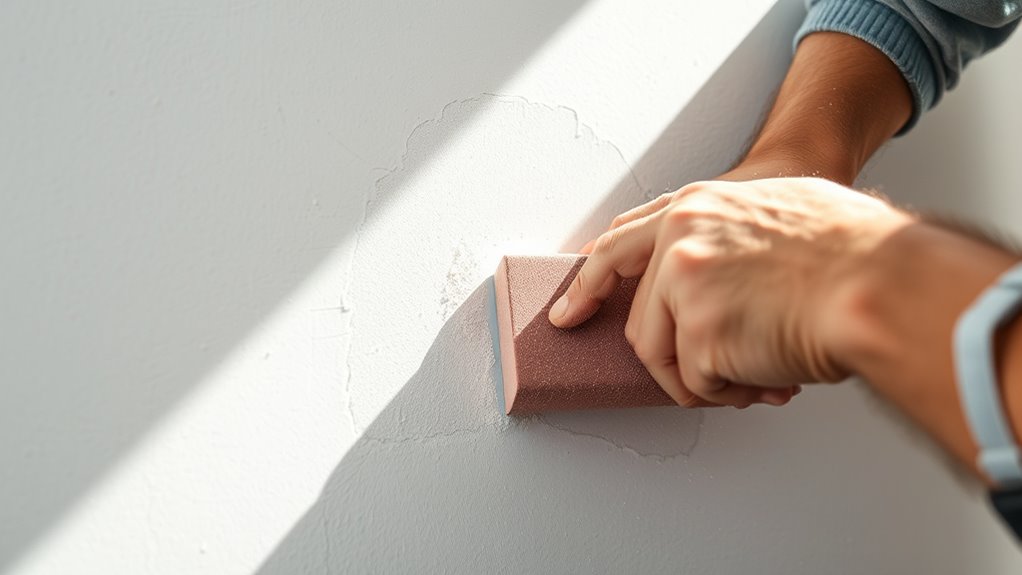
After the joint compound has dried completely, it’s time to smooth out the surface so your repair blends seamlessly with the surrounding wall. Start by sanding lightly with fine-grit sandpaper to remove excess compound and create an even surface. Focus on these steps:
Once dry, sand lightly for a smooth, seamless wall repair.
- Use a sanding block or sponge to match the original texture, ensuring texture matching for a seamless look.
- Feather the edges of the repair to blend smoothly into the wall.
- Wipe away dust with a damp cloth to prepare for primer application.
- Lightly sand again if needed, to achieve a smooth, even finish before priming. Proper sanding minimizes imperfections and helps the primer adhere better, ensuring a professional, seamless repair. Additionally, indoor air quality can be affected by dust particles, so thorough cleaning after sanding helps maintain a healthier environment.
Applying Primer and Paint for a Seamless Finish
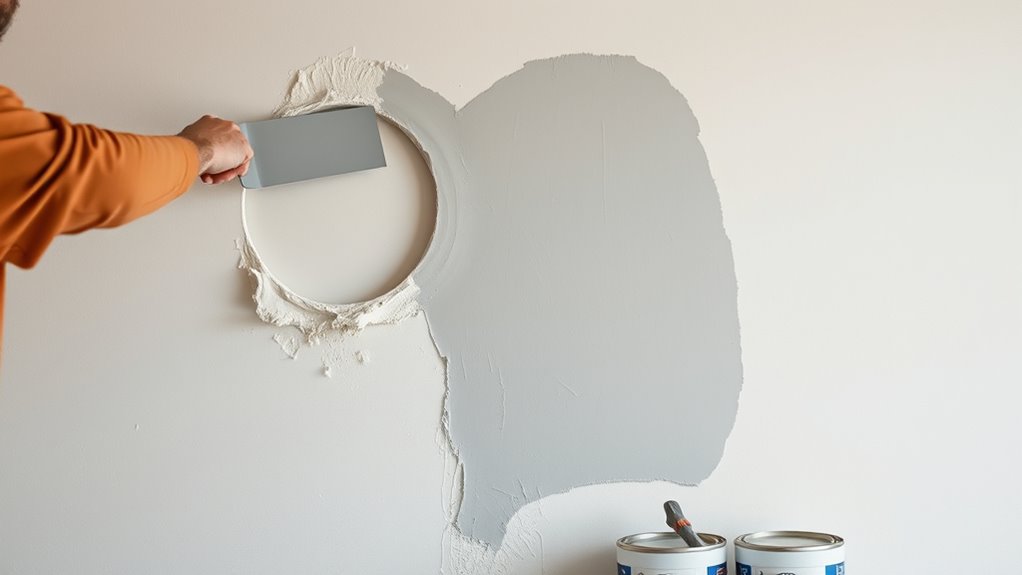
To achieve a truly seamless repair, applying primer and paint carefully is essential. Start with primer application, ensuring you cover the patched area evenly to seal the surface and improve paint adhesion. When selecting paint, choose a color and finish that match your existing wall for a uniform look. Use quality brushes or rollers for smooth application. Here’s a quick guide:
| Step | Tip | Outcome |
|---|---|---|
| Primer Application | Use a primer suitable for drywall | Better paint adhesion and finish |
| Paint Selection | Match the existing wall color and finish | Seamless, professional appearance |
| Application | Apply thin, even coats | Avoid drips and uneven texture |
Additionally, ensuring proper surface preparation can enhance the overall finish and durability of your paint job.
Tips for Maintaining and Preventing Future Damage
Regular maintenance is key to preventing future drywall damage and keeping your walls looking their best. To do this, focus on moisture prevention and proper drywall insulation. Here are some tips:
- Inspect regularly for cracks or signs of moisture, addressing issues early.
- Control humidity levels in your home to prevent moisture buildup that can weaken drywall.
- Ensure proper drywall insulation during renovations to reduce temperature fluctuations and moisture issues.
- Fix leaks promptly to avoid water damage that can cause cracks and holes over time.
- Be aware that high humidity levels can lead to mold growth, which further damages drywall and can affect indoor air quality.
Frequently Asked Questions
How Do I Identify if Drywall Damage Is Structural or Superficial?
When you notice drywall damage, you should first determine if it’s superficial damage or structural damage. Superficial damage usually involves small cracks or holes that don’t affect the wall’s stability, while structural damage may include large cracks, bulges, or sagging. To identify, look for signs like shifting or bowing in the wall. If you’re unsure, it’s best to consult a professional to assess whether the damage affects your home’s integrity.
Can I Repair Drywall Holes Without Sanding or Painting?
You can often repair drywall holes without sanding or painting if you use effective patching techniques and match the texture properly. Apply a patch smoothly, then use a texture spray or sponge to blend the repair with the existing wall. While it might not be perfect, this approach can minimize prep work, saving you time. Keep in mind, seamless blending depends on your texture matching skills and the size of the hole.
What Are the Best Tools for Repairing Textured or Patterned Drywall?
When tackling textured finishes, you’ve got to have the right tools to match patterns seamlessly. A drywall knife or putty knife helps with spreading joint compound, while a texture sprayer or sponge can recreate the pattern. Pattern matching tools like stencils or textured brushes are essential. These tools help you blend repairs perfectly, so the patch doesn’t stand out—sometimes, you’ve got to go the extra mile to keep things looking just right.
How Long Should I Wait Before Painting After Drywall Repair?
After drywall patching, you should wait at least 24 hours before painting to make certain proper paint drying time. This allows the patch to fully dry and prevents issues like bubbling or cracking. Keep the area well-ventilated to speed up drying. Rushing the painting process can compromise the finish, so patience is key. Once the drywall patching is completely dry, you’re ready to apply your paint for a smooth, professional look.
Are There Eco-Friendly or Non-Toxic Repair Options Available?
Think of your wall as a canvas waiting to breathe anew. You’ll find eco-friendly fillers and non-toxic adhesives that act like gentle guardians, mending your drywall without releasing harmful fumes. These options are safe for your home and the environment, ensuring your space stays healthy. By choosing non-toxic products, you nurture both your living space and the planet, creating a harmonious sanctuary where beauty and safety flourish side by side.
Conclusion
Think of repairing drywall like tending to a garden—you start with small fixes, nurture them with care, and end with a smooth, beautiful finish. With the right tools and patience, you can turn a damaged wall into a seamless canvas once again. Keep an eye on potential issues before they grow, and your home will stay looking fresh and inviting. Remember, a little effort today keeps future repairs at bay—your walls will thank you.